Puppet as a Configuration Management Tool Integrated With App42 DevOps
Puppet, as we know, is a configuration management tool that has been widely used for managing server infrastructure. It is quite powerful when it comes to deploying, configuring, managing, and maintaining a server machine, or even entire server infrastructure. From provisioning servers to configuration and shredding, it has the capability to fulfill every need for a system administrator.
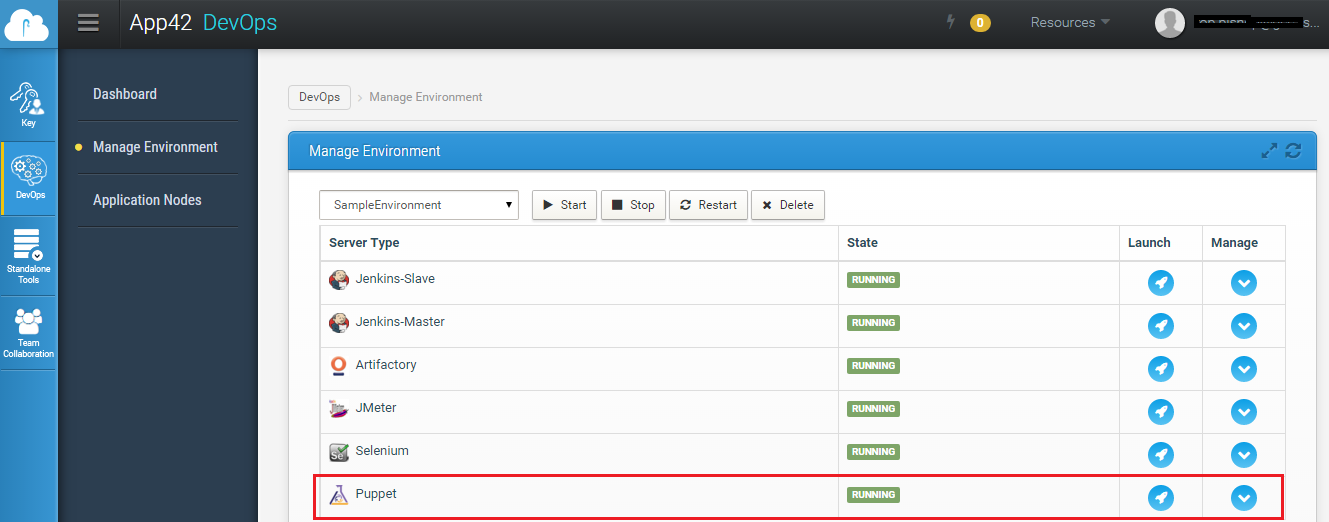
App42 DevOps provides Puppet, along with Chef, as tools for configuration management. Using Puppet once can define a distinct configuration for each and every server. Starting from creating a Puppet Master Server to signing agent nodes to uploading manifests, App42 DevOps provides all the rich features in its management console.
To get started, create a DevOps setup from https://devopshq.shephertz.com/ with Puppet as the configuration management tool.

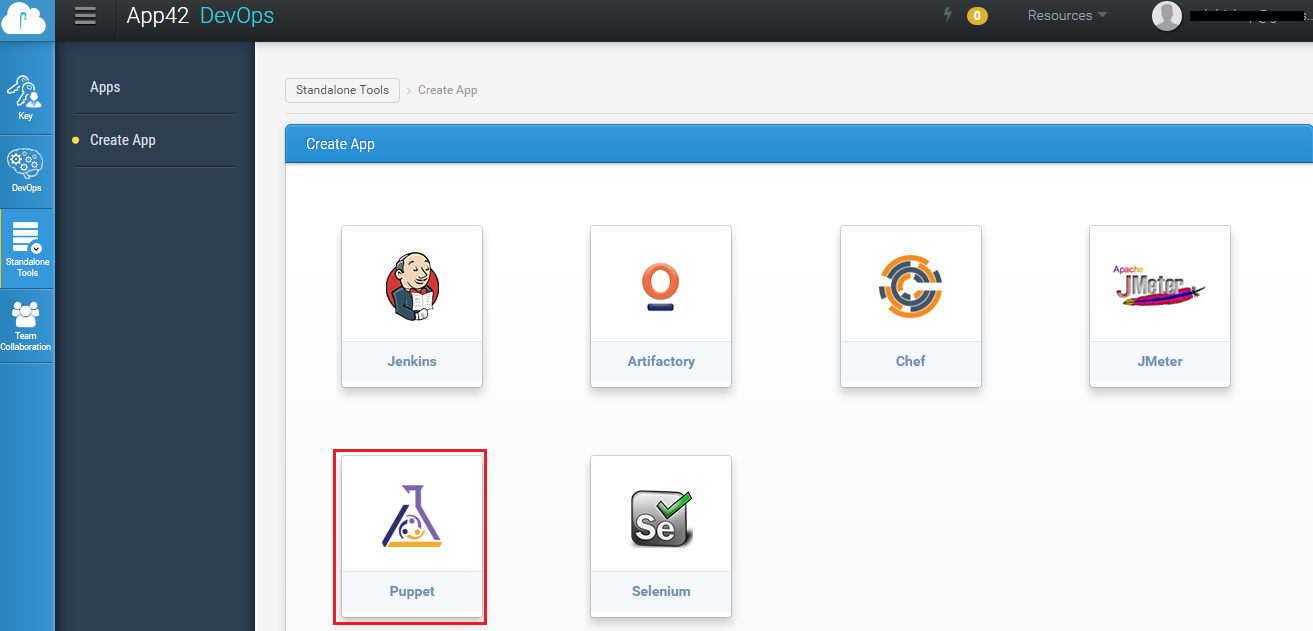
One can also create a Puppet Master Server as standalone tools from App42 DevOps Management console if he does not require complete DevOps Setup.(Shown Below)

Now, if one creates application nodes (servers) along with a DevOps setup, then the nodes are automatically registered with Puppet Master, and its certificate gets automatically signed by Puppet Master. The App42 DevOps setup does this configuration automatically during setup creation.
However, if one does not create application nodes and creates only a DevOps setup, then you need to manually send the certificate request from the application node to the Puppet Master.
To do so, follow the below step on the Puppet agent:
- Install the Puppet agent on Application Node.:
sudo apt-get update
sudo apt-get install puppet- The puppet agent is disabled by default. To change this, update its default file as shown below:
sudo vi /etc/default/puppetAnd change value of START to "yes."
- Configure the agent by modifying the agent's configuration file (puppet.conf) as shown below:
sudo vi /etc/puppet/puppet.confAdd the Puppet master's FQDN under [agent] section:
[agent]
server = puppetmaster.demo.example.com
(Where puppetmaster.demo.example.com is the Puppet master's FQDN.)
Start the puppet agent:
sudo service puppet startThe first time Puppet runs on an agent node, it will send a certificate signing request to the Puppet Master. Before the master will be able to communicate and control the agent node, it must sign that particular agent node's certificate.
If the certificate signing request is not sent to the master, send the request by using the below command :
puppet agent --server Puppet-Master --waitforcert 60 –test
(Where Puppet-Master is the hostname of the Puppet Master.)
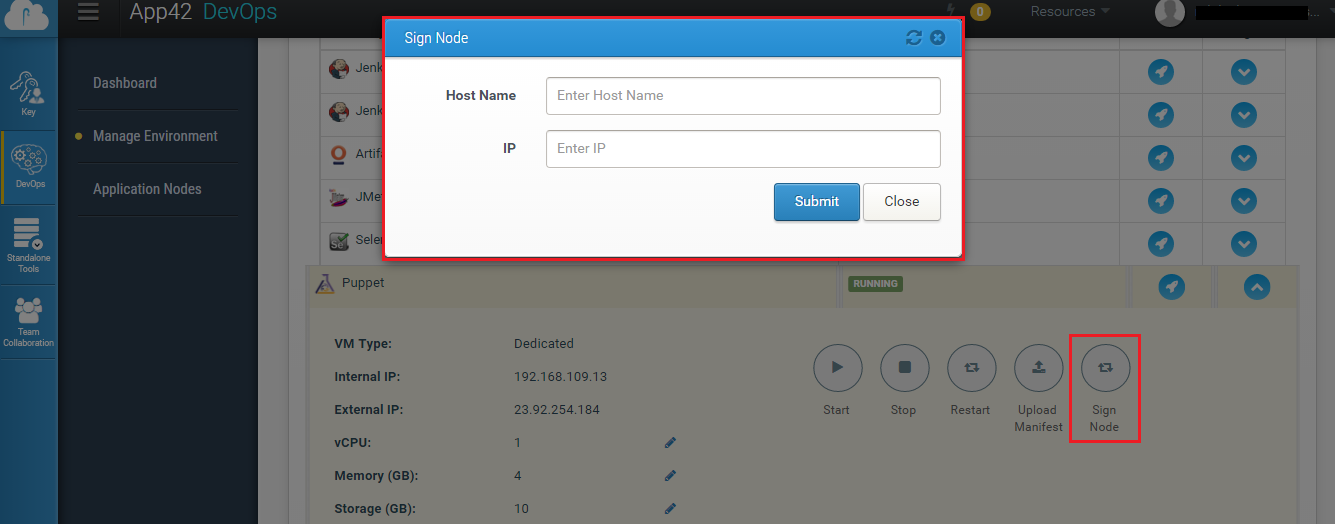
Once the Puppet master receive the certificate request, the puppet master can sign the request from management console.

Provide the host name and IP address of the Puppet agent's server and click submit. The certificate will get signed by the Puppet Master.
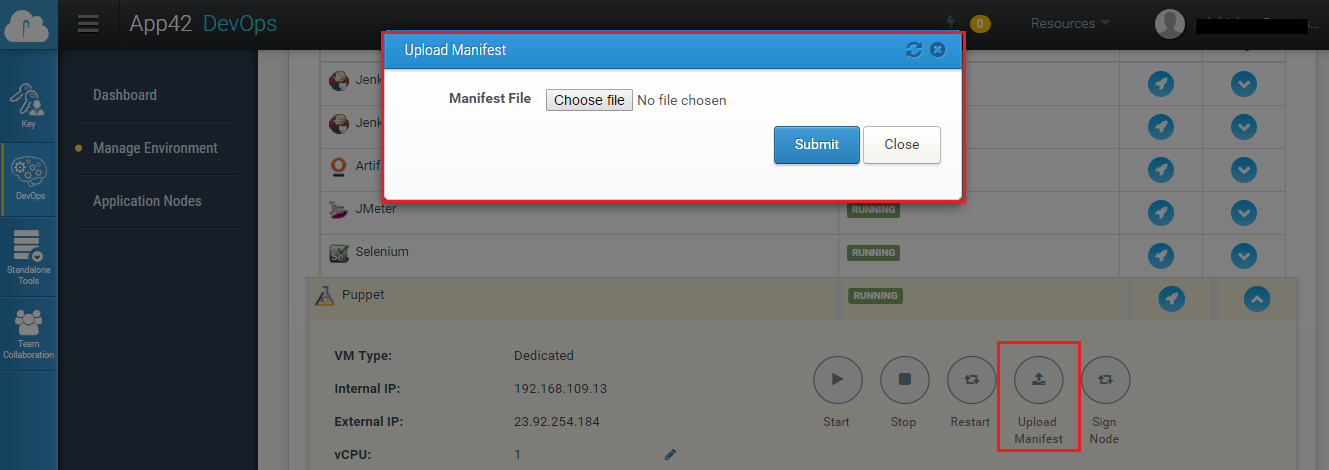
One can also upload the manifests directly from the App42 DevOps management console.
Click on Upload manifests and provide the manifest file location, the manifest will get uploaded on your puppet master server.
Sometimes you might face issues with Puppet while retrieving catalogs from the server. If you run into trouble, follow the steps below:
If Error: notice: Run of Puppet configuration client already in progress; skipping:
Solution: Remove the /var/opt/lib/puppet/state/agent_catalog_run.lock file.
If Error: Could not prepare for execution: Could not create PID file: /var/run/puppet/agent.pid:
Solution: Confirm rundir = /var/run/puppet is set properly within /etc/puppet/puppet/puppet.conf. Also, remove /var/run/puppet/agent.pid.
Delete Existing Certificates if there is a problem in certificate signing request on puppet agent. Delete any existing SSL certificates that were created during the package install. The default location of Puppet's SSL certificates is /var/lib/puppet/ssl:sudo rm -rf /var/lib/puppet/ssl .
Thus, using App42's DevOps management console and Puppet, one can easily keep the host configuration under check, and you can use them to easily configure a machine from scratch!

