Microservices on AWS Fargate
The initial AWS ECS (Elastic Container Service) release enabled the creation of Docker images and running them on EC2 instances. This was a great addition to an already flourishing bouquet of services from AWS. However, the provisioning of EC2 instances was a reason for considerable discomfort and required some level of capacity planning.
With the introduction of Fargate, AWS encourages application developers to focus on business logic by eliminating the need to spend time and effort on deciding the required capacity. Fargate is a managed service that takes care of provisioning and managing load. This article would highlight the how-tos of deploying microservices on AWS Fargate.
The Architecture
This article will demonstrate a simple ECS architecture. A Docker image would be pushed to a repository. Subsequently, three tasks would be created based on that image with Fargate launch type. Then we would have a service on top of the tasks – all running within an ECS cluster. Service discovery is a crucial aspect of microservices architecture. This example will enable service discovery on our ECS service which will be resolved by Route 53 using a private DNS. Finally, the article will describe how to automate this deployment using a CI/CD pipeline. The following diagram illustrates the architecture that we would follow.
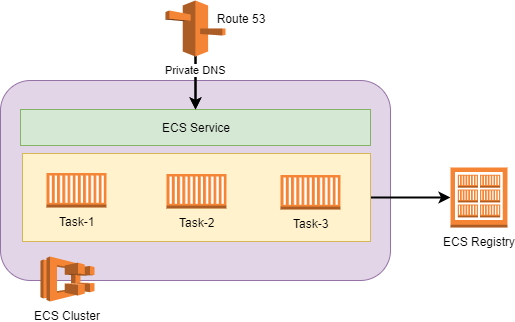
Fargate Setup
In the following paragraphs, I’ll describe a step-by-step approach of setting up a container-based application on AWS ECS with Fargate launch type.
Step 1: Create a Repository and Push a Docker Image
Login to AWS console and browse to Elastic Container Service > Repositories > Create Repository.
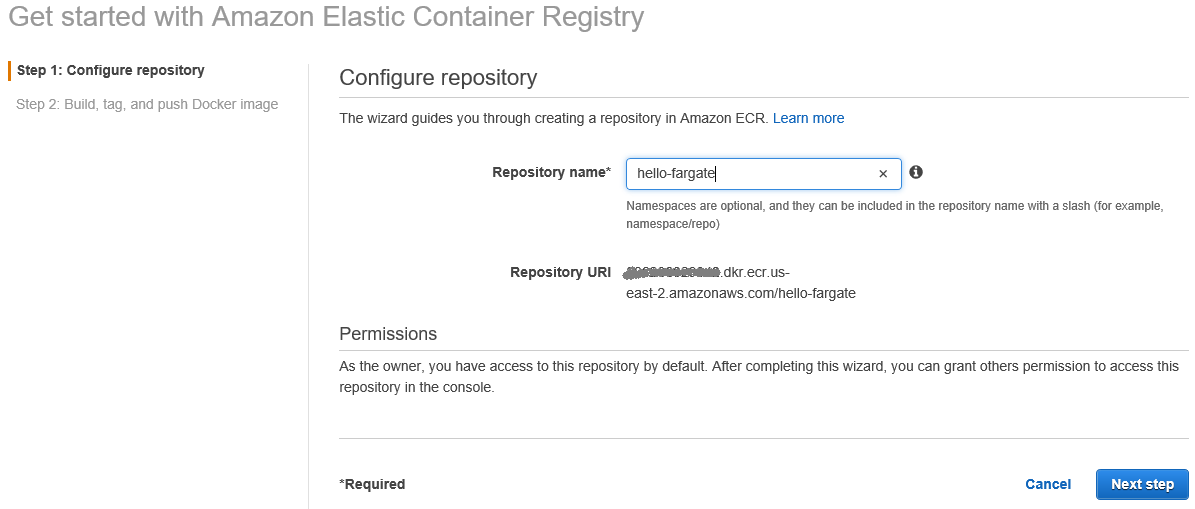
Enter a Repository name and click on Next step. The repository will be created and the next page will display the various commands to build, tag, and push images to this repository. At this point, build a Docker image of your application and push it to the repository.
Step 2: Create an ECS Cluster
Browse to Cluster > Create Cluster.
Select Networking only and click on Next step.
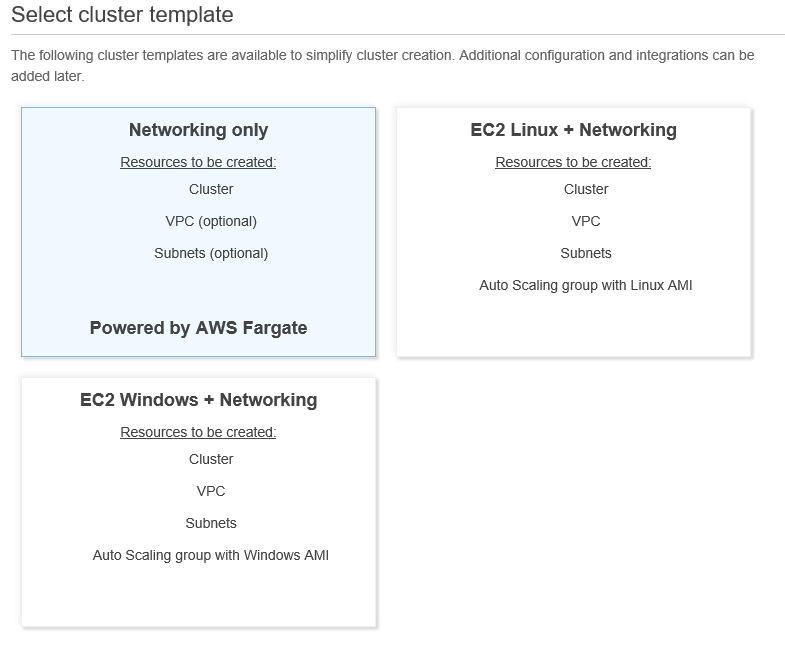
On the subsequent page, enter a cluster name and click Create. This will create an ECS cluster. Now that I have created a cluster, I’ll jump straight into creating my tasks and service.
Step 3: Configure Tasks
Browse to Task Definitions > Create new Task Definition.
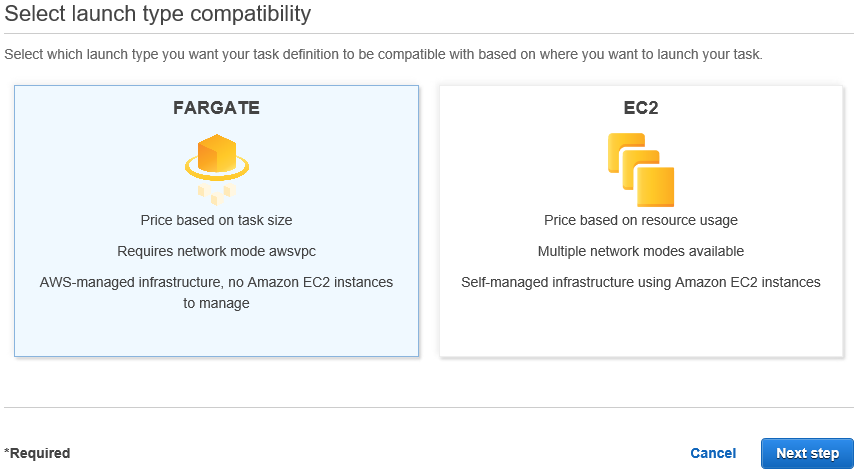
Select Fargate as the launch type and click on Next Step. It’s evident from this step that the only difference between Fargate and EC2 is the launch type. The same Docker image can also be launched on EC2.
On the next page, enter a task definition name. For Fargate, the network mode will always be awsvpsc, which will be preselected. 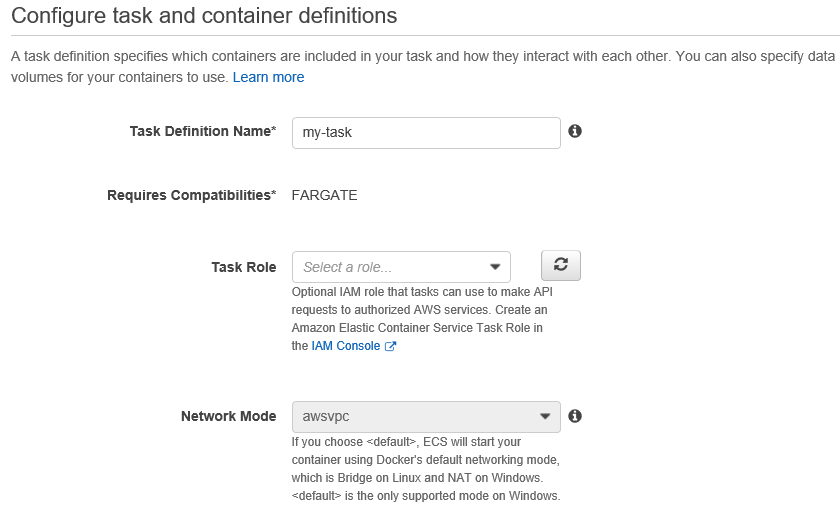
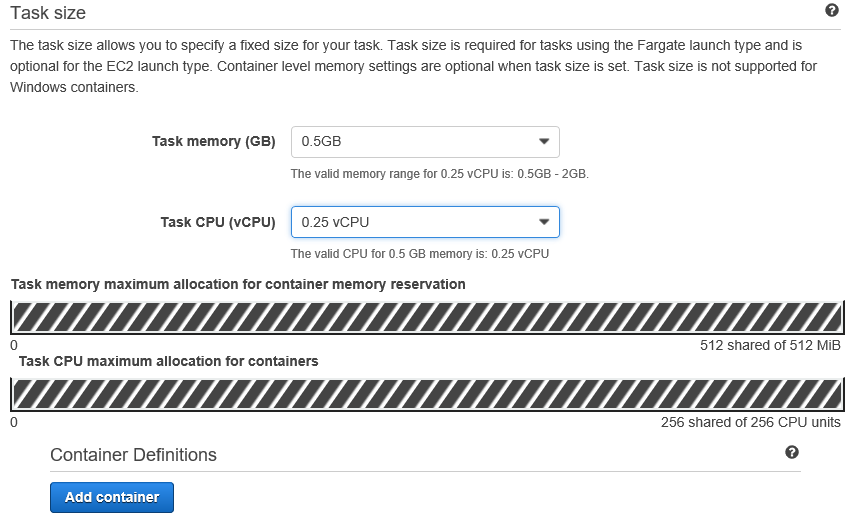
Select a task size depending on the size and complexity of the application. The next step will be to create a container. Clicking on Add Container will open up a splash page to configure container details.
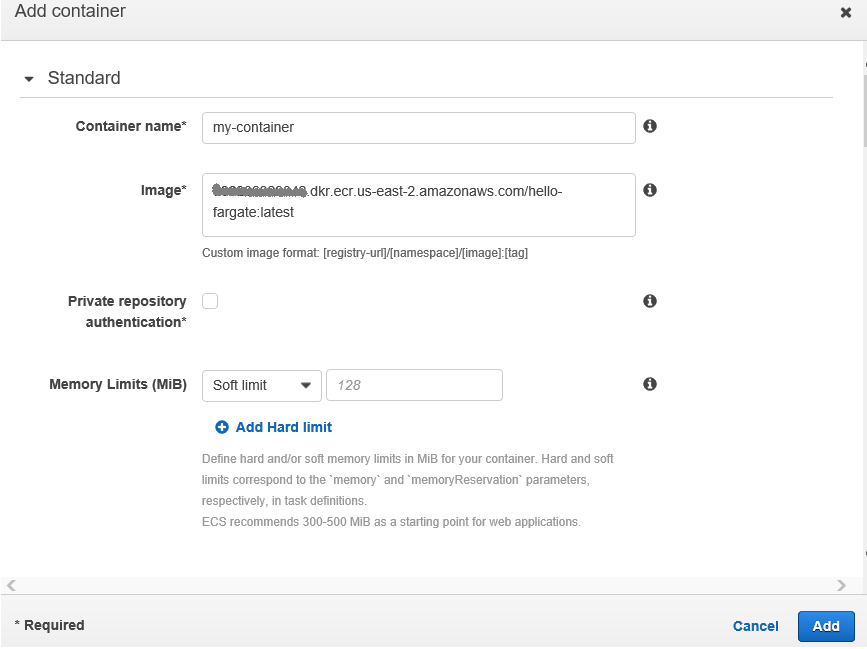
On the splash page, enter a name for the container and specify the image URL. This will consist of the repository URL, the image name, and an image tag. We will use the “latest” tag. Clicking on Add will take us back to the previous page and then clicking on Create will create the task definition.
Step 4: Configure a Service
Once the task is created, from the task details page click on Actions > Create Service
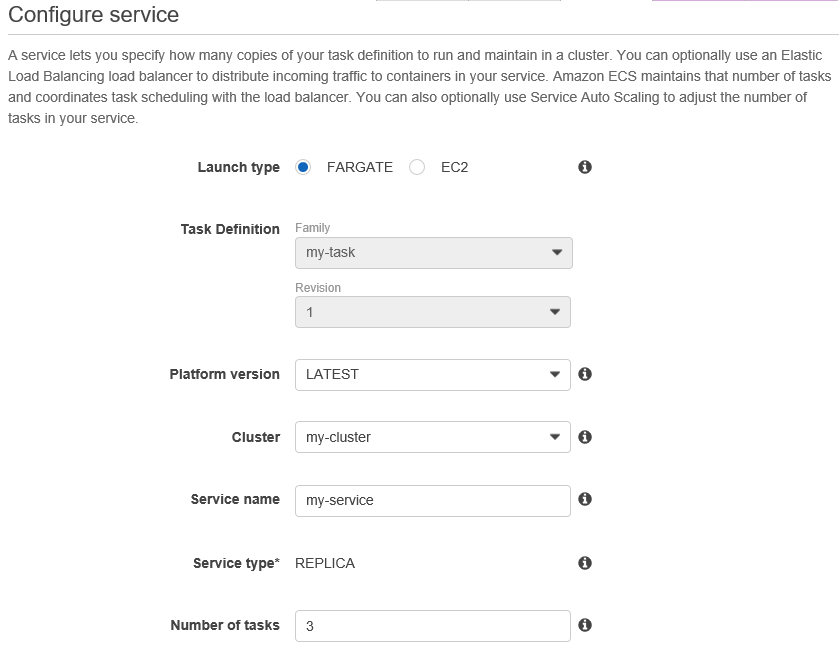
Select the launch type as Fargate, the cluster that we created in step 2 “my-cluster” and let’s name the service my-service. As depicted in the architecture diagram, enter "3" as the number of tasks.
On the next page, configurations for service discovery needs to be done. Check Enable service discovery integration. Let’s use my-service as the Service discovery name.
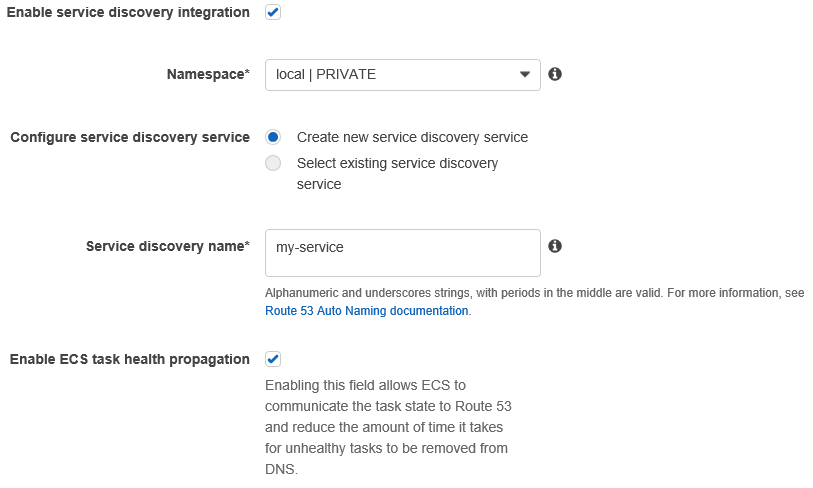
On clicking Create Service on the next page the service will be created. That’s it – all done. Now if we browse to the service details page, it’ll show my-service running three tasks of type my-task, all running within my-cluster.

The last thing I want to talk about in this context is service discovery. I have enabled service discovery when I configured the service, and in the architecture, I have shown that this would be resolved as a private DNS by Route 53. Now, if we browse to Route 53 > Hosted zones, there will be entries for my-service. The corresponding private IP will also show up on the page. Route 53 will use the service discovery name to resolve to the private IPs.
Conclusion
Fargate hides a lot of complexities and makes deployment of containerized applications straight-forward. So the question now is when to use EC2? Or should I say, when not to use Fargate? For most cases, Fargate should be sufficient. In fact, this should be the default choice for deploying containerized applications on AWS. However, if deeper control is required on the instances running the containers, then EC2 would be a better choice.
The next consideration should be to automate the deployment of the application onto the ECS cluster. In my next article, I'll discuss how to set up continuous deployment onto ECS.

