Zero Code REST With json-server
Summary
Time and again we find ourselves in need of standing up a JSON server for sharing schemas with our clients while our development is in progress or for supporting our own end-to-end testing.
The json-server is a JavaScript application. As a Java and MuleSoft developer, I'm not turned off by working with using other application stacks when there's a good fit. To be able to stand up a JSON REST Server with Zero coding makes it a compelling case. While you can add custom JavaScript middleware to enhance it's functionality, for most developers, the standard features should suffice.
When you're in need of a fast, easy to use JSON API solution, not many solutions are as quick to get running or as feature-rich as the json-server.
Architecture
The json-server is the server-side of the client/server use case, with a client application
making HTTP requests to the server and the json-server providing determined canned responses
or simulated errors.
When the json-server starts, it will read a database of static JSON responses which we'll work with later using the HTTPie JSON Client.
Another use case for json-server is when you're developing a new application which depends on APIs which are rate limited. One example of this is the Open Weather Map API. With the free tier, you're limited to a fixed number of calls in a sliding time window. You
can capture these kinds of JSON results, add them to the json-server database, and play them back
making unlimited, unbounded requests.
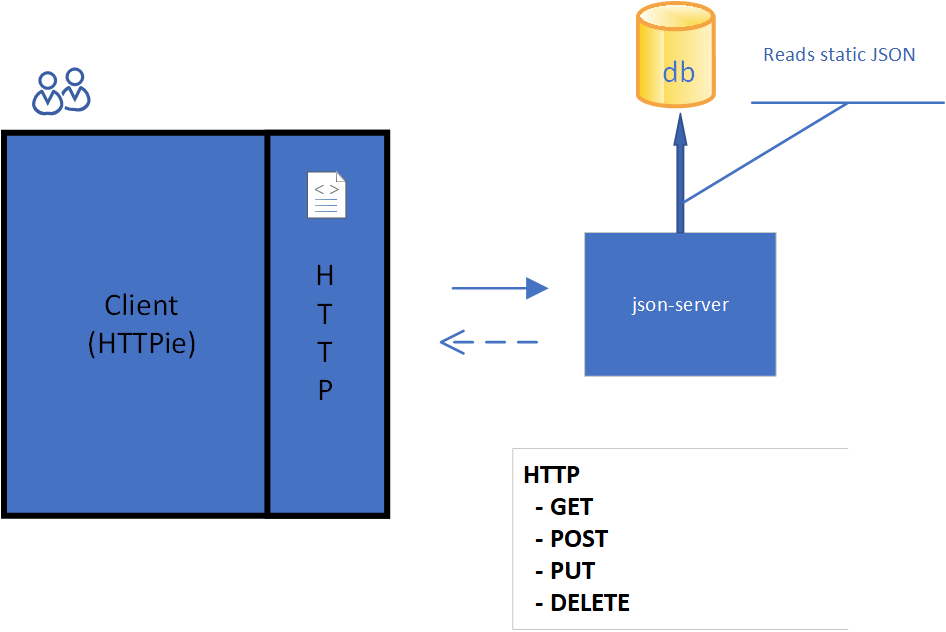
Client/Server interaction with the json-server
Installation
The json-server is a JavaScript application, which I hope won't scare off too many Java or Mule developers, certainly, it won't scare any polyglots! The installation really is quite simple.
The Node Package Manager (npm)
npm is the default package manager for the JavaScript runtime environment Node.js. It consists of a command line client that interacts with a remote registry. We'll use npm to download and install json-server.
This is as simple installation if you don't already have npm installed.
Download the latest version of Node/npm here.
With npm installed, you can perform a global install of json-server. The installation will add json-server to your path and allow you to run it from a shell window.
Note: If this is the first time you're installing npm, you may need to open a new shell to add the new path
Installing the JSON Server
npm install -g json-server

# verify the installation was successful
json-server -v
Configuring json-server
You will need to decide where you'll keep the JSON schema database, which keeps the schema
that will be returned for client requests.
db.json Database
With json-server installed, create a folder where you plan to keep any sample data and project properties.
It's up to you where you would like to put it, I like keeping it on my Google Drive so I can reuse it on different machines; keeping it in Git is another good solution.
mkdir json-server
cd json-server
mkdir json
In the json folder create this sample db.json file.
When you've completed the hierarchy, it should look like this:

json-server\json\db.json
Using your favorite editor, enter the example JSON data below into the db.json file, in the location specified above.
{
  "wines": [
    { "id": 1, "product": "SOMMELIER SELECT",
      "desc": "Old vine Cabernet Sauvignon", "price": 159.99 },
    { "id": 2, "product": "MASTER VINTNER",
      "desc": "Pinot Noir captures luscious aromas", "price": 89.99 },
    { "id": 3, "product": "WINEMAKER'S RESERVE",
      "desc": "Merlot featuring complex flavors of cherry", "price": 84.99 },
    { "id": 4, "product": "ITALIAN SANGIOVESE",
      "desc": "Sangiovese grape is famous for its dry, bright cherry character", "price": 147.99 }
  ],
  "comments": [
    { "id": 1, "body": "like the added grape skins", "wineId": 1 },
    { "id": 1, "body": "the directions need to be clearer", "wineId": 2 },
    { "id": 3, "body": "I received 3 different packages of wood chips", "wineId": 1 }
  ],
  "profile": { "name": "vintnor" }
}
db-json contents (Location:json-server\json\db.json)
Running the json-server
With our sample data created, let's start playing with the json-server.
In this section, we'll starting putting our json-server interactions into practical use.
TIP: For a refresher on the usage of HTTP Verbs see this DZone HTTP verbs article.
From within the json-server folder, we'll run a quick command to print out command line help. Run the following command:
json-server -hGetting json-server command line help
As you can see, there's lots of options for changing or overriding the default behaviors.
{
  "port": 9000
}
json-server config file: json-server.json
With the preliminaries out of the way, let's start json-server and prepare to send some command line requests.
json-server --watch json\db.jsonStarting the json-server
In this the first example, we start the json-server, asking it to watch the file json\db.json for changes.
Loading json\db.json <1>
Done

Resources <2>
http://localhost:3000/wines
http://localhost:3000/comments
http://localhost:3000/profile

Home <3>
http://localhost:3000
Beneath the ASCII part, you should see the following:
The database file, json\db.json, loaded successfully.
URIs for JSON resources which were loaded.
The URI for the default internal website (you can change this).
HTTPie Examples
To install HTTPie for the examples we'll be working with, you can download it using this link: HTTPie Download.
Feel free to use Postman or curl from a Git bash terminal shell on Windows if you'de prefer. You should be able to adapt the HTTPie examples accordingly.
HTTPie is a curl-like command line tool which can be used on Unix and Windows. I like it better than curl because it comes loaded with lots of syntactic sugar.
http localhost:3000/wines/1 <1>
or
http http://localhost:3000/wines/1 <2>
Basic example of HTTPie usage
Abreviated form
Long form
Note that when HTTPie installs, it will be called http, and you can invoke it using the command line (see examples above). You can use or leave off the http:// part of the URI, it's your choice.
Default Website
Let's get started by hitting the default website from your browser; if you changed the default port, be sure to use the port number you assigned, it should be listed in the output.
http://localhost:3000Use the browser to access json-server
Under Resources you should notice that vintner has been misspelled as vintnor. You can fix the typo using your favorite editor to modify the line in *db.json* and save the file. Refreshing the link, you should notice that the change has already been picked up by json-server.
Providing the --watch option told the json-server to run in development mode, watching for and reloading changes.
Making GET Requests
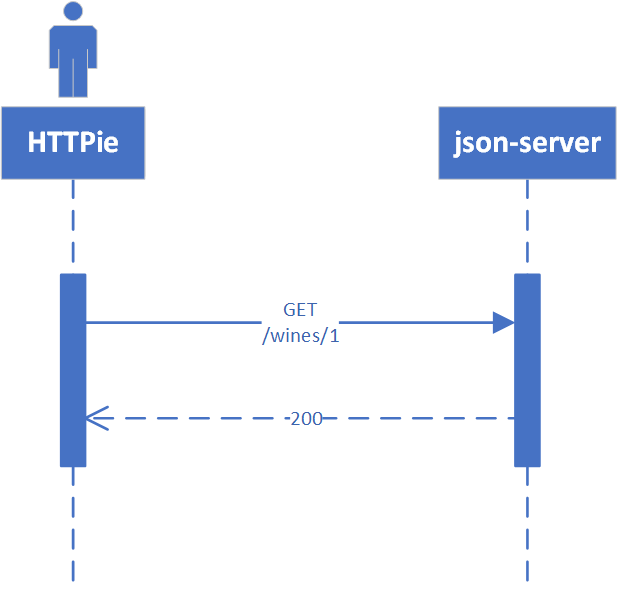
HTTP GET Requests
http localhost:3000/wines

# Enter the other commands in the table below
GET Requests
Request |
URI | Result |
GET |
http localhost:3000/wines |
All wine entries |
GET |
http localhost:3000/wines/1 |
Wine with ID=1 |
GET |
http localhost:3000/wines?price_gte=100 |
Wines with price >= 100 |
GET |
http localhost:3000/wines?id_ne=2 |
filter id=2 |
GET |
http localhost:3000/wines?_embed=comments |
embeds all comments |
GET |
http localhost:3000/wines/1?_embed=comments |
embed comments for ID=1 |
For more examples see the json-server website
Making a POST Request
With POST, we will add a new record to the database.
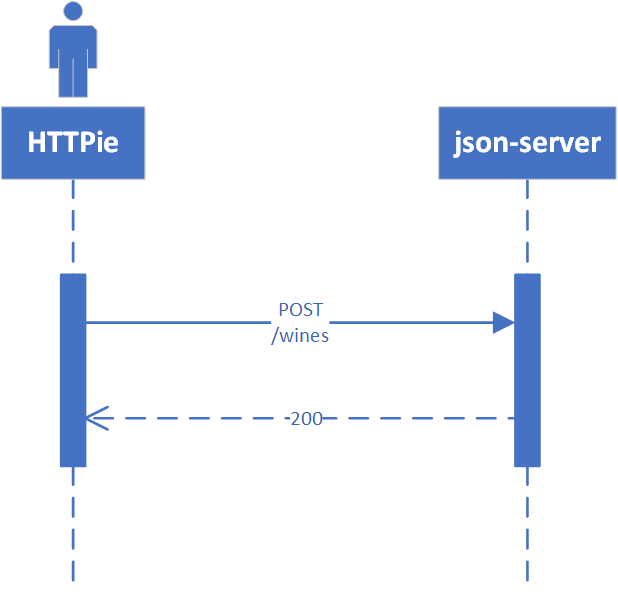
HTTP POST Requests
http POST localhost:3000/wines id=5 product="TWO BUCK CHUCK" price=2.99 desc="Squeezed rapidly from a delicate, yet unpretentious grape"Use HTTPie, curl, or postman
POST Request
| Request | URI | Result |
| POST | http POST localhost:3000/wines ... (see above) |
New wine entry with id=5 |
GET |
http localhost:3000/wines |
All wine entries |
GET |
http localhost:3000/wines?desc_like=grape |
All wines with grape in desc |
Making a PUT Request
In our PUT example, we'll make a change to product for the record we just added with POST.
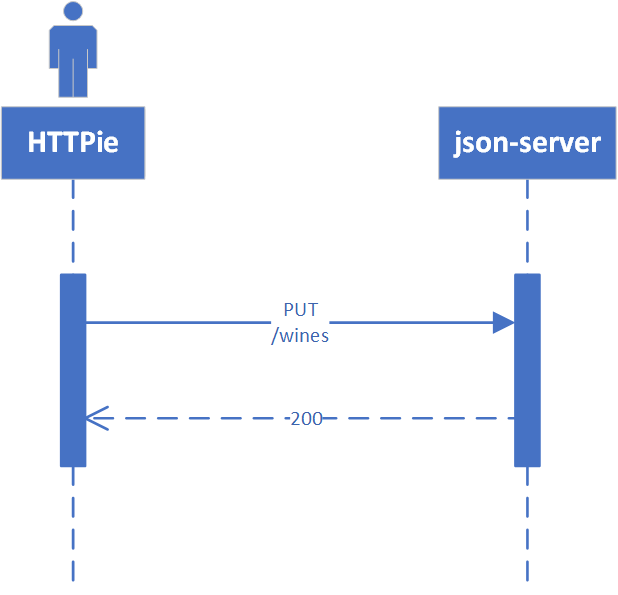
http PUT localhost:3000/wines/5 product="TWO-ISH BUCK CHUCK" price=2.99 desc="Squeezed rapidly from a delicate, yet pretentious grape"Use HTTPie, curl, or postman
PUT Request
| Request | URI | Result |
| PUT | http PUT localhost:3000/wines ... (see above) |
Replace wine entry with id=5 |
| GET | http localhost:3000/wines |
All wine entries |
NOTE: If you don't enter all the fields, PUT will replace just what you provide.
Finally, a DELETE Request
To wrap up our example CRUD operations, we'll delete the record with ID=5
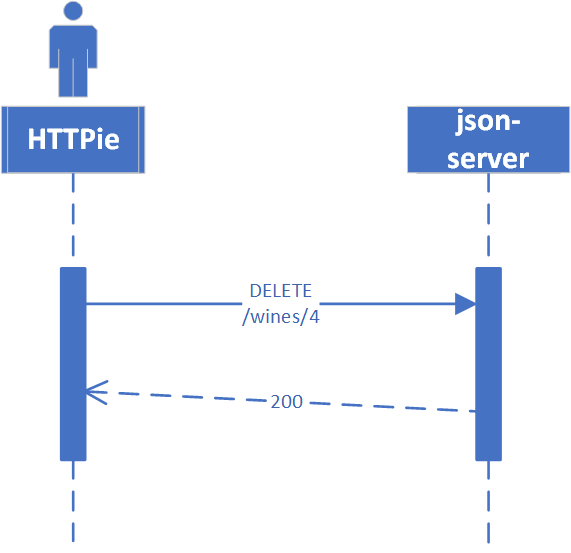
http DELETE localhost:3000/wines/5Use HTTPie, curl, or postman
DELETE Request
| Request | URI | Result |
| DELETE | http localhost:3000/wines/5 |
Deletes wine with ID=5 |
| GET | http localhost:3000/wines |
All wine entries |
Voila, the record is gone!
There's lots more you can do with json-server including requests with additional verbs, adding middleware to include new features, enabling complex routing rules, sorting, filtering, and much more.
I hope you enjoyed reading this article as much as I have enjoyed writing it, I'm looking forward to your feedback!

