Integrating Load Testing Into Azure Pipelines
The k6 open-source load testing tool integrates with Azure Pipelines (as well as many other continuous integration tools) to automate performance tests. Running load tests as part of your continuous integration (CI) pipeline saves time and ensures that you'll catch any performance regressions that occur due to code changes.
Microsoft recently introduced the world to Azure DevOps, an extension and rebranding of Visual Studio Team Services (VSTS). Azure DevOps is comprised of several services which you can use all together or just cherry-pick the services you need.
One of the cornerstones of their offering is Azure Pipelines. This is a continuous integration (CI) and continuous delivery (CD) service. It works with your preferred Git provider and can deploy to most major cloud services. Start with your code on GitHub, GitLab, Bitbucket, or Azure repos. You can automate the build, test, and deployment of your code to Microsoft Azure, Google Cloud, or Amazon Web Services (AWS).
Currently, Microsoft offers 10 free parallel jobs with unlimited build minutes for all open-source projects. That makes trying out and playing with Pipelines an endeavor that costs you literally nothing.
Getting Started
To get started, go to https://dev.azure.com/ and click Start Free or log in with your existing Microsoft account. After a successful login, follow the online instructions to create a new project.
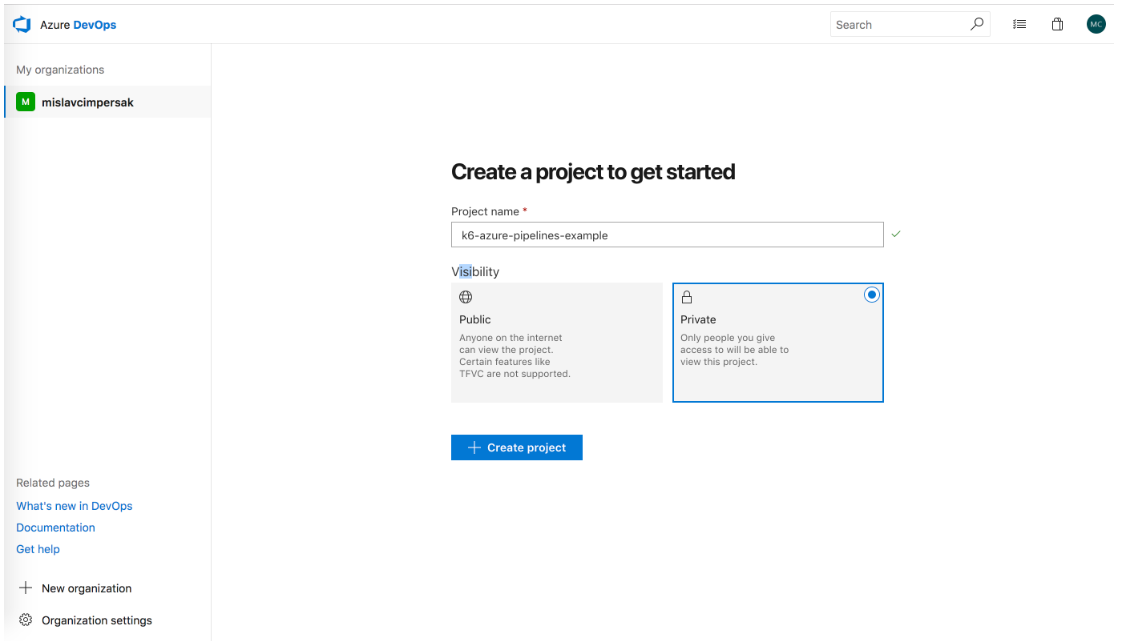
Figure 1: Azure DevOps 'Create New Project' screen
Click on the New Pipeline button.
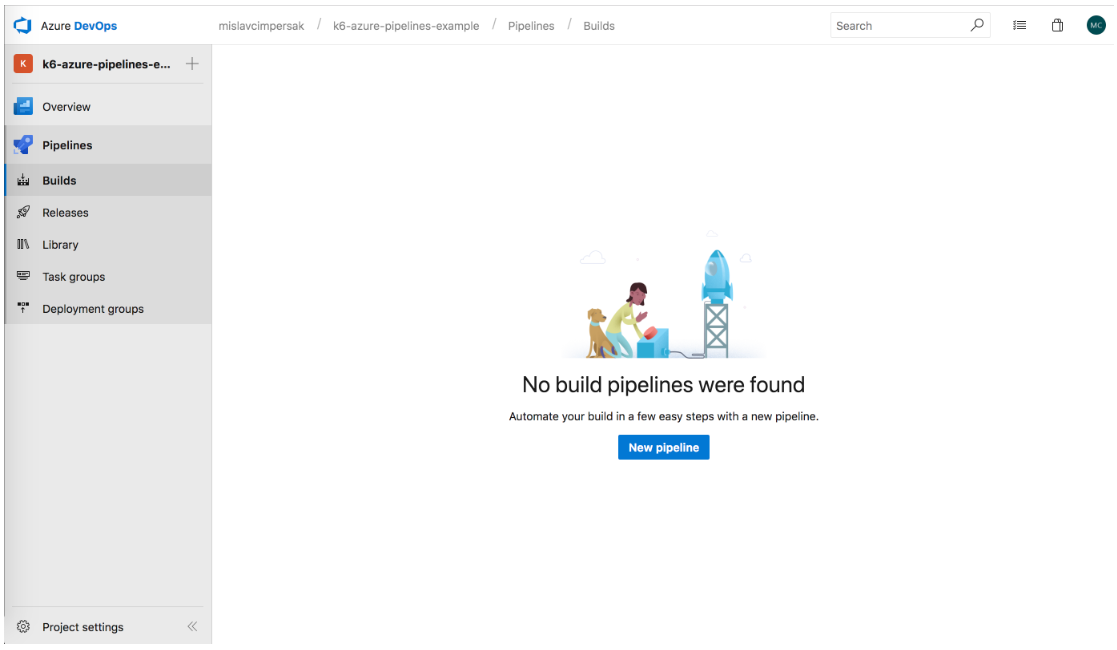
Figure 2: Azure DevOps 'Create New Pipeline' screen
Of course, our code needs to live somewhere. For this project, we’ll host our code on GitHub, one of the choices mentioned above.
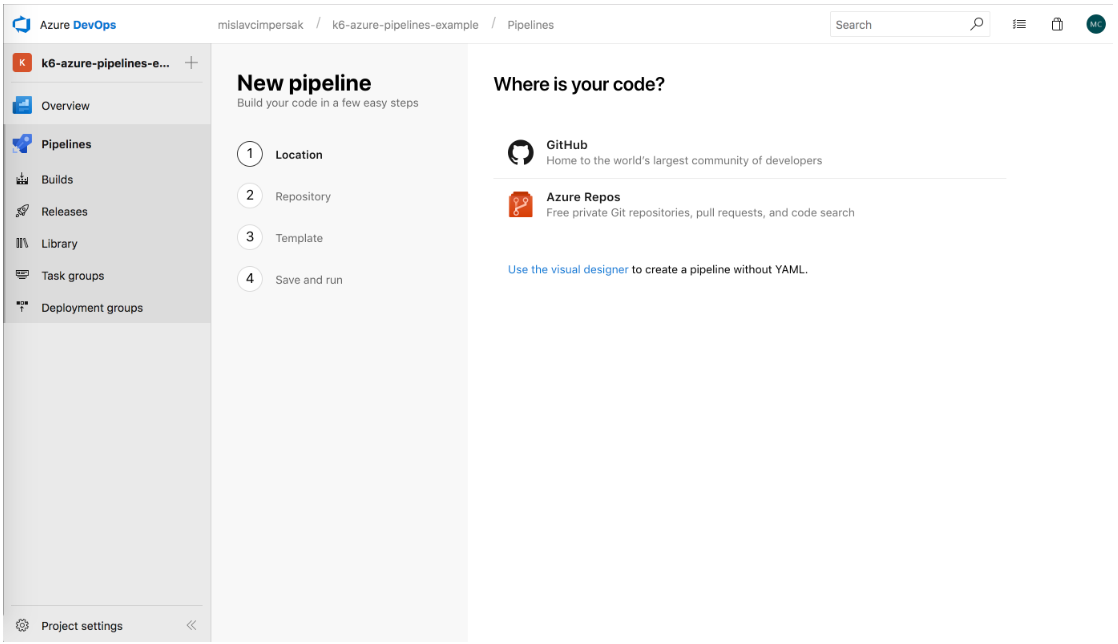
Figure 3: Azure DevOps Pipelines 'Where is your code?' screen
You need to have a project on GitHub. You can create a new project for this or use an existing one. Click the Authorize button to connect your GitHub repo to Azure Pipelines.
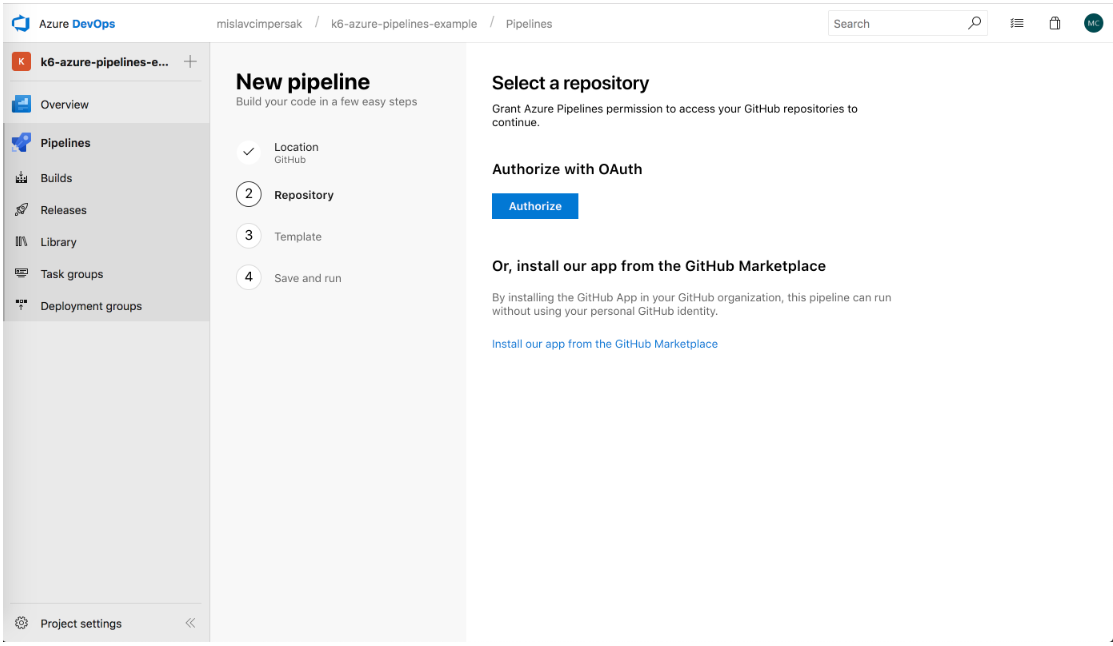
Figure 4: 'Azure DevOps Repository Authorization' screen
If you are a member of multiple organizations, select the organization that houses your project. Then, choose to install Azure Pipelines into all repositories or just a single repo.
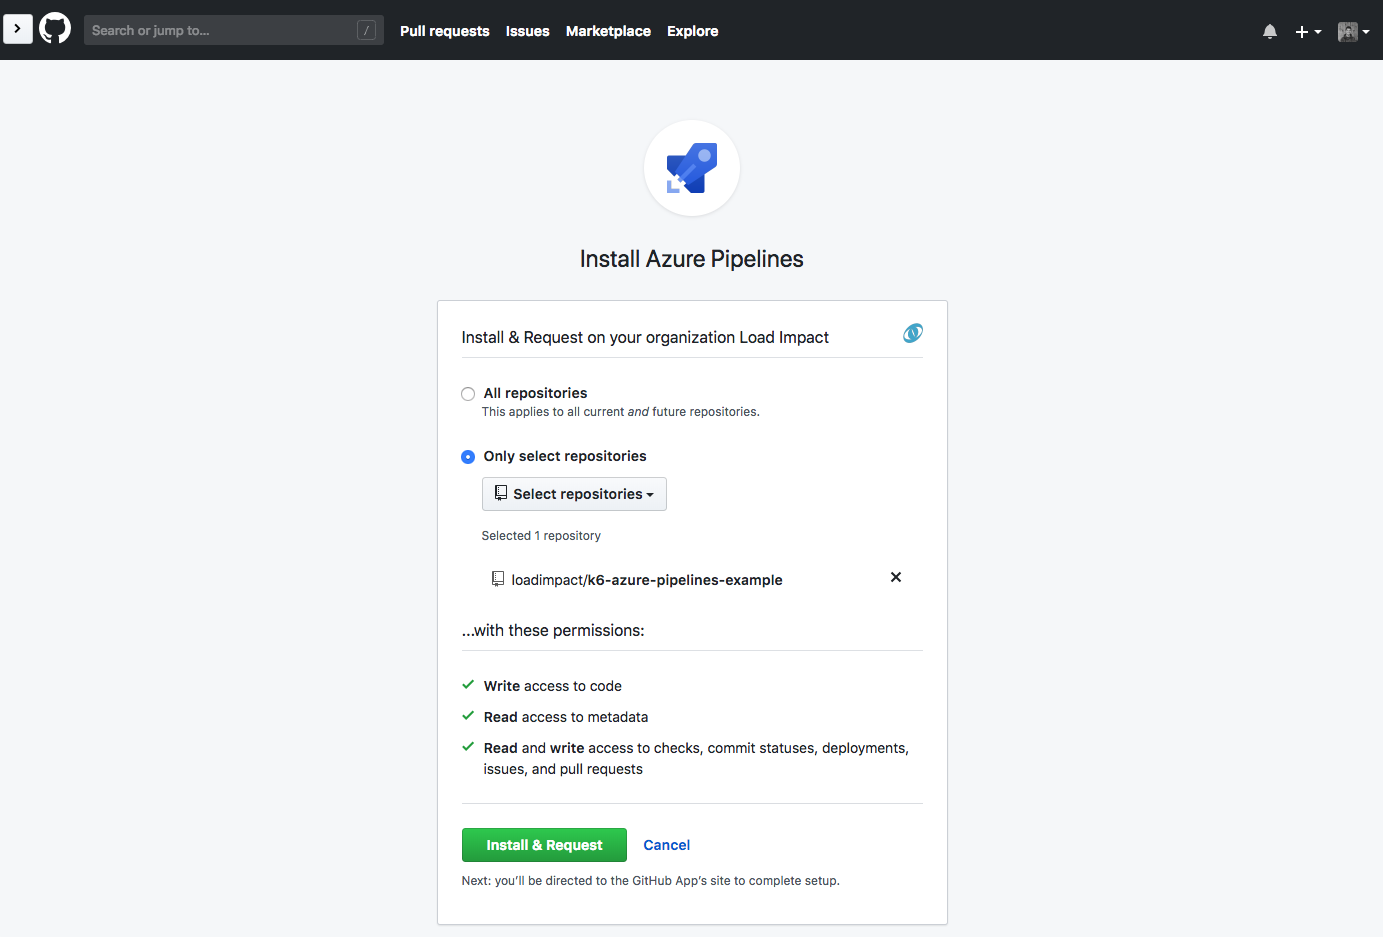
Figure 5: 'Install Azure Pipelines' screen
Follow the next few steps to finish giving Azure Pipelines access to your project.
Azure Pipelines Config
Create a new file in the root of your GitHub repo named azure-pipelines.yml.
Azure provides ready-made pools in which to run our pipeline agents. Having a choice between Windows, MacOS, and Ubuntu agents, I've selected Ubuntu 16.04. That gives us the easiest way to install the k6 tool through shell commands.
We can start our example by defining the base image for our agent:
azure-pipelines.yml

pool:
vmImage: 'Ubuntu 16.04'
Commit this new file and push the code to remote. On each push, a build is automatically triggered.
Installing k6
So far, our build does nothing useful. Let's change that. We are going to create our first script task within our pipeline step. On its GitHub page, k6 provides clear instructions for how to install k6 on a Debian based system, so we can copy that verbatim as a multiline script with a descriptive displayName attribute.
To make sure that k6 is installed properly, we can add a new script task that just outputs the version of our k6 install. This task is optional and can be removed in real-life scenarios.
In the example for this article, we're using a single-job build, so we're omitting the jobs section.
Now, we have the following in our config file:
azure-pipelines.yml

pool:
vmImage: 'Ubuntu 16.04'

steps:
- script: |
sudo apt-key adv --keyserver hkp://keyserver.ubuntu.com:80 --recv-keys 379CE192D401AB61
echo "deb https://dl.bintray.com/loadimpact/deb stable main" | sudo tee -a /etc/apt/sources.list
sudo apt-get update
sudo apt-get install k6
displayName: Install k6 tool

- script: |
k6 version
displayName: Check if k6 is installed
Commit and push the code. Go to the Azure Pipelines web UI and check the outputs. Now, we're getting somewhere!
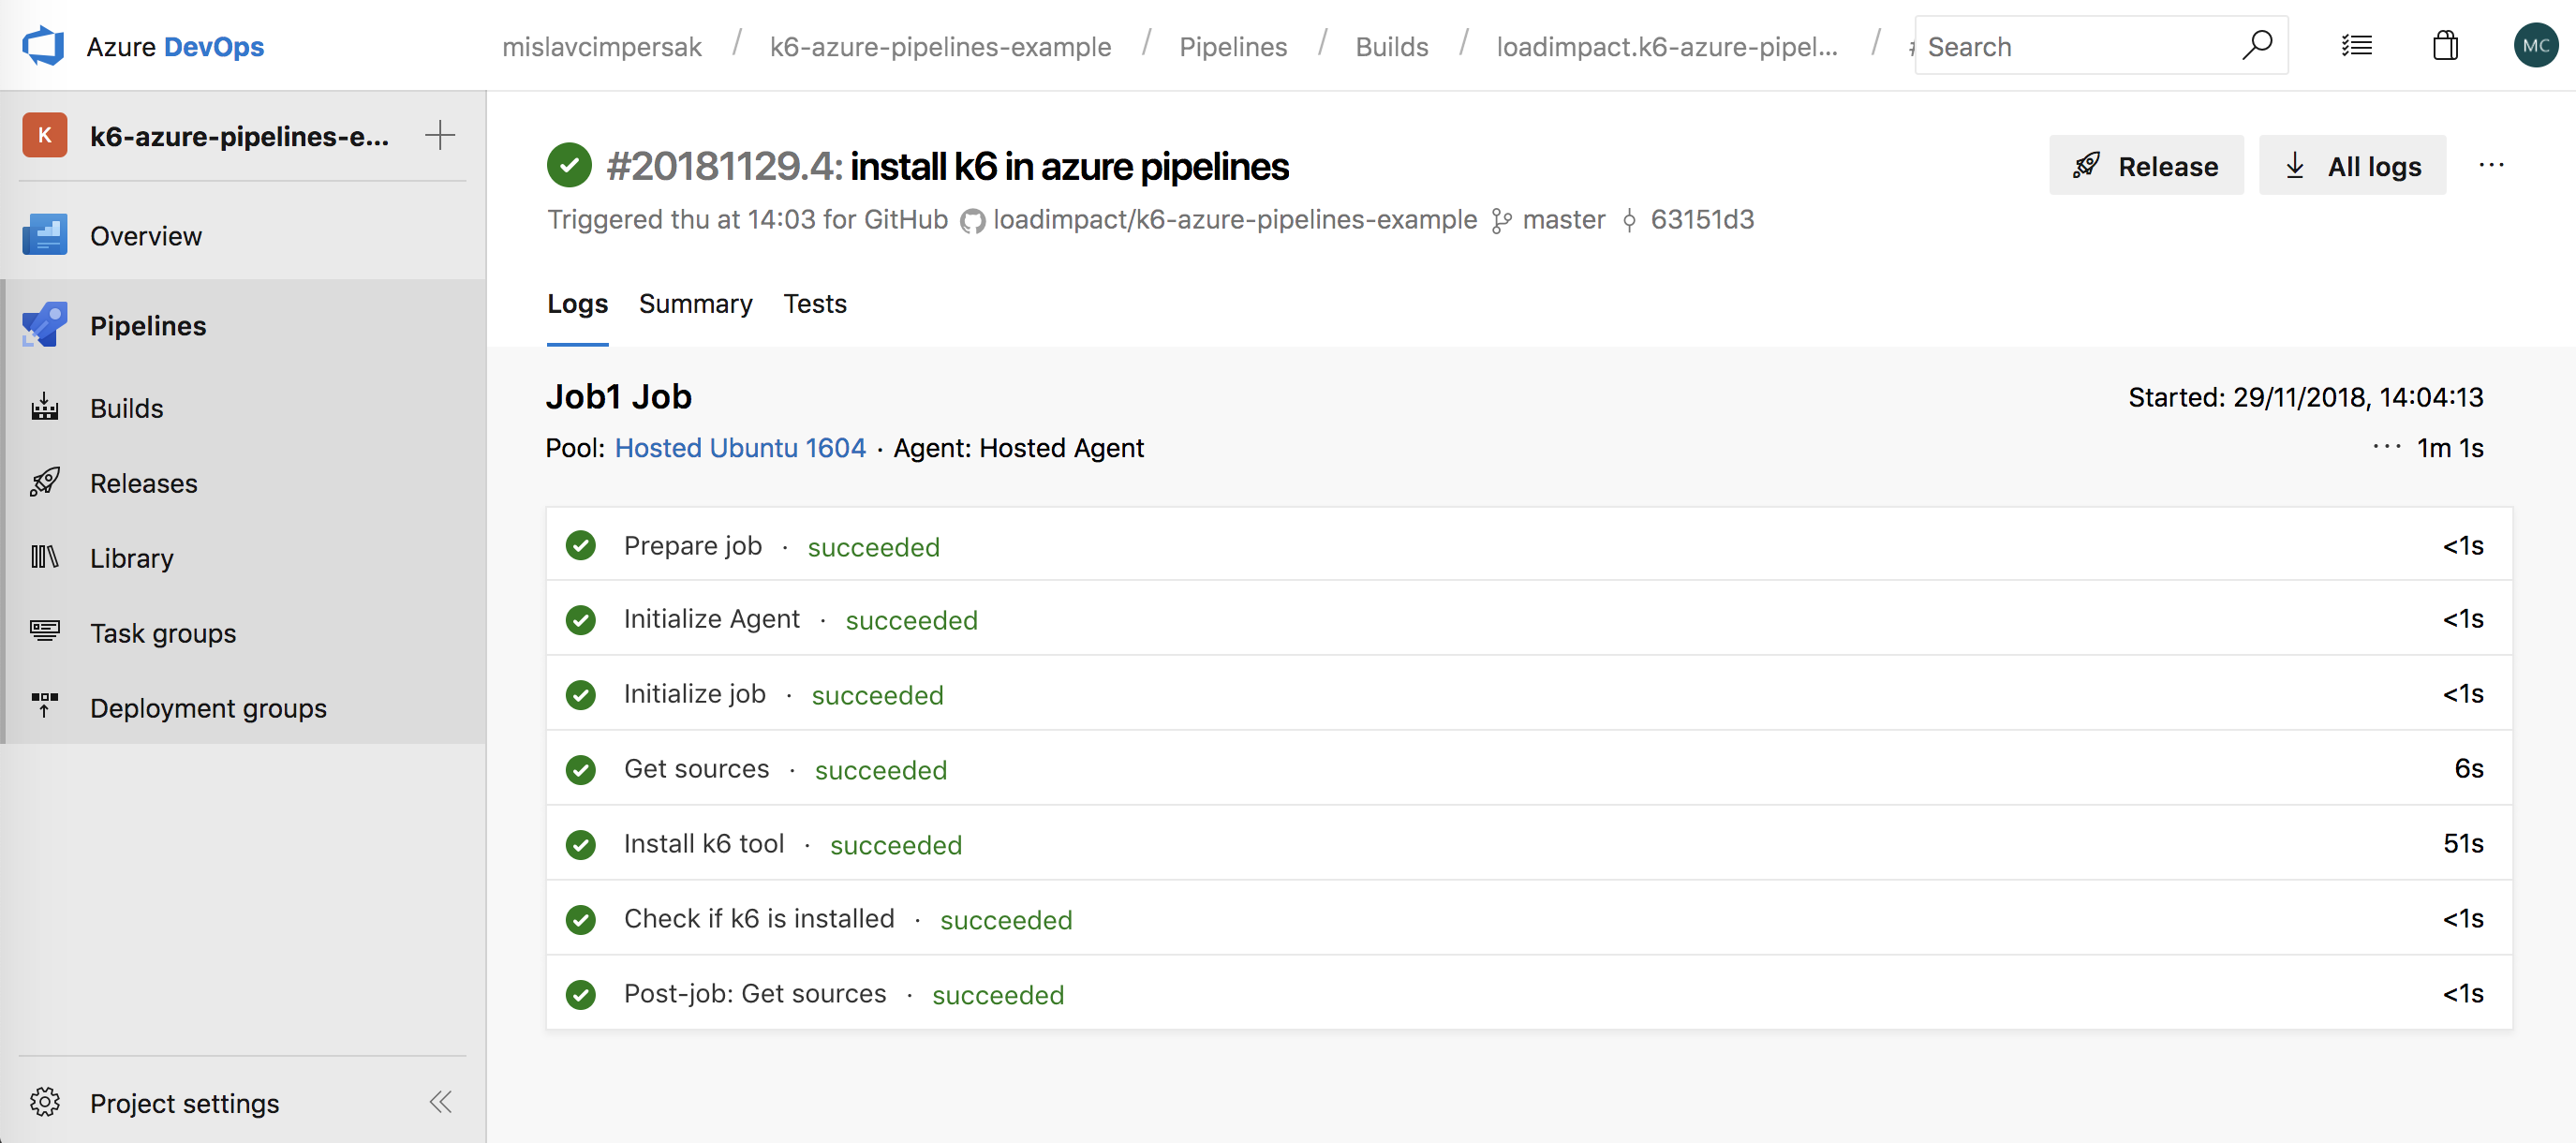
Figure 6: Azure Pipelines 'Install k6' screen
Run a Local Load Test from Azure Pipelines
We have k6 installed in our agent, so it's time to run a proper load test. k6 uses JavaScript as its scripting language, making it very flexible to create any kind of performance testing scenario.
In our test, we will be testing a single webpage. We are ramping up for 10s from one to 15 virtual users (VU), staying at that number of VUs for 20 seconds, and then bringing the test back to zero virtual users.
Let's name this test local.js since it is being run locally, straight from the Azure Pipelines agent.
Since we are planning to have multiple test scenarios, it's good practice to create a separate directory that will house them. Create a loadtests directory in the root of the repo and place the local.js file in it.
loadtests / local.js

import {
check,
group,
sleep
} from "k6";
import http from "k6/http";

export let options = {
stages: [{
duration: "10s",
target: 15
},
{
duration: "20s",
target: 15
},
{
duration: "10s",
target: 0
}
],
thresholds: {
"http_req_duration": ["p(95)<250"]
},
ext: {
loadimpact: {
name: "test.loadimpact.com"
}
}
};

export default function () {
group("Front page", function () {
let res = http.get("http://test.loadimpact.com/");
check(res, {
"is status 200": (r) => r.status === 200
});
sleep(5);
});
}
In our azure-pipelines.yml config file, we add a new script task to run the k6 load test directly from the Azure Pipelines agent:
steps:

# ...
- script: |
k6 run loadtests/local.js
displayName: Run k6 load test within Azure Pipelines
Once again, commit and push.
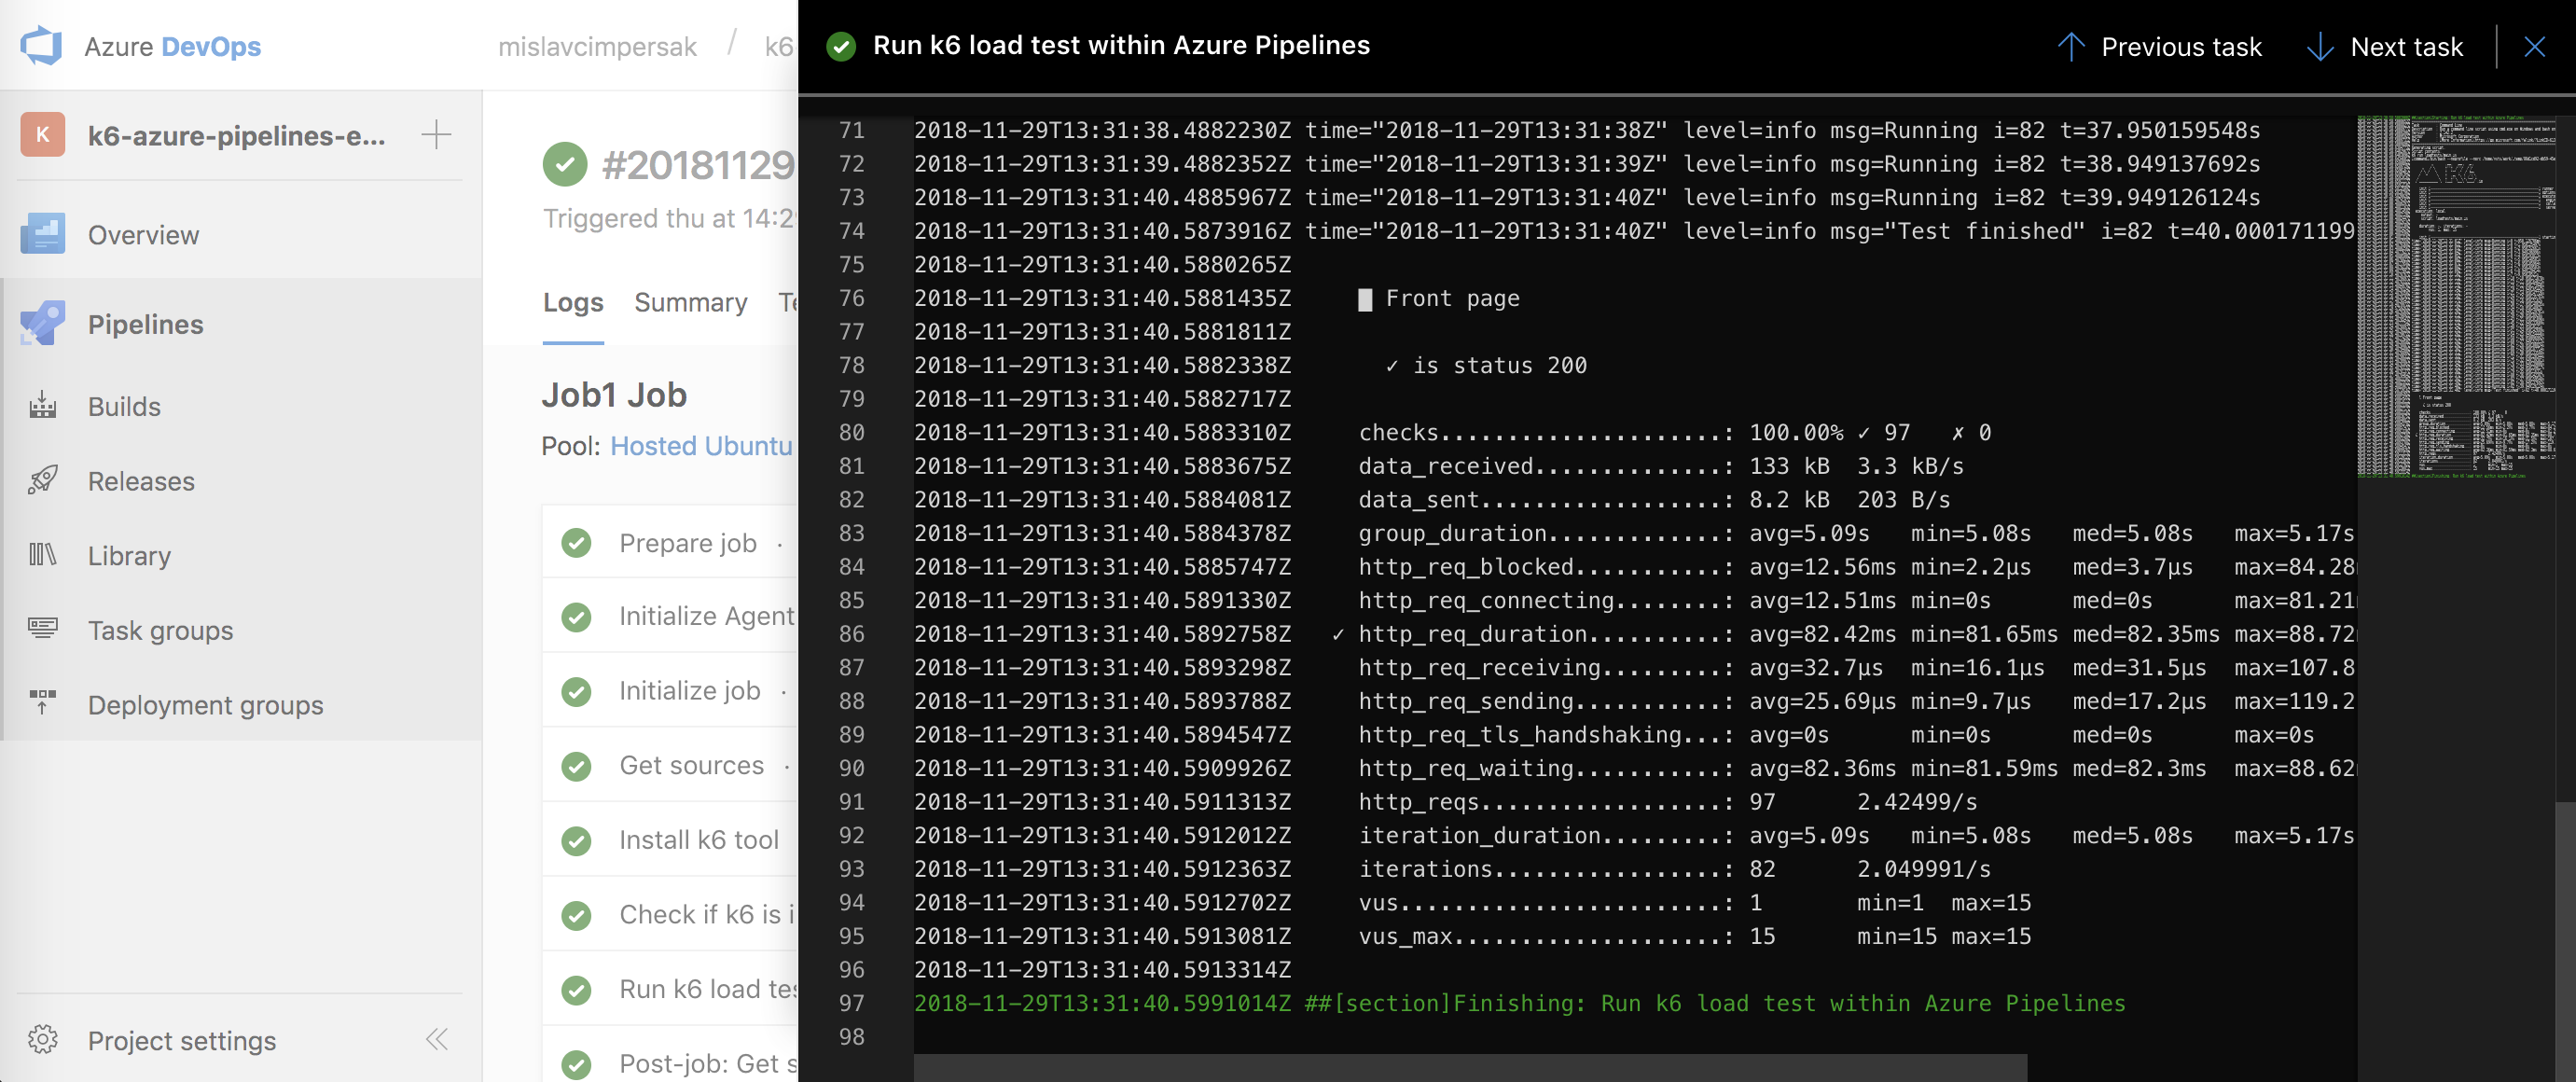
Figure 7: k6 load test run from Azure Pipelines
When you get to this screen, congrats! You now know how to set up a GitHub project CI build to run on Azure Pipelines and do some automated load testing with k6.
Run a Load Test in the Cloud With Azure Pipelines
k6 can also be used as a client to Load Impact's SaaS load testing solution. One of the advantages of using cloud execution is that it's very easy to run large load tests from multiple geographic locations (load zones).
Our test script is almost the same as the one above with a small detail changed. This time, we'll run our load test from two load zones: Ashburn and Dublin. Most likely, not all of your customers live in a single location, so it's a good idea to test from multiple locations; the load can be generated from multiple sites in the U.S. or around the globe. For a list of all available load zones, see the k6 docs. Let's create a new file in our loadtests dir named cloud.js.
loadtests / cloud.js

import {
check,
group,
sleep
} from "k6";
import http from "k6/http";

export let options = {
stages: [{
duration: "10s",
target: 15
},
{
duration: "20s",
target: 15
},
{
duration: "10s",
target: 0
}
],
thresholds: {
"http_req_duration": ["p(95)<250"]
},
ext: {
loadimpact: {
name: "test.loadimpact.com",
distribution: {
loadZoneLabel1: {
loadZone: "amazon:us:ashburn",
percent: 60
},
loadZoneLabel2: {
loadZone: "amazon:ie:dublin",
percent: 40
}
}
}
}
};

export default function () {
group("Front page", function () {
let res = http.get("http://test.loadimpact.com/");
check(res, {
"is status 200": (r) => r.status === 200
});
sleep(5);
});
}
In the azure-pipelines.yml config file, add an additional step or modify your existing step that was running k6 locally so that it now runs the cloud based test.
steps:
# ...
- script: |
k6 login cloud --token $(k6cloud.token)
k6 cloud --quiet loadtests/cloud.js
displayName: Run k6 cloud load test within Azure Pipelines
The important thing to notice here is the usage of token provided by Load Impact. So, don't commit your code just yet. First, we need to get the Load Impact token and set an Azure Pipelines secret variable.
In order to get the token, log in into your account on loadimpact.com or create one if you don't have one already. New users can use the 30-day free trial that supports testing from multiple load zones.
Go over to the 'Integrations' section of the page and click the Use your token link. Copy the provided token.
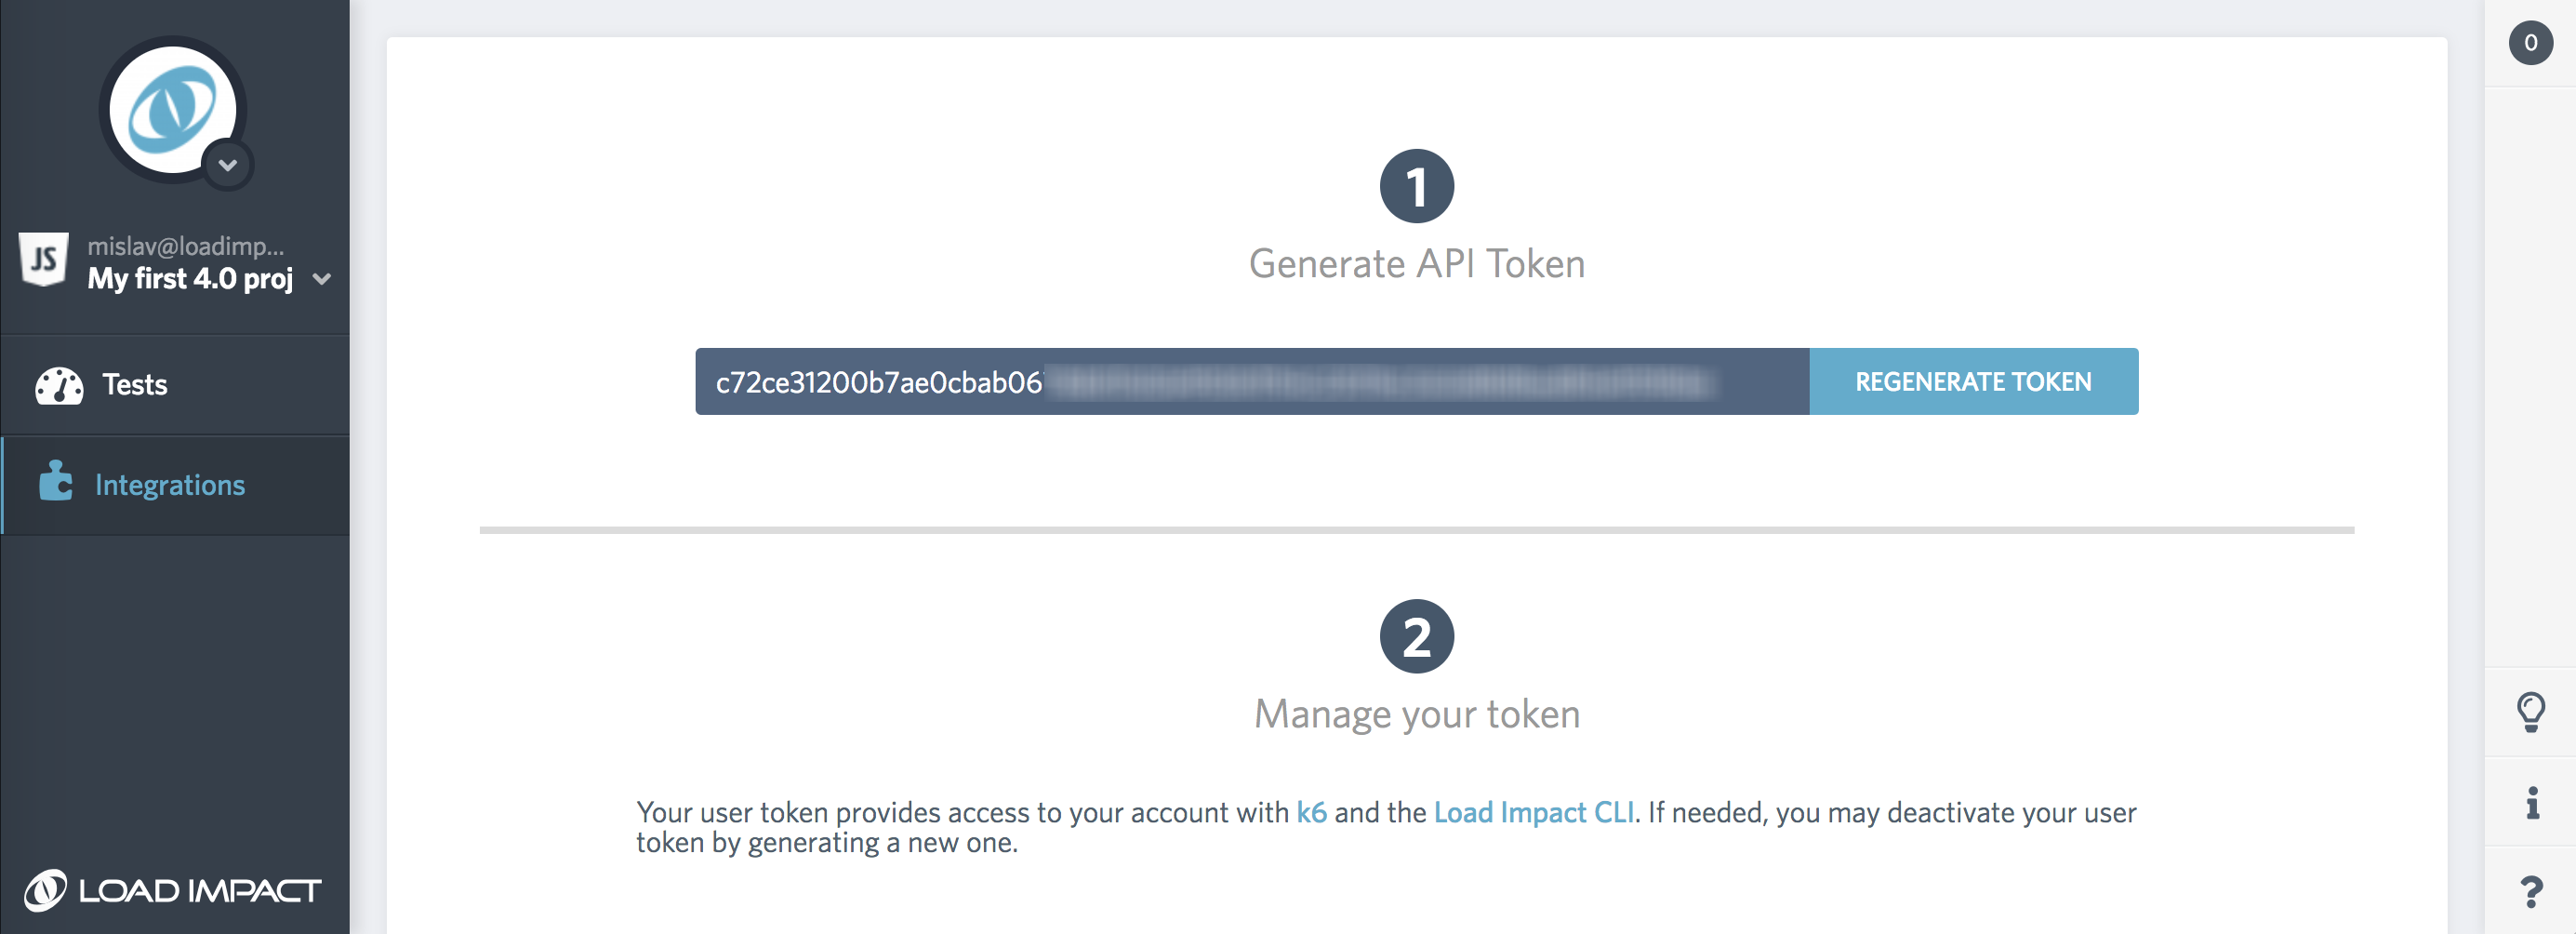
Figure 8: 'Load Impact Integrations' Screen
Now, we need to add an Azure Pipelines variable that will be available within the build.
Go to the Azure Pipelines web UI and from the left side menu, select Pipelines and then click the Edit button next to the name of your project.
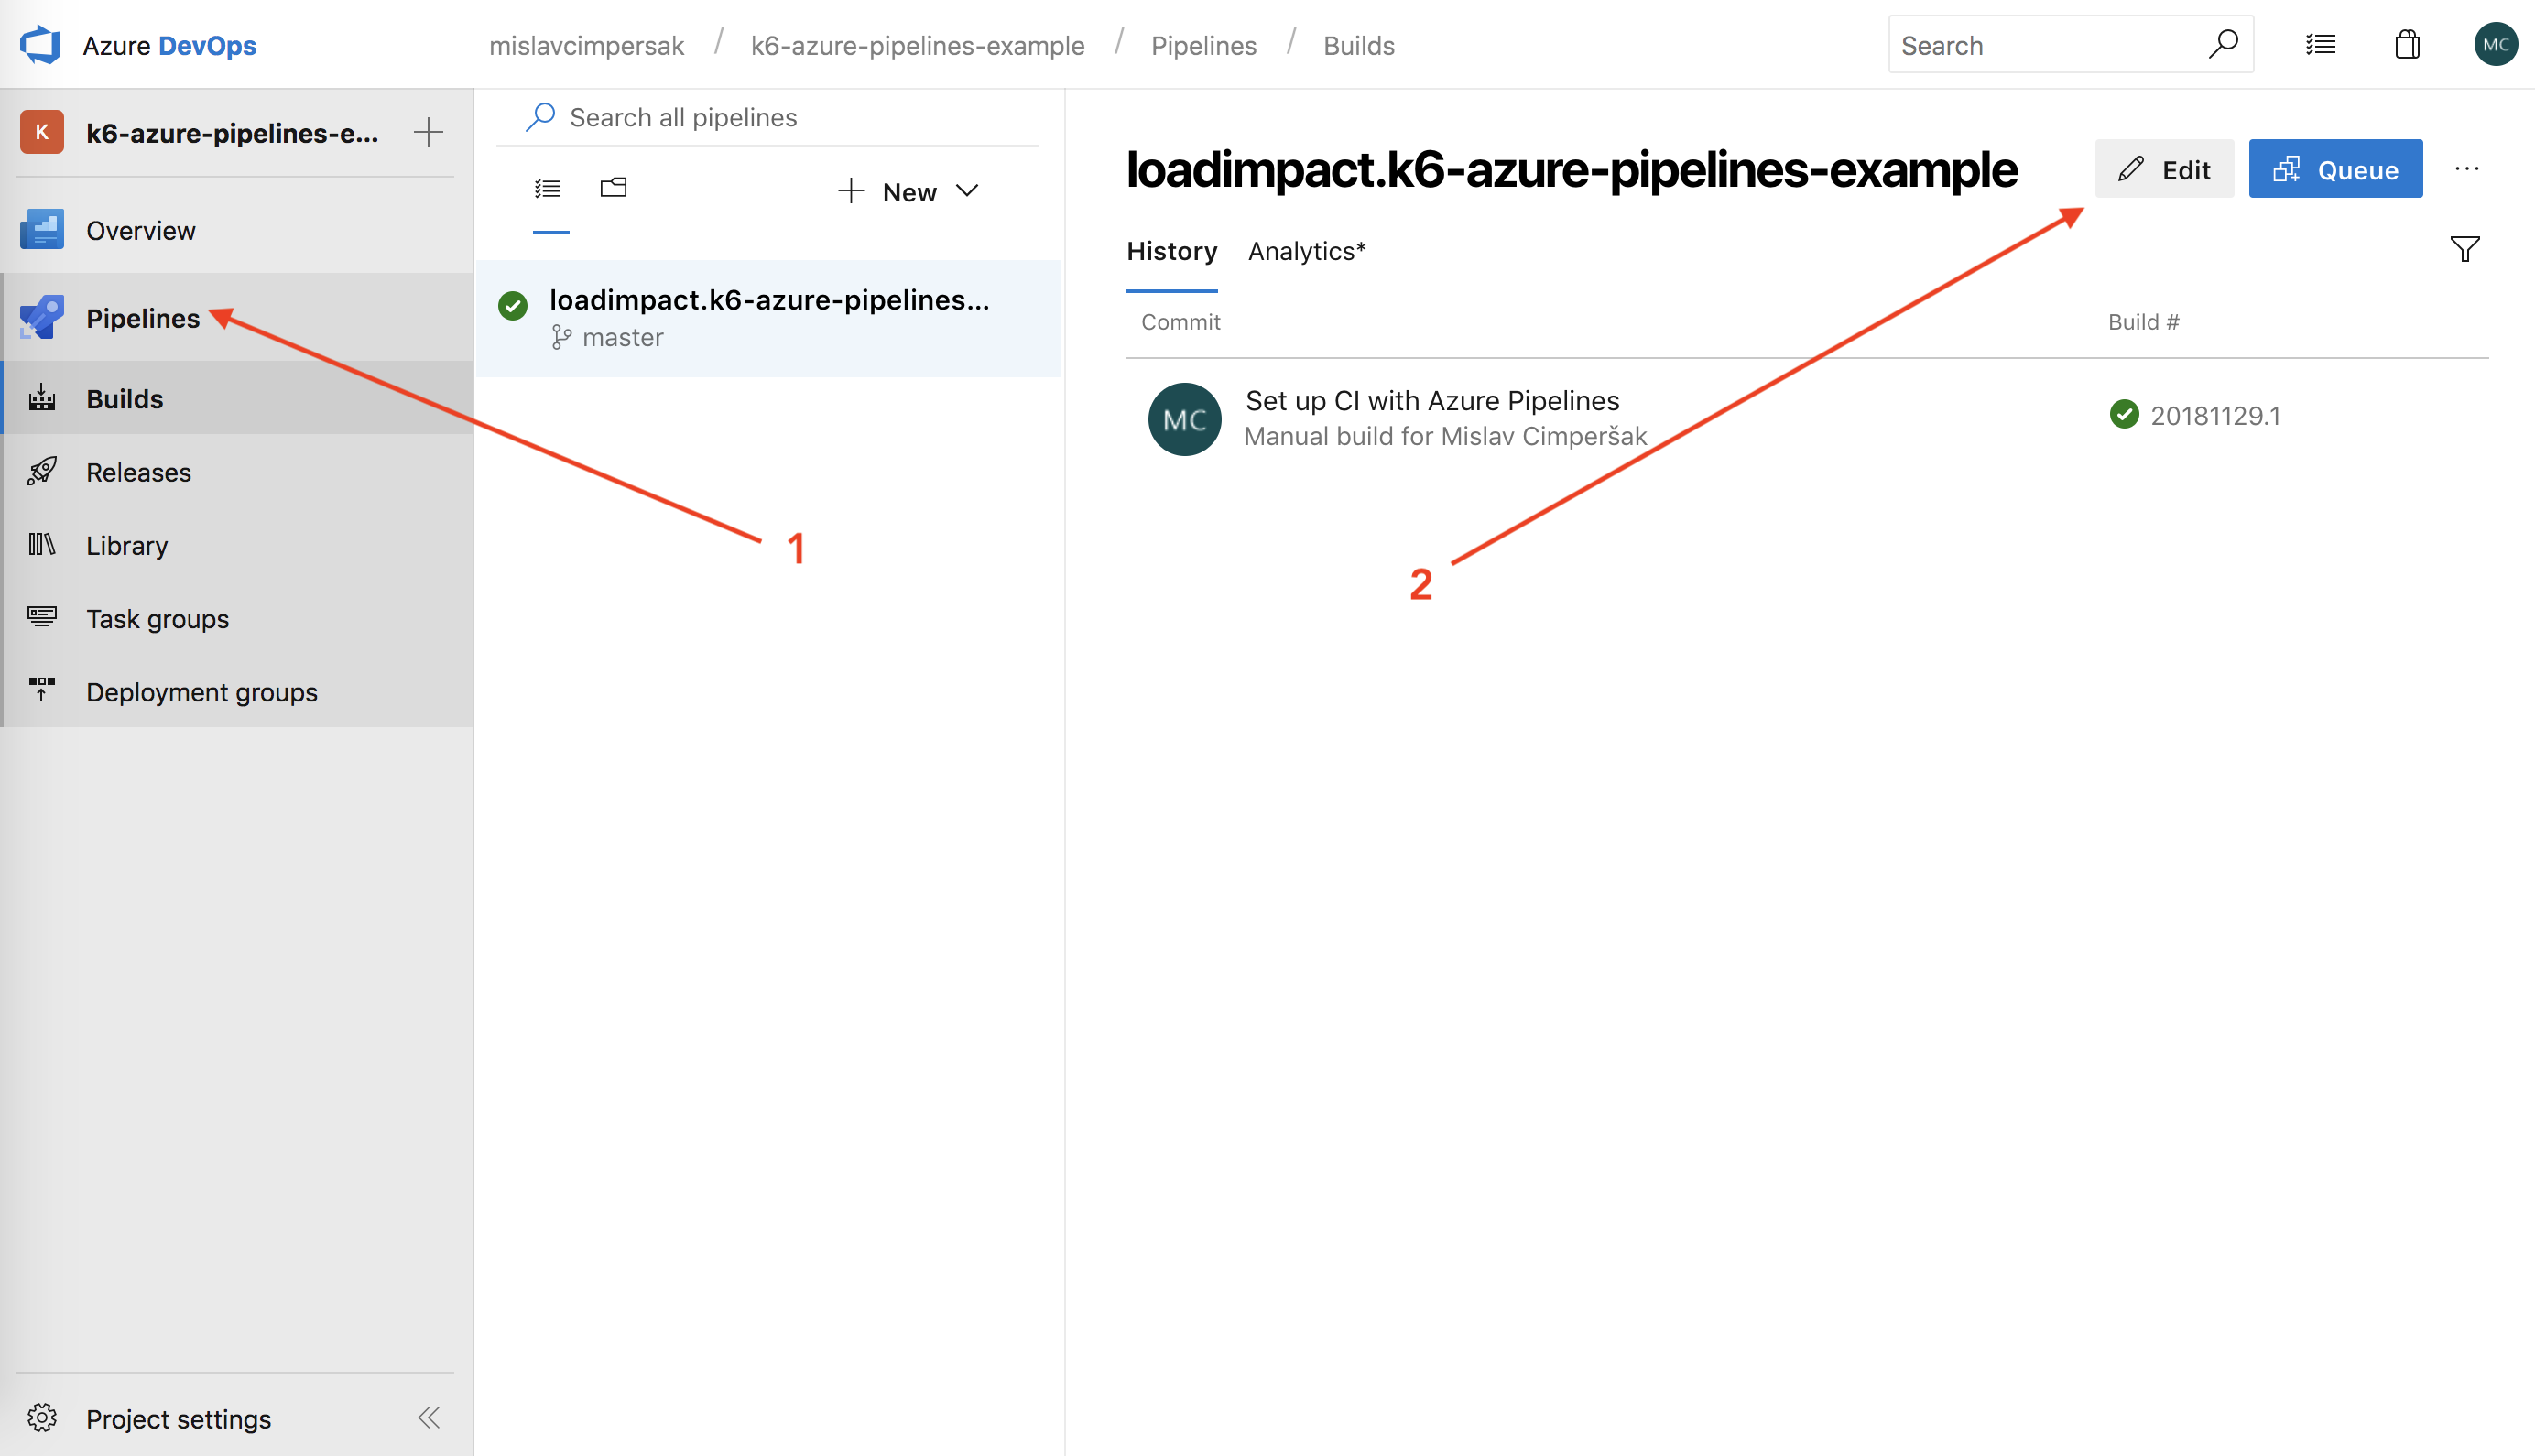
Figure 9: 'Azure Pipelines' Screen
Once you enter the options for your project, switch to the 'Variables' tab in the web UI and enter a new secret variable that will be used during k6 cloud execution.
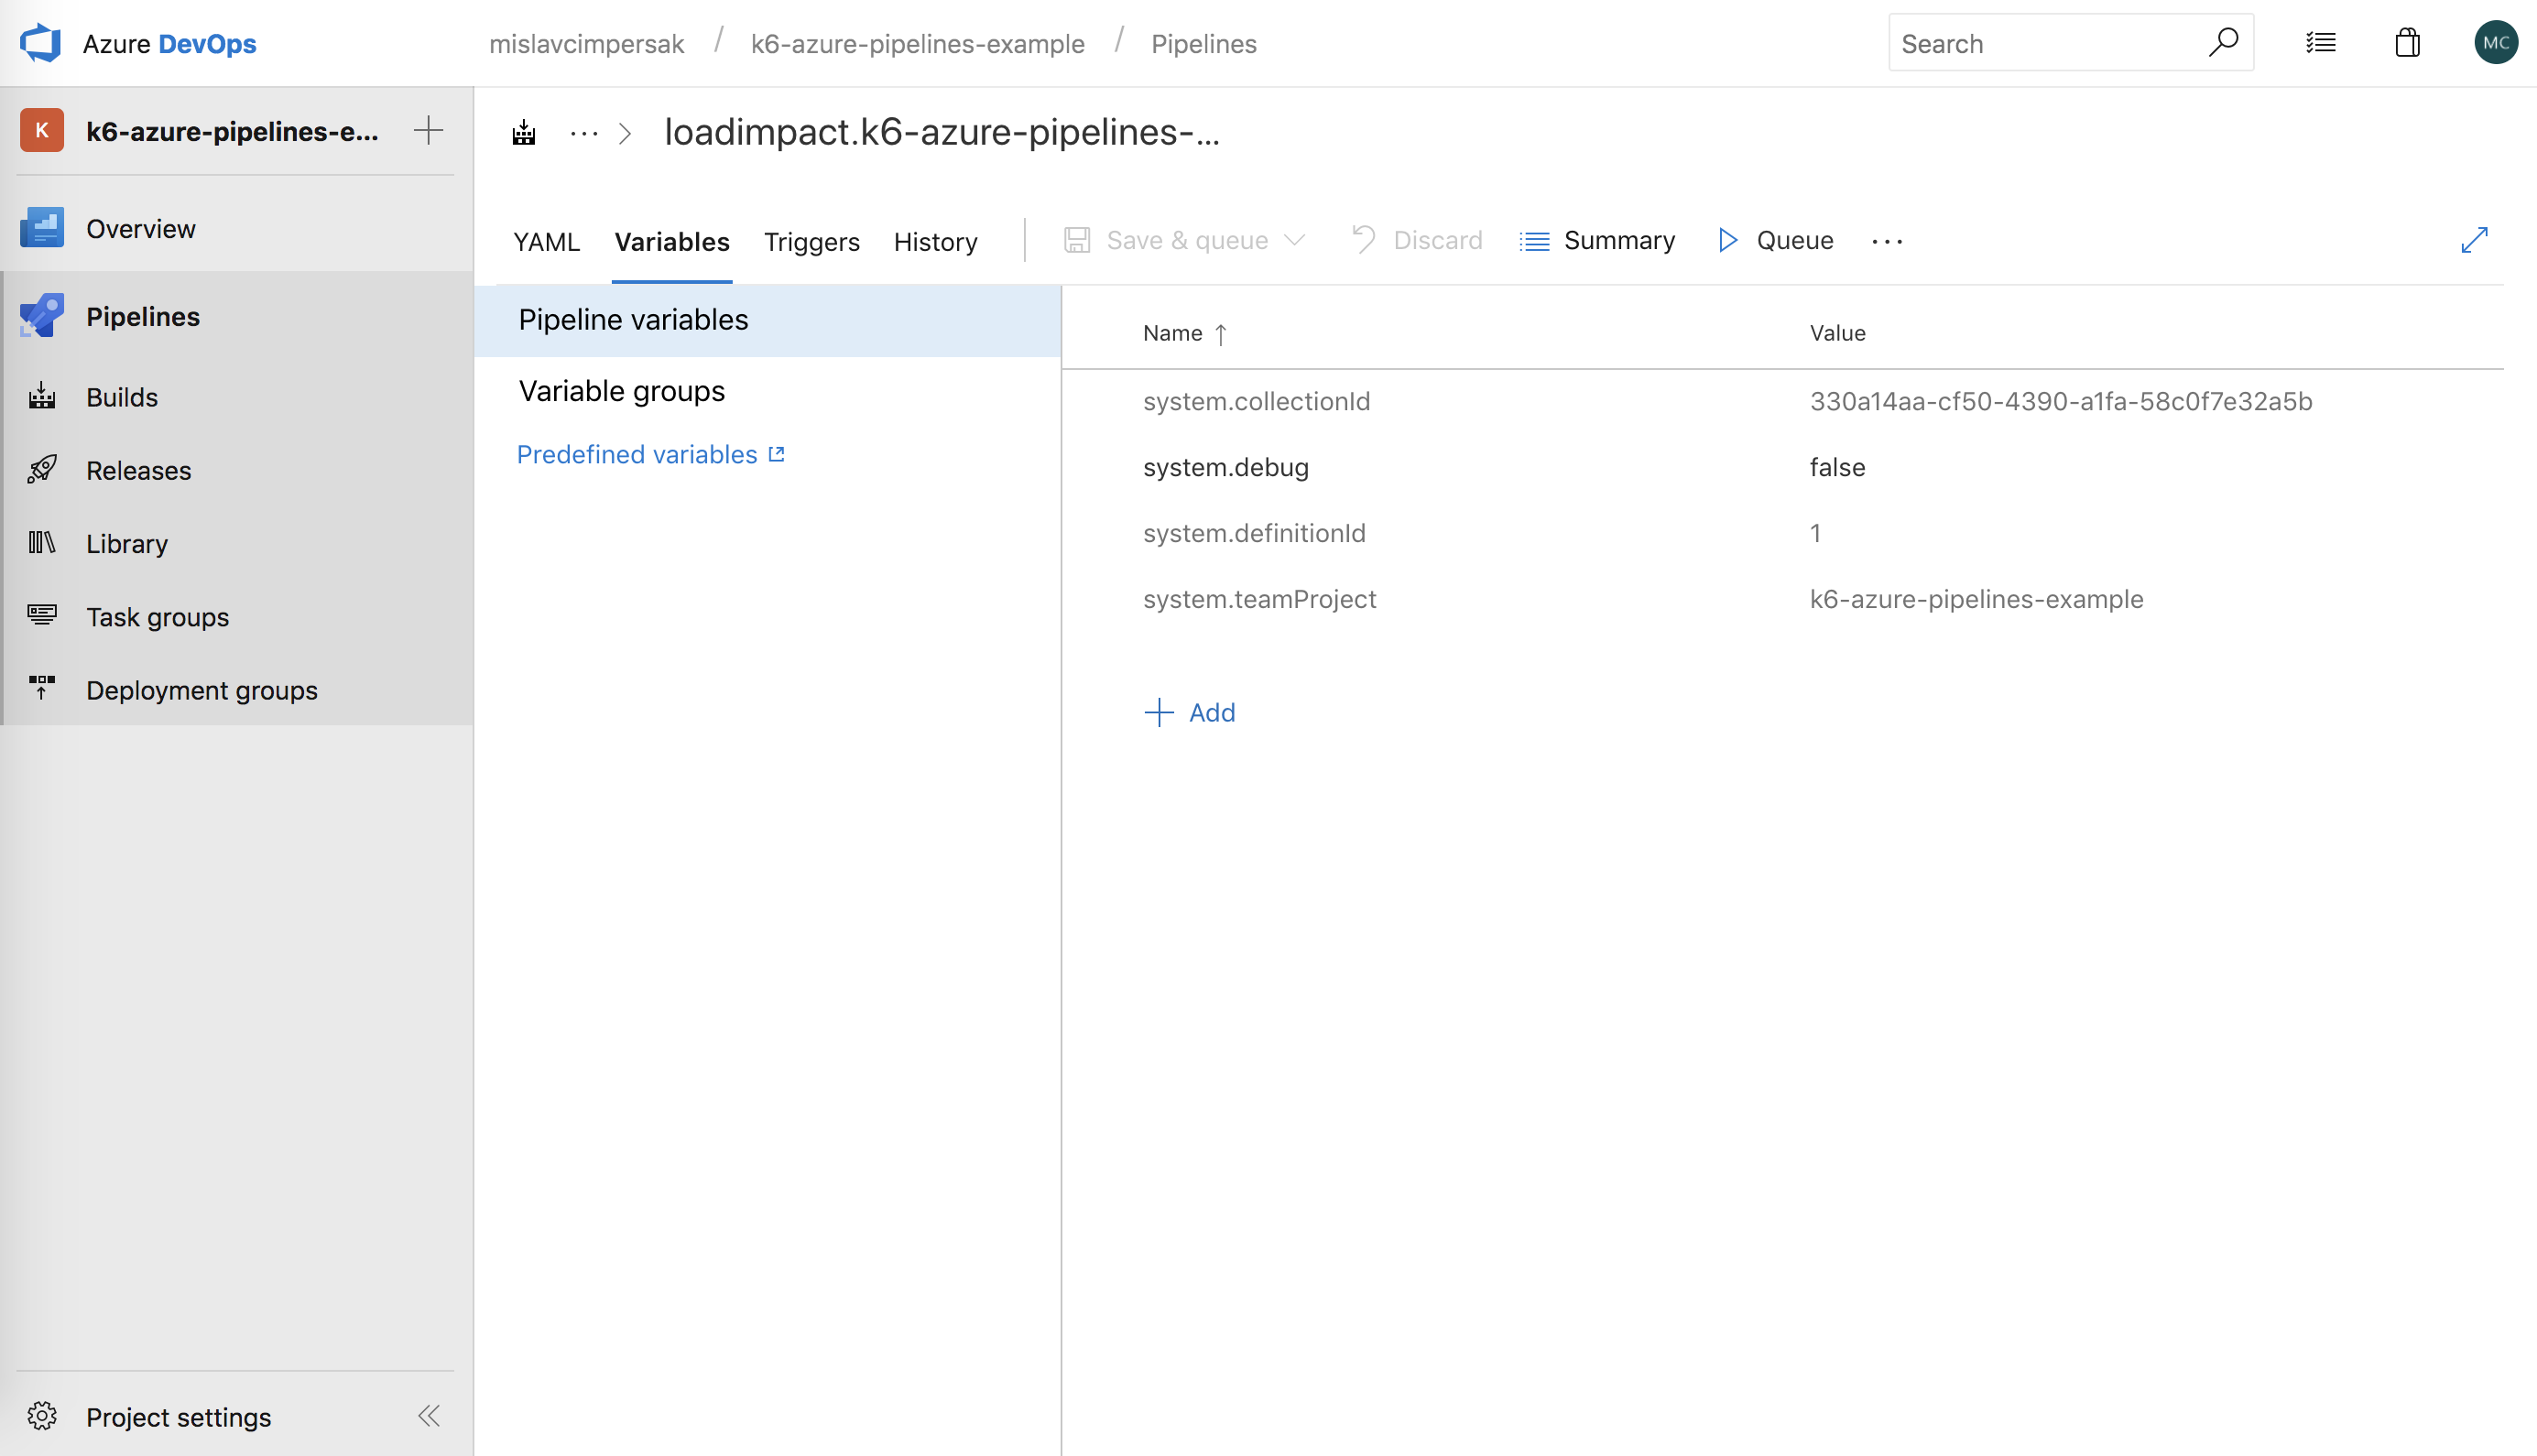
Figure 10: 'Azure Pipelines Variables' screen
Click Add to add a new variable. For name, enter k6cloud.token and for its value, paste Load Impact's token. Don't forget to set the variable as secret so that it's not visible as plain text in your pipelines output.
After entering the values, click the Save & queue button and in the Save commentfield, enter something like adding k6cloud.token env var.
Now, you can push your new loadtests/cloud.js script alongside new Pipelines script task to trigger a new build. You can see the k6 output in the Azure Pipelines web UI, but for a more in-depth view and analysis of your load test, go to Load Impact's web UI.
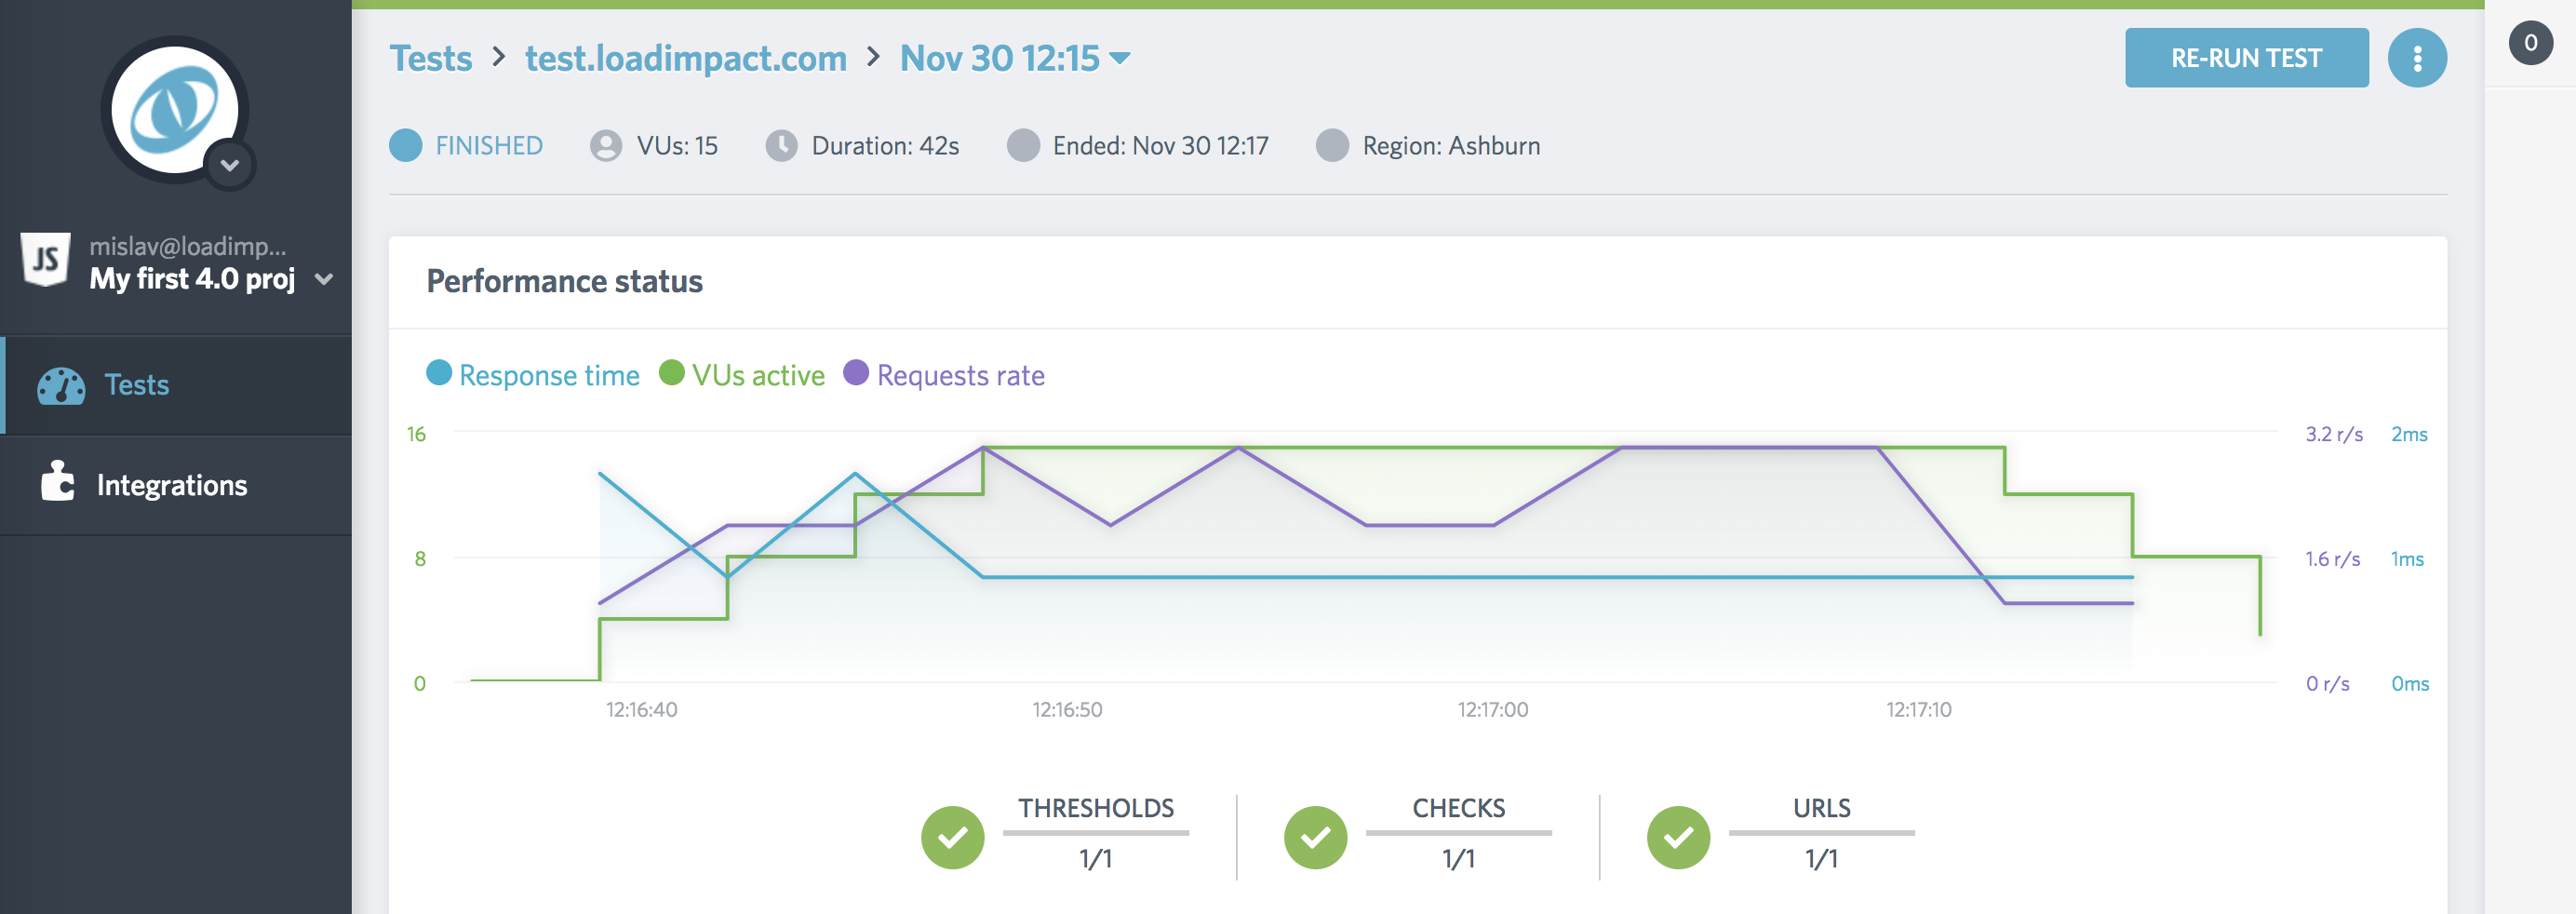
Figure 11: Load Impact Insights Web UI showing our load test results
All code used in this article is available in a public GitHub repo. Feel free to use it as a starting point for setting up your own Azure Pipelines builds for automated performance testing.

