How to Use Vault and Spring Cloud Config to Secure Secrets
Back in 2013, a feature was released on GitHub that let users scan code in public repositories. Almost immediately, it was partially deactivated. People suspect that the reason for this was that the feature exposed all kinds of secrets. Then, in 2014, 50,000 uber drivers had their information stolen. This happened because a hacker accessed Uber’s database using credentials they got from a public GitHub repository. The following year, Hashicorp Vault (a tool for managing secrets and encrypting data in transit) was announced. And, two years after that, Spring Vault (the integration of Spring and Vault) came into being.
While this may seem like old news at this point, the leakage of secrets is still pervasive today. It happens to a whole host of developers (see this study from NC State University). This exposure of secrets leads to more cyber-attacks, loss or corruption of data, breaches, and crypto-jacking (cryptocurrency mining using a victim’s cloud computer power). Hashicorp’s Vault and Spring Cloud Vault can reduce this risk.
Since it’s not recommended to store secret values in code, this tutorial will offer these alternatives:
- Using environment variables for Spring Boot secrets
- Secrets encryption with Spring Cloud Config
- Secrets management with HashiCorp’s Vault
- Using Spring Cloud Vault
Prerequisites: Java 8+ and Docker.
Use Environment Variables for Secrets; a Precursor to Spring Vault
Spring Boot applications can bind property values from environment variables. To demonstrate, create a vault-demo-app with OpenID Connect authentication, using the Spring Initializr. Then add web, okta, and cloud-config-client dependencies, some of which will be required later in the tutorial:
curl https://start.spring.io/starter.zip \
-d dependencies=web,okta,cloud-config-client \
-d groupId=com.okta.developer \
-d artifactId=vault-demo-app \
-d name="Spring Boot Application" \
-d description="Demo project of a Spring Boot application with Vault protected secrets" \
-d packageName=com.okta.developer.vault \
-o vault-demo-app.zip
Unzip the file and open the project. Modify its src/main/java/.../Application.java class to add the / HTTP endpoint:
xxxxxxxxxx
package com.okta.developer.vault;
import org.springframework.boot.SpringApplication;
import org.springframework.boot.autoconfigure.SpringBootApplication;
import org.springframework.security.core.annotation.AuthenticationPrincipal;
import org.springframework.security.oauth2.core.oidc.user.OidcUser;
import org.springframework.web.bind.annotation.GetMapping;
import org.springframework.web.bind.annotation.RestController;
public class Application {
public static void main(String[] args) {
SpringApplication.run(Application.class, args);
}
("/")
String hello( OidcUser user) {
return String.format("Welcome, %s", user.getFullName());
}
}
For the Okta authentication set up, register for a free developer account. After you log in, go to API > Authorization Servers and copy your Issuer URI into a text editor.
Then go to Applications and create a new Web application. Configure it as follows:
- Name:
Vault Demo - Base URIs:
http://localhost:8080/ - Login redirect URIs:
http://localhost:8080/login/oauth2/code/okta - Logout redirect URIs:
http://localhost:8080 - Grant type allowed:
- Authorization Code
- Refresh Token
Click Done and copy the Client ID and Client secret into a text editor for later.
Instead of storing Okta credentials in application.properties, Spring Boot allows you to bind properties from environment variables. You can see this in action by starting your application with the Maven command below:
xxxxxxxxxx
SPRING_SECURITY_OAUTH2_CLIENT_PROVIDER_OKTA_ISSUER_URI={yourIssuerURI} \
SPRING_SECURITY_OAUTH2_CLIENT_REGISTRATION_OKTA_CLIENT_ID={yourClientId} \
SPRING_SECURITY_OAUTH2_CLIENT_REGISTRATION_OKTA_CLIENT_SECRET={yourClientSecret} \
./mvnw spring-boot:run
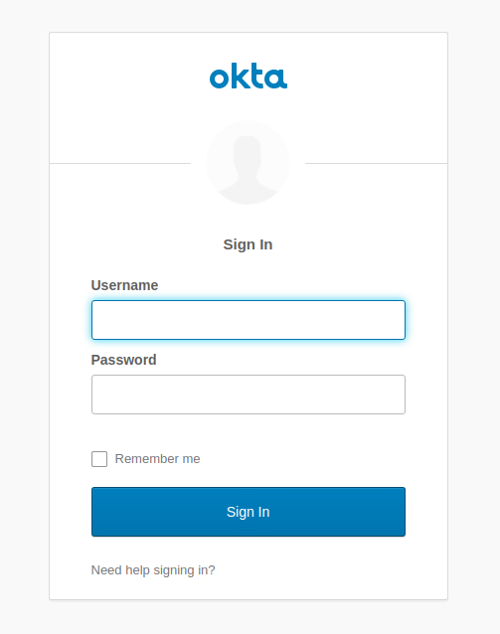
In an incognito window, go to http://localhost:8080. Here, you should see the Okta login page:

In the application logs, you’ll see the security filter chain initializes an OAuth 2.0 authentication flow:
xxxxxxxxxx
2020-05-01 00:19:45.952 INFO 12058 --- [main] o.s.s.web.DefaultSecurityFilterChain: Creating filter chain: any request,
[org.springframework.security.web.context.request.async.WebAsyncManagerIntegrationFilter,
org.springframework.security.web.context.SecurityContextPersistenceFilter,
org.springframework.security.web.header.HeaderWriterFilter,
org.springframework.security.web.csrf.CsrfFilter,
org.springframework.security.web.authentication.logout.LogoutFilter,
org.springframework.security.oauth2.client.web.OAuth2AuthorizationRequestRedirectFilter,
org.springframework.security.oauth2.client.web.OAuth2AuthorizationRequestRedirectFilter,
org.springframework.security.oauth2.client.web.OAuth2LoginAuthenticationFilter,
org.springframework.security.web.authentication.ui.DefaultLoginPageGeneratingFilter,
org.springframework.security.web.authentication.ui.DefaultLogoutPageGeneratingFilter,
org.springframework.security.web.savedrequest.RequestCacheAwareFilter,
org.springframework.security.web.servletapi.SecurityContextHolderAwareRequestFilter,
org.springframework.security.web.authentication.AnonymousAuthenticationFilter,
org.springframework.security.oauth2.client.web.OAuth2AuthorizationCodeGrantFilter,
org.springframework.security.web.session.SessionManagementFilter,
org.springframework.security.web.access.ExceptionTranslationFilter,
org.springframework.security.web.access.intercept.FilterSecurityInterceptor]
Using environment variables for passing secrets to containerized applications is now considered bad practice because the environment can be inspected or logged in a number of cases. So, let’s move on to using Spring Cloud Config server for secrets storage.
Spring Cloud Config with Secrets Encryption
In microservice architectures, managing configuration with a centralized config server is essential. Secret encryption is desirable at rest and when in transit. Spring Cloud Config Server is a popular implementation. Let’s configure the server to store encrypted secrets.
NOTE: To use encryption and decryption features in Java 8, you must install the Java Cryptography Extension (JCE) in your JVM, which is not included by default. Otherwise, the requests to the /encrypt endpoint in the config server will fail with “Illegal key size”.
Using the Spring Initializr API, create a Vault + Config Server application:
xxxxxxxxxx
curl https://start.spring.io/starter.zip \
-d dependencies=cloud-config-server \
-d groupId=com.okta.developer \
-d artifactId=vault-config-server \
-d name="Spring Boot Configuration Server" \
-d description="Demo project of a Spring Boot application with Vault protected secrets" \
-d packageName=com.okta.developer.vault \
-o vault-config-server.zip
Unzip the downloaded file. Rename src/main/resource/application.properties to src/main/resource/application.yml, edit the file to specify the port, add a native profile, and specify config search locations:
xxxxxxxxxx
server:
port: 8888
spring:
profiles:
active: native
Edit:src/main/java/com/okta/developer/vault/SpringBootConfigurationServerApplication.java and add a @EnableConfigServer annotation:
xxxxxxxxxx
package com.okta.developer.vault;
import org.springframework.boot.SpringApplication;
import org.springframework.boot.autoconfigure.SpringBootApplication;
import org.springframework.cloud.config.server.EnableConfigServer;
public class SpringBootConfigurationServerApplication {
public static void main(String[] args) {
SpringApplication.run(SpringBootConfigurationServerApplication.class, args);
}
}
Start the server, as you are going to encrypt your Okta secrets using the /encrypt endpoint. For this example, you are using a symmetric (shared) encryption key, passed through the environment variable ENCRYPT_KEY. Before running the command below, you should replace {encryptKey} with a random string of characters.
xxxxxxxxxx
ENCRYPT_KEY={encryptKey} ./mvnw spring-boot:run
Then, in another terminal, encrypt your client ID and secret.
xxxxxxxxxx
curl localhost:8888/encrypt -d {yourOktaClientId}
curl localhost:8888/encrypt -d {yourOktaClientSecret}
In the vault-config-server project folder, create a src/main/resources/config/vault-demo-app-dev.yml file to store the secrets for the dev profile, with the following contents:
xxxxxxxxxx
spring:
security:
oauth2:
client:
provider:
okta:
issuer-uri: {yourIssuerURI}
registration:
okta:
client-id: '{cipher}encryptedClientId'
client-secret: '{cipher}encryptedClientSecret'
The client-id and client-secret encrypted values must be prefixed with {cipher}. Restart the config server.
To consume the config server properties, the client application must set the server address in the bootstrap properties. In the vault-demo-app project folder, create the file src/main/resources/bootstrap.yml with the following content:
xxxxxxxxxx
spring:
application:
name: vault-demo-app
cloud:
config:
uri: http://localhost:8888
profiles:
active: dev
Start vault-demo-app without passing the environment variables:
xxxxxxxxxx
./mvnw spring-boot:run
When requesting http://localhost:8080 it should again redirect to the Okta login.
In a real environment, the config server should be secured. Spring Cloud Config Server supports asymmetric key encryption as well, with the server encrypting with the public key, and the clients decrypting with the private key. However, the documentation warns about spreading the key management process around clients.
Vault as a Configuration Backend with Spring Cloud Vault
In the cloud, secrets management has become much more difficult. Vault is a secrets management and data protection tool from HashiCorp that provides secure storage, dynamic secret generation, data encryption, and secret revocation.
Vault encrypts the secrets prior to writing them to persistent storage. The encryption key is also stored in Vault, but encrypted with a master key not stored anywhere. The master key is split into shards using Shamir’s Secret Sharing algorithm, and distributed among a number of operators. The Vault unseal process allows you to reconstruct the master key by adding shards one at a time in any order until enough shards are present, then Vault becomes operative. Operations on secrets can be audited by enabling audit devices, which will send audit logs to a file, syslog or socket.
As Spring Cloud Config Server supports Vault as a configuration backend, the next step is to better protect the application secrets by storing them in Vault.
Pull the Vault docker image and start a container using the command below. Make sure to replace {hostPath} with a local directory path, such as /tmp/vault.
xxxxxxxxxx
docker pull vault
docker run --cap-add=IPC_LOCK \
-e 'VAULT_DEV_ROOT_TOKEN_ID=00000000-0000-0000-0000-000000000000' \
-p 8200:8200 \
-v {hostPath}:/vault/logs \
--name my-vault vault
NOTE: The docker run command above will start a vault instance with the name my-vault. You can stop the container with docker stop my-vault and restart it with docker start my-vault. Note that all the secrets and data will be lost between restarts, as explained in the next paragraphs.
IPC_LOCK capability is required for Vault to be able to lock memory and not be swapped to disk, as this behavior is enabled by default. As the instance is run for development, the ID of the initially generated root token is set to the given value. We are mounting /vault/logs, as we are going to enable the file audit device to inspect the interactions.
Once it starts, you should notice the following logs:
xxxxxxxxxx
...
WARNING! dev mode is enabled! In this mode, Vault runs entirely in-memory
and starts unsealed with a single unseal key. The root token is already
authenticated to the CLI, so you can immediately begin using Vault.
...
The unseal key and root token are displayed below in case you want to
seal/unseal the Vault or re-authenticate.
Unseal Key: wD2mT9W56zGWrG9PYajIA47spzSLEkIMYQX7Ocio1VQ=
Root Token: 00000000-0000-0000-0000-000000000000
Development mode should NOT be used in production installations!
==> Vault server started! Log data will stream in below:
It is clear Vault is running in dev mode, meaning it short-circuits a lot of setup to insecure defaults, which helps for the experimentation. Data is stored encrypted in-memory and lost on every restart. Copy the Unseal Key, as we are going to use it to test Vault sealing. Connect to the container and explore some vault commands:
xxxxxxxxxx
docker exec -it my-vault /bin/sh
The command above will start a shell session with the container. After the prompt shows, run the following three commands:
xxxxxxxxxx
export VAULT_TOKEN="00000000-0000-0000-0000-000000000000"
export VAULT_ADDR="http://127.0.0.1:8200"
vault status
The status command output shows if the vault instance is sealed:
xxxxxxxxxx
Key Value
--- -----
Seal Type shamir
Initialized true
Sealed false
Total Shares 1
Threshold 1
Version 1.3.3
Cluster Name vault-cluster-a80e6cd6
Cluster ID 769bfd8c-7c9e-5ef2-a2bd-667ae19b4180
HA Enabled false
As you can see, in development mode Vault starts unsealed, meaning stored data can be decrypted/accessed.
Enable a file audit device to watch the interactions with Vault:
xxxxxxxxxx
vault audit enable file file_path=/vault/logs/vault_audit.log
You should see a success message. Now store the Okta secrets for the vault-demo-app:
xxxxxxxxxx
vault kv put secret/vault-demo-app,dev \
spring.security.oauth2.client.registration.okta.client-id="{yourClientId}" \
spring.security.oauth2.client.registration.okta.client-secret="{yourClientSecret}" \
spring.security.oauth2.client.provider.okta.issuer-uri="{yourIssuerURI}"
vault kv get secret/vault-demo-app,dev
As illustrated above, key-value pairs are stored with kv put command, and you can check the values with the kv get vault command.
Check vault_audit.log in your specified {hostPath} directory. Operations are logged in JSON format by default, with sensitive information hashed:
xxxxxxxxxx
{
"time":"2020-05-01T02:08:49.528995105Z",
"type":"response",
"auth":{...},
"request":{
"id":"1cc73d31-d678-88d4-0b8e-f16b3d961791",
"operation":"read",
"client_token":"...",
"client_token_accessor":"...",
"namespace":{
"id":"root"
},
"path":"secret/data/vault-demo-app,dev",
"remote_address":"127.0.0.1"
},
"response":{
"data":{
"data":{
"spring.security.oauth2.client.provider.oidc.issuer-uri":"hmac-sha256:d44ecf9418576aba39752cf34a253bdf960a5ac475bd5eece78a776555035e1a",
"spring.security.oauth2.client.registration.oidc.client-id":"hmac-sha256:d35fa23d933b5402a8c665ce4d73643506c7d13743e922e397a3cf78acde6c88",
"spring.security.oauth2.client.registration.oidc.client-secret":"hmac-sha256:d6c38a298b067ac8ce76c427bd060fdda8558a024ebb1a60beb9cde60d9e5db8"
},
"metadata":{
"created_time":"hmac-sha256:b5283ce3fbb0bb7a74c91e2e565e08d44d378d2e37946b1fa871e0c23947a6c1",
"deletion_time":"hmac-sha256:81566d1c06213e53b6f7cf141388772d1ab59efcc4cfa9373c32098d90bda09a",
"destroyed":false,
"version":1
}
}
}
}
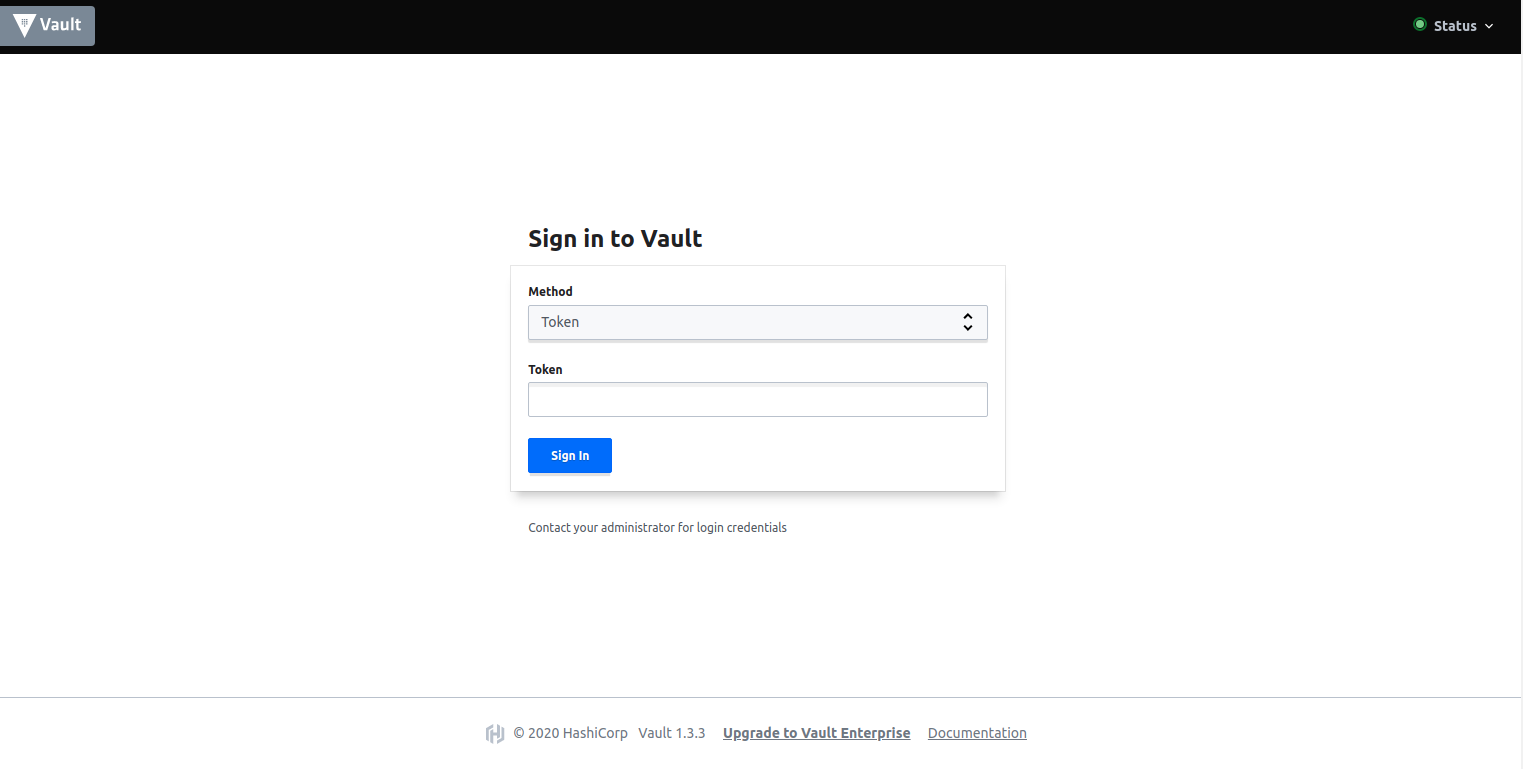
Let’s assume you don’t want to configure the root token in the vault-demo-app. You can instead create a policy granting read permissions on the path where the secrets were stored. Go to the Vault Web UI at http://localhost:8200 and log in with the root token (00000000-0000-0000-0000-000000000000).

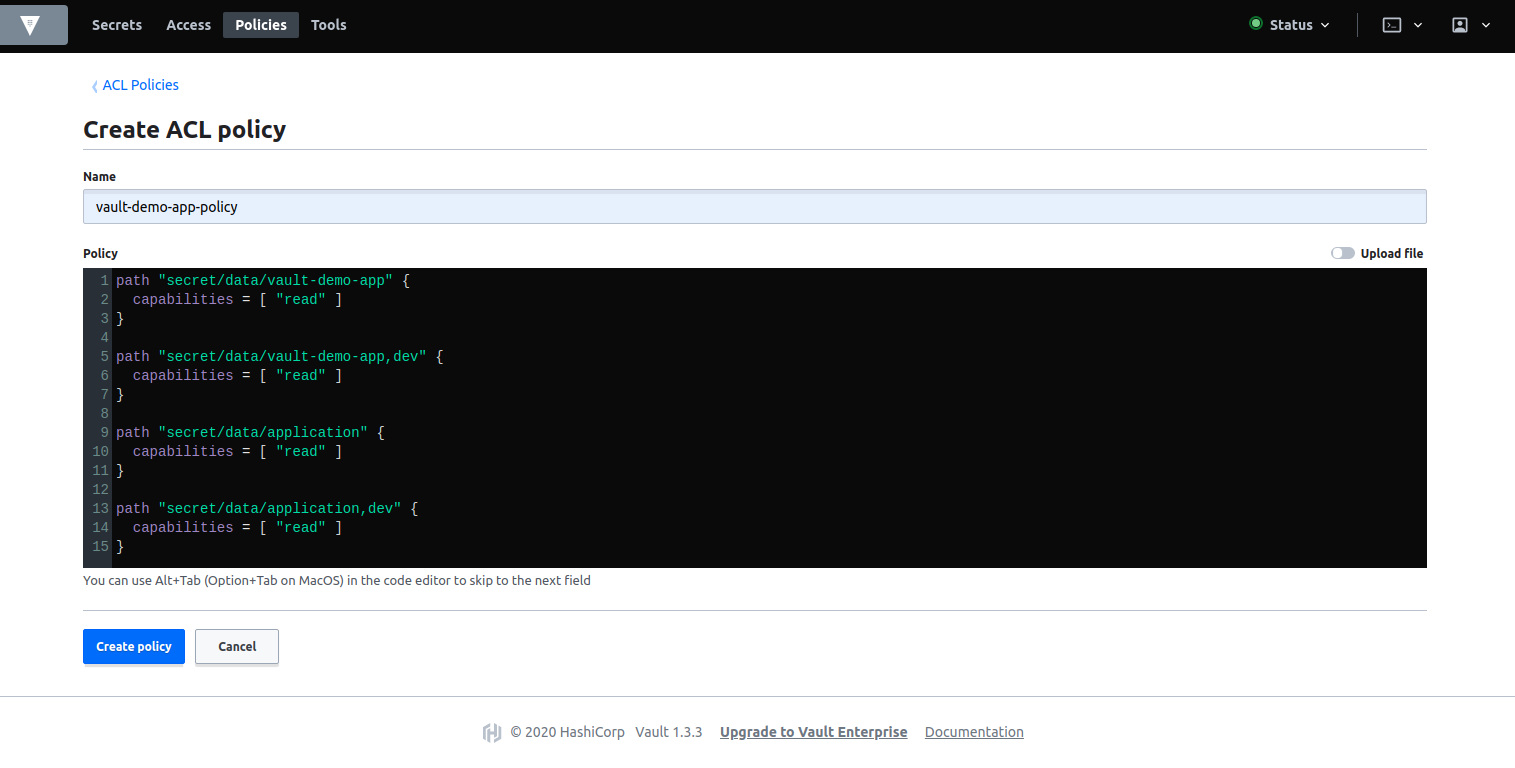
Next, go to Policies and Create ACL policy. Create a vault-demo-app-policy with the following capabilities:
xxxxxxxxxx
path "secret/data/vault-demo-app" {
capabilities = [ "read" ]
}
path "secret/data/vault-demo-app,dev" {
capabilities = [ "read" ]
}
path "secret/data/application" {
capabilities = [ "read" ]
}
path "secret/data/application,dev" {
capabilities = [ "read" ]
}
All the paths above will be requested by the config server to provide configuration for the vault-demo-app when it starts with the dev profile active.
Now, go back to the container command line, and create a token with the vault-demo-app-policy.
xxxxxxxxxx
vault token create -policy=vault-demo-app-policy
Key Value
--- -----
token s.4CO6wzq0M1WRUNsYviJB3wzz
token_accessor 2lYfyQJZtGPO4gyxsLmOnQyE
token_duration 768h
token_renewable true
token_policies ["default" "vault-demo-app-policy"]
identity_policies []
policies ["default" "vault-demo-app-policy"]
You are now ready to update the config server. In the vault-config-server project, edit src/main/resource/application.yml to add Vault as the config backend:
xxxxxxxxxx
server:
port: 8888
spring:
profiles:
active: vault
cloud:
config:
server:
vault:
host: 127.0.0.1
port: 8200
kvVersion: 2
logging:
level:
root: TRACE
Note that the logging level is set to TRACE to see the interaction between the server and Vault. Restart the vault-config-server.
xxxxxxxxxx
./mvnw spring-boot:run
You should see the logs below if the server was configured correctly:
xxxxxxxxxx
2020-05-01 01:19:10.105 INFO 14072 --- [main] SpringBootConfigurationServerApplication:
Started SpringBootConfigurationServerApplication in 4.525 seconds (JVM running for 4.859)
You will not see the config server trying to connect to Vault in the logs. That will happen when a config client requests the properties. Start the vault-demo-app, passing the token just created in the environment variable SPRING_CLOUD_CONFIG_TOKEN. For example:
xxxxxxxxxx
SPRING_CLOUD_CONFIG_TOKEN=s.4CO6wzq0M1WRUNsYviJB3wzz \
./mvnw spring-boot:run
When the vault-demo-app starts, it will request the configuration to the config server, which in turn will make a REST to Vault. In the config server logs, with enough logging level, you will be able to see:
xxxxxxxxxx
2020-05-01 01:21:02.691 DEBUG 21168 --- [nio-8888-exec-1] o.s.web.client.RestTemplate:
HTTP GET http://127.0.0.1:8200/v1/secret/data/vault-demo-app,dev
To increase logging so you see the above message, add the following to
application.propertieslogging.level.org.springframework.web=DEBUG
Go to http://localhost:8080 and verify that authentication with Okta works.
Finally, let’s seal Vault. Sealing allows you to lock Vault data to minimize damages when an intrusion is detected. In the container command line,
enter:
vault operator seal
Restart vault-demo-app and verify the configuration will not be retrieved as Vault is sealed. The vault-config-server logs should read:
503 Service Unavailable: [{"errors":["error performing token check: Vault is sealed"]}
To unseal Vault, run:
vault operator unseal {unsealKey}
Learn More About Encryption and Storing Secrets
Hopefully, you see the benefits of using a secrets management tool like Vault as a configuration backend, as opposed to storing secrets in a file, on a file system, or in a code repository. To learn more about Vault and Spring Cloud, check out the following links:
- How Bad Can It Git?
- Spring Cloud Config - Vault Backend
- Container Secrets with Vault
- Amazon Engineer Leaked Private Encryption Keys
We have several related posts about encryption and storing secrets on this blog.
- The Hardest Thing About Data Encryption
- Why Public Key Cryptography Matters
- Security Patterns for Microservice Architectures
- Java Microservices with Spring Cloud Config and JHipster
You can find the code for this tutorial at GitHub.
For more tutorials like this one, follow @oktadev on Twitter. We also have a YouTube channel you might like. If you have any questions, please leave a comment below!

