An Introduction to TDD With Java
welcome to an introduction to test driven development (tdd) series. we will talk about java and junit in the context of tdd, but these are just tools. the main aim of the article is to give you a comprehensive understanding of tdd regardless of the programming language and testing framework.
in my opinion, if you don’t use tdd in your project you are either lazy or you simply don’t know how tdd works. excuses about lack of time don’t apply here.
about this post
in this post i’ll explain what tdd is and how it can be used in java, unit testing in tdd what you have to cover with your unit tests, and which principles you need to adhere in order to write good and effective unit tests.
if you have already know everything about tdd in java, but you are interested in examples and tutorials, i recommend you to skip this part and continue to the next one (it will be published in one week).
what is tdd?
if somebody asks me to explain tdd in few words, i say tdd is a development of tests before a feature implementation. you can argue that it’s hard to test things which are not existing yet. and kent beck will probably give you a slap for this.
so how is it possible? it can be described by following steps:
-
you read and understand requirements for a particular feature.
-
you develop a set of tests which check the feature. all of the tests are red, due to absence of the feature implementation.
-
you develop the feature until all tests become green.
-
refactor the code.

tdd requires a different way of thinking, so in order to start tdd you need to forget the way you developed code before. this process is very hard. and it is even harder if you don’t know how to write unit tests. but it’s worth it.
developing with tdd has valuable advantages:
-
you have a better understanding of a feature you implement.
-
you have robust indicators of feature completeness.
-
code is covered with tests and has less chance to be corrupted by fixes or new features.
the cost of these advantages is pretty high – inconvenience related to switching to a new development manner and time which you spend for developing each new feature. it’s a price of quality.
so that’s how tdd works – write red unit tests, start implementing a feature, make the tests green, and refactor the code.
place of unit tests in tdd
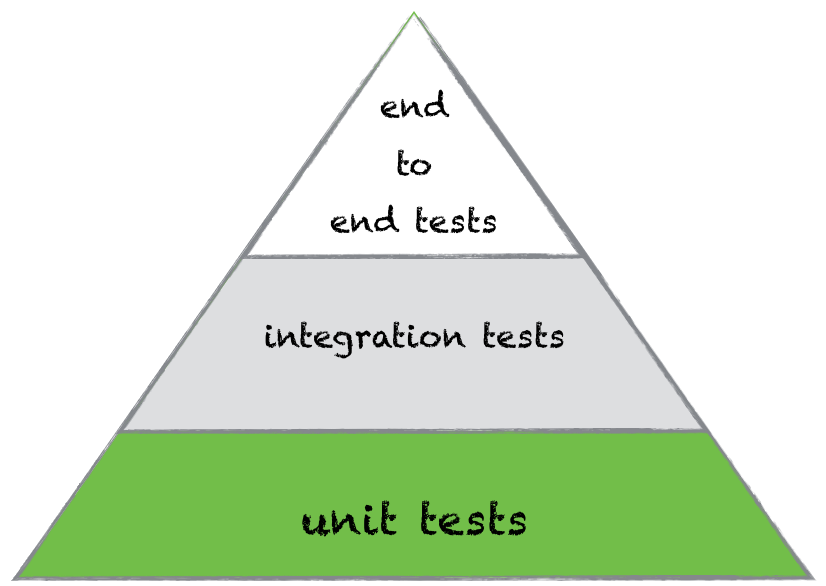
since unit tests are the smallest elements in the test automation pyramid, tdd is based on them. with the help of unit tests we can check the business logic of any class. writing unit tests is easy if you know how to do this. so what do you test with unit tests, and how do you do it? i’ll try to illustrate answers in a concise form.

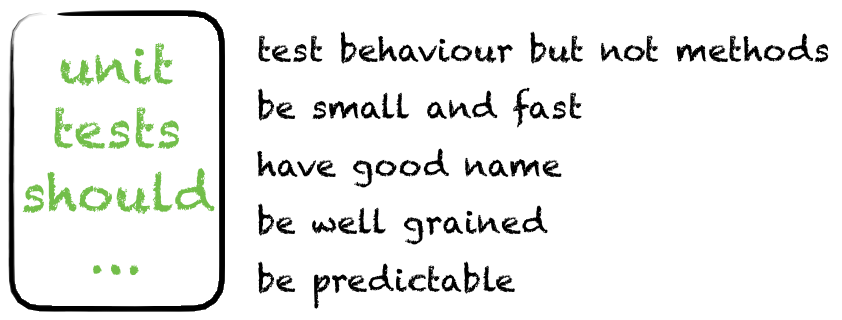
a unit test should be as small as possible. don’t think about this as one test for one method. that is possible, but as a rule one unit test implies invocation of several methods. this is called testing of behavior.
let’s consider the account class:
public class account {

    private string id = randomstringutils.randomalphanumeric(6);
    private boolean status;
    private string zone;
    private bigdecimal amount;

    public account() {
        status = true;
        zone = zone.zone_1.name();
        amount = createbigdecimal(0.00);
    }

    public account(boolean status, zone zone, double amount) {
        this.status = status;
        this.zone = zone.name();
        this.amount = createbigdecimal(amount);
    }

    public enum zone {
        zone_1, zone_2, zone_3
    }

    public static bigdecimal createbigdecimal(double total) {
        return new bigdecimal(total).setscale(2, bigdecimal.round_half_up);
    }

    @override
    public string tostring() {
        stringbuilder sb = new stringbuilder();
        sb.append("id: ").append(getid())
                .append("\nstatus: ")
                .append(getstatus())
                .append("\nzone: ")
                .append(getzone())
                .append("\namount: ")
                .append(getamount());
        return sb.tostring();
    }

    public string getid() {
        return id;
    }

    public boolean getstatus() {
        return status;
    }

    public void setstatus(boolean status) {
        this.status = status;
    }

    public string getzone() {
        return zone;
    }

    public void setzone(string zone) {
        this.zone = zone;
    }

    public bigdecimal getamount() {
        return amount;
    }

    public void setamount(bigdecimal amount) {
        if (amount.signum() < 0)
            throw new illegalargumentexception("the amount does not accept negative values");
        this.amount = amount;
    }
}
there are 4 getter methods in the class. pay extra attention to them. if we create a separate unit test for each getter method, we get too many redundant lines of code. this situation can be handled with help of behavior testing . imagine that we need to test the correctness of the object using one of its constructors. how do we check that the object is created as expected? we need to check a value of each field, hence getters can be used in this scenario.
create small and fast unit tests , because they should be executed before each commit to a git repository and new build to a server. consider an example with real numbers in order to understand importance of unit tests speed.
let’s assume a project has 1000 unit tests. each of them takes 100ms. as a result all tests take 1 minute and 40 seconds. actually 100ms is too long for a unit test, so you have to reduce runtime by applying different rules and techniques, e.g. do not perform database connection in unit tests (by definition unit tests are isolated) or perform initialisations of expensive objects in the @before block.
choose good names for unit tests . a name of a test can be as long as you want, but it should represent what the test verifies. for example if i need to test a default constructor of the account class, i’ll name it defaultconstructortest . one more useful piece of advice for choosing a test’s name is to write the test logic before you name the test. while you are developing a test you learn what happens inside of it, making it easier to name.
unit tests should be predictable . this is the most obvious requirement. i’ll explain it by example. in order to check the operation of a money transfer (with 5% fee) you have to know which amount you sent and how much you get as output. this test scenario can be implemented as sending of $100 and receiving of $95.
and finally unit tests should be well-grained . when you put one logical scenario per test you can achieve informative feedback. and in cases of a single failure, you will not lose information about the rest of the functionality.

all these recommendations are aimed to improve the unit test's design. but there is one more thing you need to know – basics of test design techniques.
basics of test design techniques
writing tests is impossible without test data. when you are testing a money transfer system you set some amount in the send money field. the amount is our test data in this case. so which values should you choose for testing? in order to answer this question we need to go through the most popular test design techniques. the general purpose of test design technique is simplifying the composing of test data.
first let’s pretend that we can send just positive integer amounts of money, and we cannot send more than 1000. that’s can be presented as:
0 < amount <= 1000; amount in integer
all our test scenarios can be split into two groups: positive & negative scenarios. the first one is for test data which is allowed by a system and leads to successful results. the second one is for so called “failure scenarios”, when we use inappropriate data for interaction with the system.
according to the classes of equivalence technique we can select single random integer numbers from the range (0; 1000]. let it be 500. since the system works for 500 it should work fine for all integer numbers from the range. so 500 is a valid value. we can also select invalid input from the range. it can be any number with a floating point, for instance 125.50
then we have to refer to the boundary testing technique . we have to choose two valid values from the left and right sides of the range. in our case we take 1 as the lowest allowed positive integer and 1000 from the right side.
the next step is to choose two invalid values on boundaries. so it’s 0 and 1001.
so in the end we have 6 values which we need to use in the unit test:
(1, 500, 1000) – for positive scenarios
(0, 125.50, 1001) – for negative scenarios
summary
in this post i tried to explain all aspects of tdd and show how important unit tests are in the tdd. so i hope after the details and theory we can continue in practice. in my next article i’ll demonstrate how to develop tests before functionality. we will do it step by step, starting from documentation analysis and finishing with code refactoring.
be sure that all tests will be green =)

