Server-Side Rendering With Laravel and Vue.js 2.5

Server-side rendering is a great way to increase the perception of loading speed in your full-stack app. Users get a complete page with visible content when they load your site, as opposed to an empty page that doesn't get populated until JavaScript runs.

One of the downsides of using Laravel as a backend for Vue.js was the inability to server render your code. Was. The release of Vue.js 2.5.0 has brought server-side rendering support to non-Node.js environments including PHP, Python, Ruby, etc.

In this tutorial, I'll take you through the setup steps for Laravel and demonstrate a simple server-rendered app. Get the code for this here on GitHub.

Quick Overview of Server-Side Rendering

If you aren't familiar with server-side rendering (SSR), here's a simple example: say we have a Vue.js app built with components. If we use the browser dev tools to view the page DOM after the page has loaded, we will see our fully rendered app:

HTML


x


1
<div id="app">
2
  <ul>
3
    <li>Component 1</li>
4
    <li>Component 2</li>
5
    <li>
6
      <div>Component 3</div>
7
    </li>
8
  </ul>
9
</div>


But if we view the source of the document, i.e. index.html, as it was when sent by the server, you'll see it just has our mount element:

HTML


xxxxxxxxxx
1


1
<div id="app"></div>


Why the discrepancy? Because JavaScript is responsible for building the page, and, ipso facto, JavaScript has to run before the page is built. Fresh off the server, the page will have no content.

But with server-side rendering, our page includes the HTML needed for the browser to build a DOM before JavaScript is downloaded and run, i.e. the page source would look like the first example above. This is achieved by running the Vue.js app on the server and capturing the output, then injecting that output into the page before it is sent to the user.

With SSR, your app does not load or run any faster, indeed it may run slightly slower as the server has the added task of rendering the app. But the page content is shown sooner, therefore, the user can see engage with the page sooner.

You may also like: Client-Side v/s Server-Side Rendering: What to Choose When? 

Why Couldn't Laravel Do Vue SSR Until Now?

Obviously, SSR requires a JavaScript environment on the server, as a Vue app is made with JavaScript. For non-Node.js backends like PHP, Ruby, and Python, a JavaScript sandbox must be spawned from the server to run the Vue app and generate an output.

V8Js is a project that allows you to install the V8 JavaScript runtime within a PHP environment and create such a sandbox. But until Vue version 2.5.0, this was still not adequate as Vue SSR required certain Node.js APIs to run correctly. The recent update has made sure the server renderer is now "environment agnostic" and can, therefore, be run in Node.js, V8Js, Nashorn, etc.

Vue/Laravel SSR Demo

Let's now get a simple demo of Vue SSR in a Laravel app.

Environment

php-v8js is the PHP extension that will give access to Google's V8 JavaScript engine. Undoubtedly the trickiest part of setting up Vue SSR with PHP is getting V8Js installed. Due to my limited Linux knowledge, it, in fact, took me several hours to get it working.

If you have a bit of skill with DevOps, you might try installing it yourself. If not, I recommend you use this Docker image and install Laravel on that.
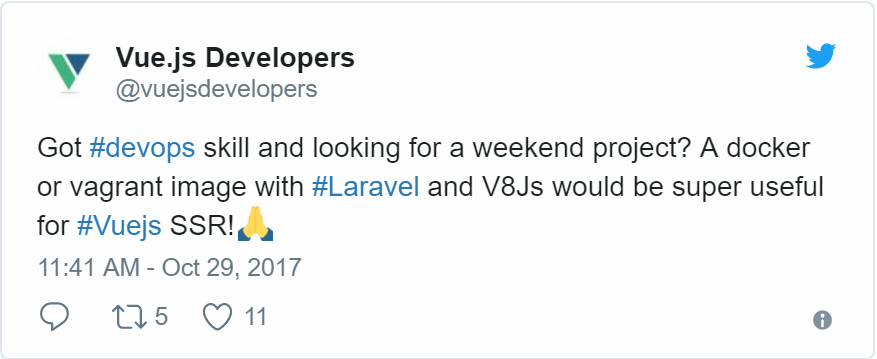
Vue and Laravel tweet

Installing Dependencies

Once you have the extension working and have a fresh Laravel project, you'll need to install both Vue and vue-server-renderer. You'll need a minimum version of 2.5.0 to get the environment-agnostic SSR features.

Shell


xxxxxxxxxx
1


1
npm i --save-dev vue@>=2.5.0 vue-server-renderer@>=2.5.0


Vue.js

Let's begin by setting up a simple full-stack Vue.js/Laravel app. This won't have any SSR features yet, but we'll be laying the foundations that we'll need. To start, we'll put the app's main functionality into a single-file component, App.vue.

resources/assets/js/components/App.vue

HTML


xxxxxxxxxx
1
14


1
<template>
2
  <div id="app">
3
    {{ message }}
4
  </div>
5
</template>
6
<script>
7
  export default {
8
    data() {
9
      return {
10
        message: 'Hello World'
11
      }
12
    }
13
  }
14
</script>


Our app entry file, app.js, will only be responsible for rendering the component and mounting it to the template. Using a render function here instead of a DOM template is essential for reasons that will soon be clear.

resources/assets/js/app.js

JavaScript


xxxxxxxxxx
1


1
import App from './components/App.vue';
2
import Vue from 'vue';
3
 
          
4
new Vue({
5
  el: '#app'
6
  render: h => h(App)
7
});


Mix Configuration

Let's set up a Mix configuration that builds the entry file. Note that I'm also overwriting the default Vue build to use the runtime-only build. Since we're using render functions and single-file components we won't need the template renderer.

webpack.mix.js

JavaScript


xxxxxxxxxx
1
13


1
let mix = require('laravel-mix');
2
 
          
3
mix
4
  .js('resources/assets/js/app.js', 'public/js')
5
;
6
 
          
7
mix.webpackConfig({
8
  resolve: {
9
    alias: {
10
      'vue$': 'vue/dist/vue.runtime.common.js'
11
    }
12
  }
13
});


With that done, you should be able to build the Vue.js app:

Shell


xxxxxxxxxx
1


1
$ npm run dev
2
 
          
3
## Outputs to public/js/app.js


Blade View

We'll need a Blade template to deliver our Vue app to the browser. Make sure to include an empty div with id app which will serve as the mount element. Also, include the build script.

resources/views/app.blade.php

HTML


xxxxxxxxxx
1
13


1
<!doctype html>
2
<html lang="{{ app()->getLocale() }}">
3
  <head>
4
    <meta charset="utf-8">
5
    <meta http-equiv="X-UA-Compatible" content="IE=edge">
6
    <meta name="viewport" content="width=device-width, initial-scale=1">
7
    <title>Vue/Laravel SSR App</title>
8
  </head>
9
  <body>
10
    <div id="app"></div>
11
    <script src="{{ asset('js/app.js') }}" type="text/javascript"></script>
12
  </body>
13
</html>


Controller and Route

Let's make a new controller class which will soon include the logic for server rendering the app.

Shell


xxxxxxxxxx
1


1
$ php artisan make:controller AppController


To begin with, we'll create a method get that will return our app view:

app/Http/Controllers/AppController.php

PHP


xxxxxxxxxx
1
10


1
<?php
2
 
          
3
namespace App\Http\Controllers;
4
 
          
5
class AppController extends Controller
6
{
7
  public function get() {
8
    return view('app');
9
  }
10
}


We'll add a web route for the root path which calls this controller method:

routes/web.php

JavaScript


xxxxxxxxxx
1


1
Route::get('/', 'AppController@get');


With that done, we should now be able to view our humble full-stack app:

Hello, world output

Server-Side Rendering

The Vue.js app we run in the sandbox must be slightly different to the one we run in the browser, as, although the same language is used, these environments are quite different. For example, there is no window or document object in the sandbox.

We will, therefore, need two builds. These will be as similar as possible but will have some small differences. We'll keep any common (i.e. universal) code in app.js, but any environment-specific code will go into the new entry files we'll create shortly.

Server and client workflow

In app.js, let's remove the el property from the Vue config as it makes no sense in a server environment since the app has no document to mount to. We'll also make it so this file exports a function which returns a fresh instance of the app which can be imported into our new entry files.

resources/assets/js/app.js

JavaScript


xxxxxxxxxx
1


1
export function createApp() {
2
  return new Vue({
3
    render: h => h(App)
4
  });
5
}


Entry Files

We now need to create two new entry files, one for the browser (client), and one for the server.

Shell


xxxxxxxxxx
1


1
$ touch resources/assets/js/entry-client.js resources/assets/js/entry-server.js


The client entry will simply re-implement the functionality we just deleted from app.js, i.e. it will import the universal app and mount it to the template.

resources/assets/js/entry-client.js

JavaScript


xxxxxxxxxx
1


1
import { createApp } from './app'
2
 
          
3
createApp().$mount('#app');


The server entry file is a little more interesting. Firstly, it calls a global method renderVueComponentToString. This method is exposed by vue-server-renderer which we'll introduce into our SSR setup soon. Secondly, it calls a method print. This method is part of the V8Js API and is the mechanism for getting something from the JavaScript sandbox back into the PHP environment.

resources/assets/js/entry-server.js

JavaScript


xxxxxxxxxx
1


1
import { createApp } from './app'
2
 
          
3
renderVueComponentToString(createApp(), (err, res) => {
4
  print(res);
5
});


We'll now need to update our Mix configuration so that we get a build of each version of the app from the two new entry files:

webpack.mix.js

Shell


xxxxxxxxxx
1


1
mix
2
  .js('resources/assets/js/entry-client.js', 'public/js')
3
  .js('resources/assets/js/entry-server.js', 'public/js')
4
;


After you run npm run dev again, you will, of course, have two build files. We'll need to update our Blade view to ensure the new client build file is being loaded instead of app.js:

resoures/views/app.blade.php

HTML


xxxxxxxxxx
1


1
<script src="{{ asset('js/entry-client.js') }}" type="text/javascript"></script>


If you refresh the page in the browser you should see no difference in behavior yet.

Laravel

We now finally get to the server-side rendering functionality. Add a new method render to AppController which works like this:

  1. The vue-server-renderer module and the server build of the app are loaded from the file system.
  2. Output buffering is turned on. This means that any output sent from the script is captured internally rather than being printed to the screen.
  3. Pass some necessary environment variables to V8Js.
  4. The renderer code and the server build file are then executed. Remember that in entry-server.js we use the print method to output something. This will be captured by the output buffer.
  5. Return the buffer contents and delete the current output buffer.

app/Http/Controllers/AppController.php

PHP


xxxxxxxxxx
1
28


1
<?php
2
 
          
3
namespace App\Http\Controllers;
4
 
          
5
use Illuminate\Support\Facades\File;
6
 
          
7
class AppController extends Controller
8
{
9
  private function render() {
10
    $renderer_source = File::get(base_path('node_modules/vue-server-renderer/basic.js'));
11
    $app_source = File::get(public_path('js/entry-server.js'));
12
 
          
13
    $v8 = new \V8Js();
14
 
          
15
    ob_start();
16
 
          
17
    $v8->executeString('var process = { env: { VUE_ENV: "server", NODE_ENV: "production" }}; this.global = { process: process };');
18
    $v8->executeString($renderer_source);
19
    $v8->executeString($app_source);
20
 
          
21
    return ob_get_clean();
22
  }
23
 
          
24
  public function get() {
25
    $ssr = $this->render();
26
    return view('app', ['ssr' => $ssr]);
27
  }
28
}


The value returned from render will be the server-rendered output of our app. It's an HTML string. We'll now assign this to a template variable and send it to the view. Be sure to skip string escaping by using the {!! !!} braces so the HTML is printed as-is.

resources/views/app.blade.php

HTML


xxxxxxxxxx
1


1
<body>
2
  {!! $ssr !!}
3
  <script src="{{ asset('js/entry-client.js') }}" type="text/javascript"></script>
4
</body>


With that, server-side rendering is now working! If you load the app, though, you probably won't notice any difference, as the page loading improvement on a local server is not going to be perceptible. To confirm it works, view the source of the document and you'll see this:

Final output

Final output


Rather than the empty <div id="app">, we have actual content in our page. Note the special attribute that vue-server-renderer adds: data-server-rendered="true". This is so that when the Vue instance mounts, rather than trying to re-build the content, it will attempt to mount over it.

Conclusion

Lack of server-side rendering was one of the biggest cons of using Laravel as a Vue.js backend. It's still second-rate compared to Node.js since a sandbox is required, but it's great that it now works.

For more information on Vue SSR, check out the Vue.js Server-Side Rendering Guide.


Further Reading


Top