How to Stream Docker Containers to Your Browser
Docker is a widely adopted platform to package, share, and spin up applications effortlessly, in a reproducible manner, abstracting away from the underlying OS, and with an excellent degree of isolation of the resulting ephemeral containers. It’s so popular that it shouldn’t really need an introduction!
Docker containers are extremely versatile and one of their least-known (but definitely not least cool!) usages that have come to light over the last few years comes down to streaming GUI applications — or even whole operative systems — over the browser.
Why Would I Do That?
That’s a fair question. Let’s check out some of the advantages that come from streaming Docker containers over the wire:
- Increased privacy: just imagine browsing the web via a Dockerised Tor Browser instance hosted in the cloud and streamed over the wire.
- Security and isolation at your fingertips: spin up and access anything from simple GUI applications to full-fledged operative systems through your browser without the need for any additional software and in full isolation, even a docker container escape would at most compromise your server but not your client machines.
- Sharing interactive sessions: colleagues, friends, students could go over to your “website” and share a collaborative session over the same application, being able to both view what others are doing and operate the application themselves.
- Work from low-end machines: no need to buy expensive hardware for your client(s) when you can outsource your resource demands and workloads.
How Does It Work?
There are a few ways to stream Docker containers over to your browser. Let’s start with a lower-level approach in order to better understand what is actually happening behind the curtains.
Building Your Own Streamable Docker Container From Scratch
In order to make a Docker container streamable you should install a few components inside your container, namely at least:
- the application you want to stream (eg. Google Chrome)
- ratpoison, an extremely lightweight window manager
- the X-Server
- a VNC Server like TurboVNC
- VirtualGL and OpenGL libraries such as
libxv1andlibglu1-mesa - a web-accessible VNC client like novnc
- a wrapper for WebSocket to TCP conversion such as websockify
NOTE: on top of the basic stack highlighted above, additional dependencies may be needed to make the whole thing work, depending on what comes installed with your base image.
Here is a sample image that allows you to stream a Google Chrome instance starting within a containerized Ubuntu:
FROM ubuntu:18.04
ENV USER=root
ENV PASSWORD=password1
ENV DEBIAN_FRONTEND=noninteractive
ENV DEBCONF_NONINTERACTIVE_SEEN=true
RUN apt-get update && \
	echo "tzdata tzdata/Areas select America" > ~/tx.txt && \
	echo "tzdata tzdata/Zones/America select New York" >> ~/tx.txt && \
	debconf-set-selections ~/tx.txt && \
	apt-get install -y abiword gnupg apt-transport-https wget software-properties-common ratpoison novnc websockify libxv1 libglu1-mesa xauth x11-utils xorg tightvncserver && \
	wget https://kumisystems.dl.sourceforge.net/project/virtualgl/2.6.5/virtualgl_2.6.5_amd64.deb && \
	wget https://kumisystems.dl.sourceforge.net/project/turbovnc/2.2.7/turbovnc_2.2.7_amd64.deb && \
	wget https://dl.google.com/linux/direct/google-chrome-stable_current_amd64.deb && \
	apt install -y ./google-chrome-stable_current_amd64.deb	&& \
	dpkg -i virtualgl_*.deb && \
	dpkg -i turbovnc_*.deb && \
	mkdir ~/.vnc/ && \
	mkdir ~/.dosbox && \
	echo $PASSWORD | vncpasswd -f > ~/.vnc/passwd && \
	chmod 0600 ~/.vnc/passwd && \
	echo "set border 1" > ~/.ratpoisonrc  && \
	echo "exec google-chrome --no-sandbox">> ~/.ratpoisonrc && \
	openssl req -x509 -nodes -newkey rsa:2048 -keyout ~/novnc.pem -out ~/novnc.pem -days 3650 -subj "/C=US/ST=NY/L=NY/O=NY/OU=NY/CN=NY emailAddress=email@example.com"
EXPOSE 80
CMD /opt/TurboVNC/bin/vncserver && websockify -D --web=/usr/share/novnc/ --cert=~/novnc.pem 80 localhost:5901 && tail -f /dev/null
To test it out you can simply download the above dockerfile, move to its location and run:
docker build -t chrome-vnc .
docker run --name vnc-container -p8080:80 chrome-vnc
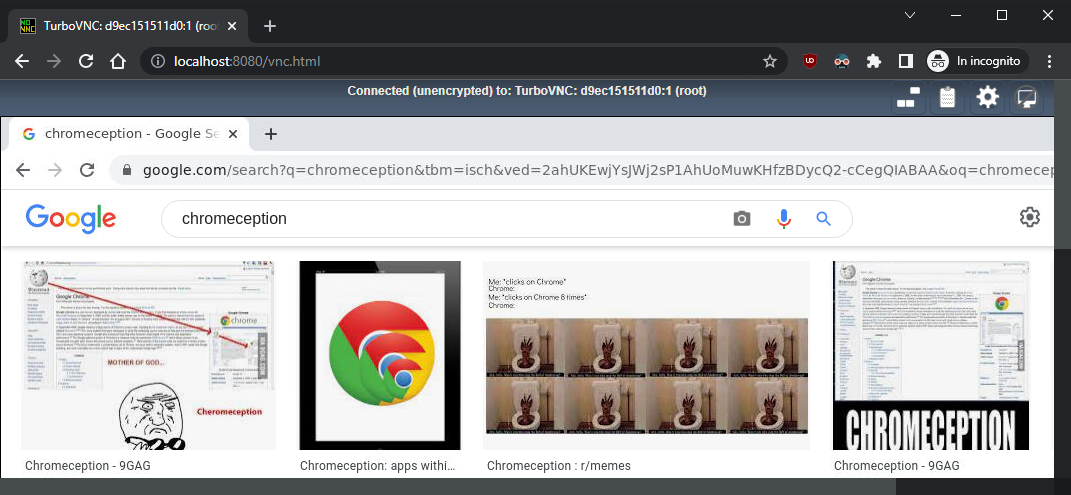
Once the image has been fully built and the Docker container is running you can visit http://localhost:8080/vnc.html where you will be prompted to insert the password specified in the docker file:password1 by default.

If everything went as expected, you should now be able to operate a Google Chrome instance running inside your browser!
If you want to dig deeper, here you can find a very well-detailed explanation of how all of this works.
As you can imagine, this approach can be quite cumbersome; upgrading your Docker container’s base image to get the latest security patches can easily break things, and figuring out what changed is not always immediate. Moreover, it’s not well-fitted for multiple applications; you’d have to create as many images, expose them on different ports, and keep track of all port number => application mappings.
But… what if I told you, there is a much easier way?
Streaming Docker Containers With Kasm Workspaces
Kasm Workspaces is a feature-rich platform that provides streaming, orchestration, and fine-tuning of Docker containers over the wire.
If you followed along and tried streaming Docker containers the hard way, you’d know by now that making it work is no big deal — but making it work well is not so simple: the performance is less than desirable; patches and major upgrades are hard to apply without the risk of breaking something; it is just a streaming mechanism, not a full-fledged platform, therefore lacking ease of implementation for useful features such as web filtering, session-sharing configurability, etc…
On the other side of the coin, a Kasm Server is very easy to install and operate, it offers a plethora of enterprise-level features, and the streaming feels blazing fast thanks to KasmVNC, an open-source VNC server solution developed by Kasm Technologies.
Installation
Before proceeding with the installation make sure to double-check the Kasm Workspaces requirements.
To run your own Kasm Server, just head over to https://www.kasmweb.com/downloads.html and download the latest available version.
You can now unpack the downloaded file, move it to the extracted kasm_release folder and run the installer with sudo ./installer.sh. The installation might take a while and prompt you for consent and additional configuration, so make sure to check the terminal from time to time.
At the end of the installation process check the terminal and save the Kasm credentials that have been printed. These include the username and password that will be needed to operate the Kasm Server remotely via Web UI.
Usage
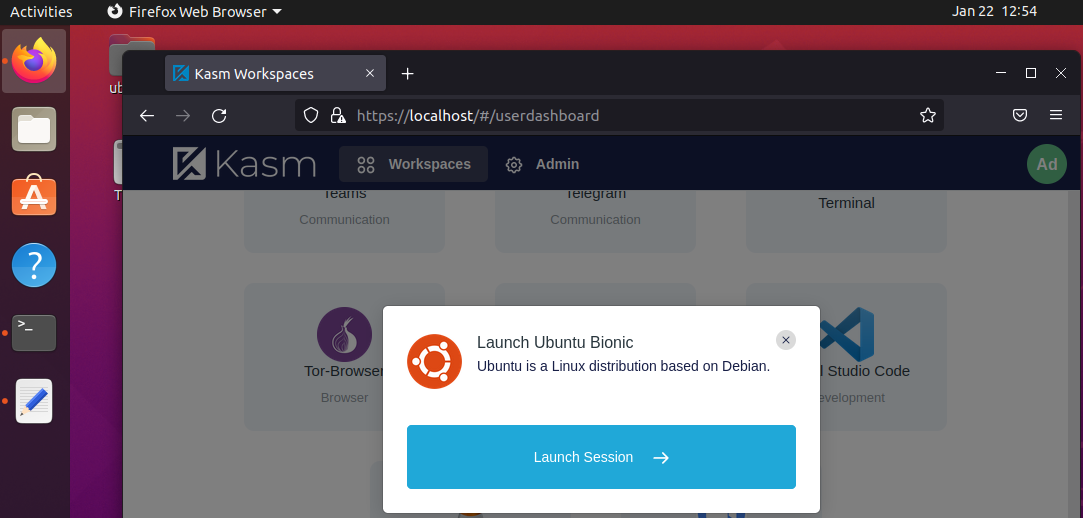
You can now access the Kasm Web UI by visiting http://{your-server-here} through your browser of choice, log in with the credentials you previously saved, move to the “Workspaces” tab, and voila!

You are now able to launch interactive browser sessions from anywhere for a predefined set of Docker images, and dispose of them in just a few clicks!
Kasm Workspaces offers a wide range of native images, all of which are open-source and publicly available. You can find them here.
If an application or OS that you wanted to stream doesn’t seem to be available under the “Workspaces” section, you should move over to the “Admin” tab and select “Images” from the menu on the left. From here you can browse through all the images natively provided by Kasm and enable the ones that you might need that are not enabled by default (eg. Doom, Kali Linux, and more) by editing them through the menu on the right and checking the “Enabled” flag.
If an application or OS that you wanted to stream is actually not available, don’t worry! Kasm Technologies provides guidance on how to build your own custom images that you can then make available by adding them as images to your Kasm Server instance through the very same Web UI just mentioned above.
Bonus

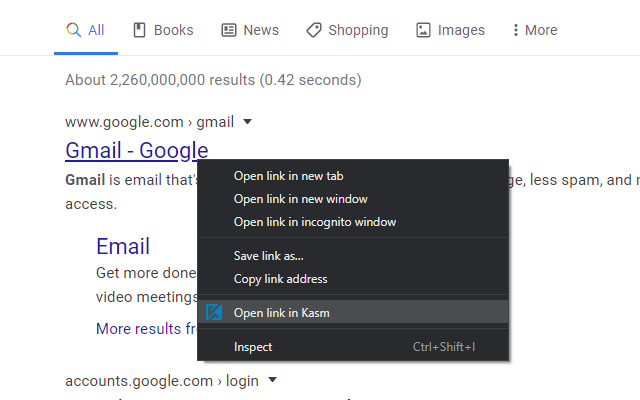
If you’re using Google Chrome make sure to check out the “Kasm: Open In Isolation” Chrome extension. This will add an “Open link in Kasm” voice to the Chrome context menu, enabling you to immediately open links by launching a session to the browser of your choice through your Kasm Server, in absolute safety!
Wrap-Up
We barely scratched the surface of what Kasm Workspaces is capable of. Feel free to explore the “Admin” panel and go through all of the useful features that could help you out in setting up the solution that you need, like Web Filtering, Session Casting, and much more. Chances are that whatever solution you’re trying to build, it’s either already natively available or can be achieved without much effort!

