Securing REST APIs With Nest.js: A Step-by-Step Guide
This guide walks you through setting up a secure REST API using Nest.js in Node.js. We'll create a login system with JWTs and implement best practices for token management and API security.
Setting Up Nest.js
Prerequisites: Node.js installed.
- Installation:
npm i -g @nestjs/cli- Creating a New Project:
nest new nestjs-secure-apiBuilding a Login API
Creating a User Module: Generate the module, controller, and service:
cd nestjs-secure-api
nest generate module users
nest generate controller users
nest generate service users- User Authentication with Passport.js: Install necessary packages:
npm install @nestjs/passport passport passport-local
npm install @nestjs/jwt passport-jwt
npm install @types/passport-local @types/passport-jwt --save-dev
npm install class-validator bcrypt express-rate-limit
In users.service.ts, implement the JWT strategy and authentication logic. (For brevity, this example assumes you have user retrieval and verification logic):
import { Injectable } from '@nestjs/common';
import * as bcrypt from 'bcrypt';

export type User = any;

@Injectable()
export class UsersService {
  private readonly users: User[];

  constructor() {
    this.users = [];
  }

  async findOne(username: string): Promise<User | undefined> {
    return this.users.find(user => user.username === username);
  }

  async create(username: string, pass: string): Promise<void> {
    const hashedPassword = await bcrypt.hash(pass, 10);
    this.users.push({ username, password: hashedPassword });
    console.log(`User is created with usernam ${username} and encrypted password ${hashedPassword}`)
  }
}
- Creating Login and Registration Endpoints:
Inusers.controller.ts:
import { Controller, Post, Body, BadRequestException } from '@nestjs/common';
import { UsersService } from './users.service';
import { AuthService } from './auth.service';
import * as bcrypt from 'bcrypt';
import { CreateUserDto } from './create-user.dto';

@Controller('users')
export class UsersController {
  constructor(
    private usersService: UsersService,
    private authService: AuthService
  ) {}

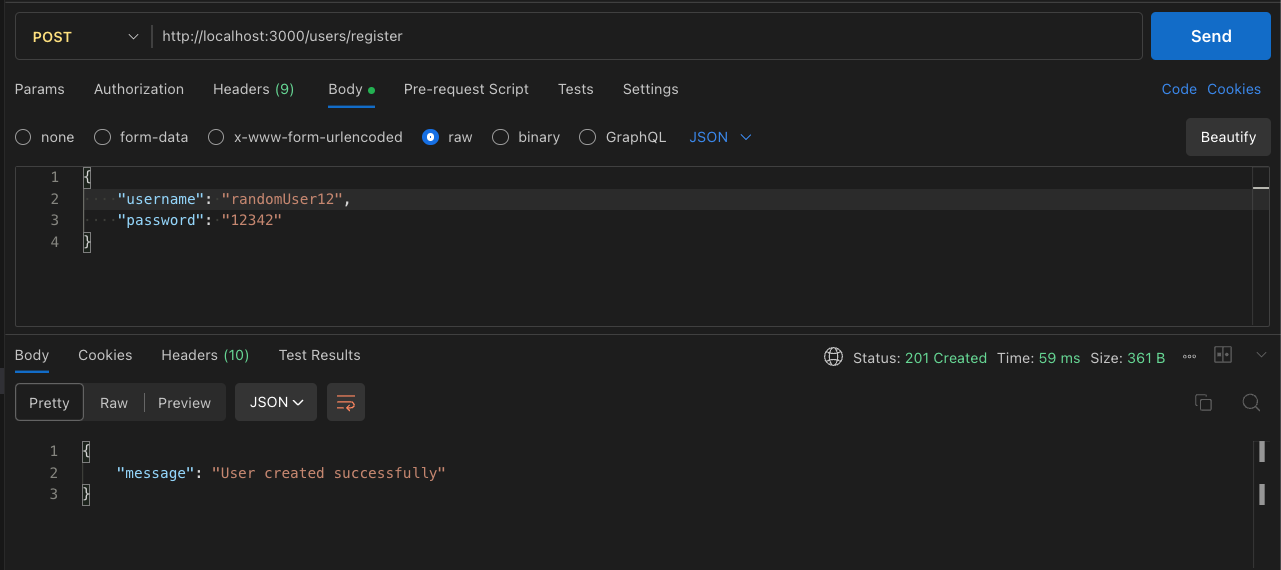
  @Post('register')
  async register(@Body() body: CreateUserDto) {
    const { username, password } = body;
    const userExists = await this.usersService.findOne(username);
    if (userExists) {
      throw new BadRequestException('Username already exists');
    }
    await this.usersService.create(username, password);
    return { message: 'User created successfully' };
  }

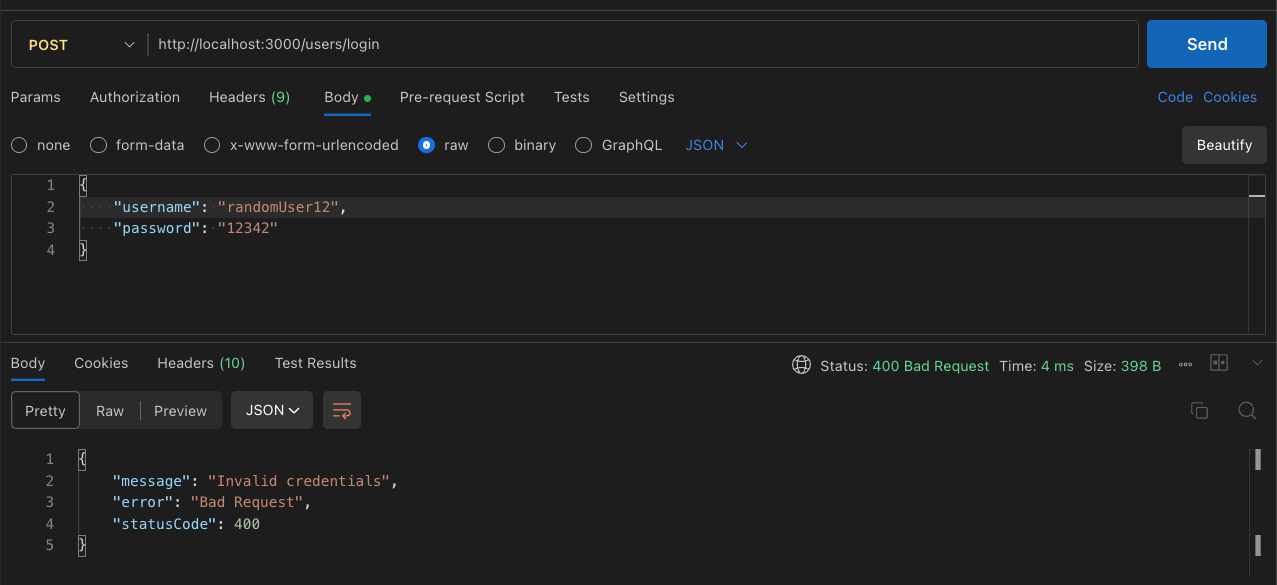
  @Post('login')
  async login(@Body()  body: CreateUserDto) {
    const { username, password } = body;
    const user = await this.usersService.findOne(username);
    if (!user) {
      throw new BadRequestException('Invalid credentials');
    }
    const isMatch = await bcrypt.compare(password, user.password);
    if (!isMatch) {
      throw new BadRequestException('Invalid credentials');
    }
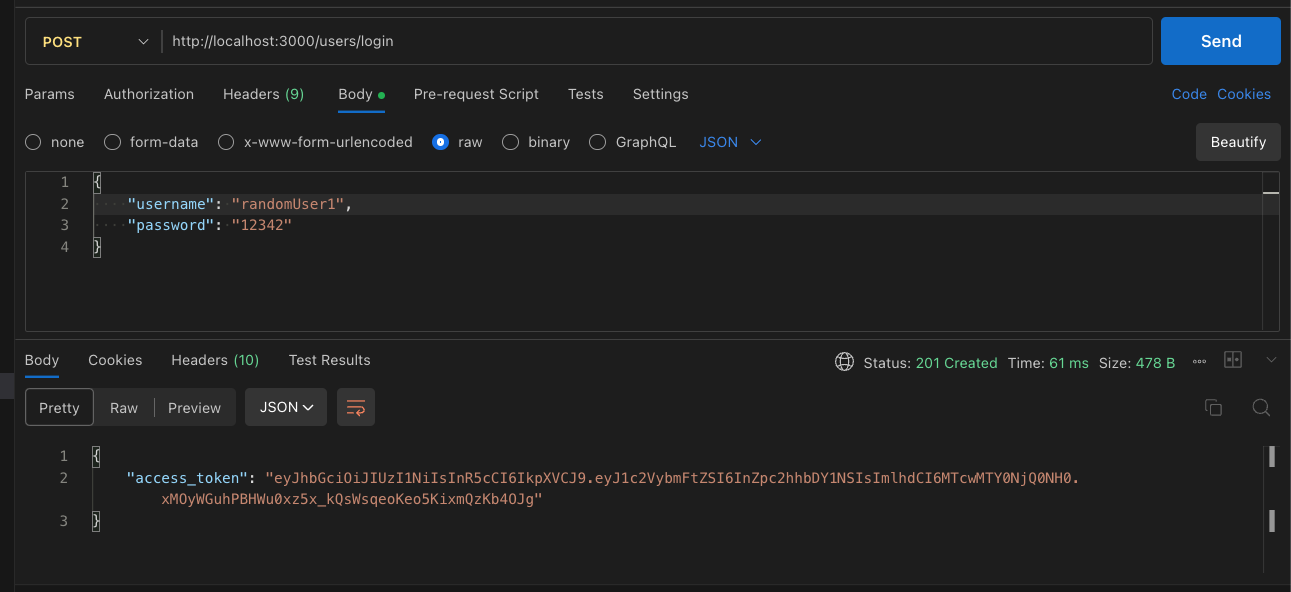
    const jwtToken = this.authService.login(user);
    console.log(`User ${username} is succesfully loggedIn.`)
    return jwtToken;
  }
}
- Token Storage and Encryption:
In auth.service.ts, add token hashing:
import { Injectable } from '@nestjs/common';
import { JwtService } from '@nestjs/jwt';

@Injectable()
export class AuthService {
  constructor(
    private jwtService: JwtService
  ) {}

  async login(user: any) {
    const payload = { username: user.username, sub: user.userId };
    return {
      // for now secret is set as 'secret' it should be env variable but to make things simple I'm adding a string here.
      access_token: this.jwtService.sign(payload, { secret: `${process.env.JWT_SECRET}` || 'secret' }),
    };
  }
}
- Token Security Best Practices: Ensure you use HTTPS. Implement token expiration and refresh tokens.
Securing the API
- LoggerMiddleware: In
logger.middleware.tsimplement the logging middleware:
import { Injectable, NestMiddleware } from '@nestjs/common';
import { Request, Response, NextFunction } from 'express';

@Injectable()
export class LoggerMiddleware implements NestMiddleware {
  use(req: Request, res: Response, next: NextFunction) {
    console.log(`[${new Date().toISOString()}] ${req.method} ${req.originalUrl}`);
    next();
  }
}
- Middleware and Guards: In
app.module.ts, implement middleware for request logging:
import { MiddlewareConsumer, Module } from '@nestjs/common';
import { AppController } from './app.controller';
import { AppService } from './app.service';
import { UsersModule } from './users/users.module';
import { LoggerMiddleware } from './logger.middleware';

@Module({
  imports: [UsersModule],
  controllers: [AppController],
  providers: [AppService],
})
export class AppModule {
  configure(consumer: MiddlewareConsumer) {
    consumer
      .apply(LoggerMiddleware) // assuming you want to add some some loggerMiddleware then you can add it here
      .forRoutes('*');
  }
}
- Input Validation and Rate Limiting: Use DTOs for input validation. In
create-user.dto.ts:
import { IsNotEmpty, IsString } from 'class-validator';
export class CreateUserDto {
    @IsNotEmpty()
    @IsString()
    username: string;

    @IsNotEmpty()
    @IsString()
    password: string;
  }
- Set up rate limits in
main.ts:
import * as rateLimit from 'express-rate-limit';
import { NestFactory } from '@nestjs/core';
import { AppModule } from './app.module';

async function bootstrap() {
  const app = await NestFactory.create(AppModule);
  app.use(rateLimit({
    windowMs: 15 * 60 * 1000, // 15 minutes
    max: 100, // limit each IP to 100 requests per windowMs
  }));
  await app.listen(3000);
}
bootstrap();
Conclusion
This guide has covered the essentials of setting up a secure REST API with Nest.js, from user authentication to token management and rate limiting. Following these steps will give you a robust foundation for building secure, scalable web applications.
Running the Application
To run the application, execute:
npm run startAccess the API at http://localhost:3000/
Example of API validation:


The complete code is available in the GitHub repository.
Note: This article provides a starting framework. Additional security measures and functionalities may be necessary depending on your application's specific needs. Keep your dependencies updated and regularly review your security practices.

