Supabase CDC Webhooks to Memphis Rest Gateway
Introduction
Supabase is an open-source Firebase alternative.
In databases, change data capture (or CDC) is a set of software design patterns used to determine and track the data that has changed so that action can be taken using the changed data or because of it.
In simple words: Each time a new event occurs on a specific table, such as INSERT / UPDATE / DELETE, an event will be created and, if configured — published to a destination so some service will be notified for it.
Flow
- Install Memphis over Kubernetes.
- Expose Memphis REST Gateway.
- Create a new Supabase table.
- Configure a webhook for the newly created table.
- Check the incoming CDC events in Memphis.
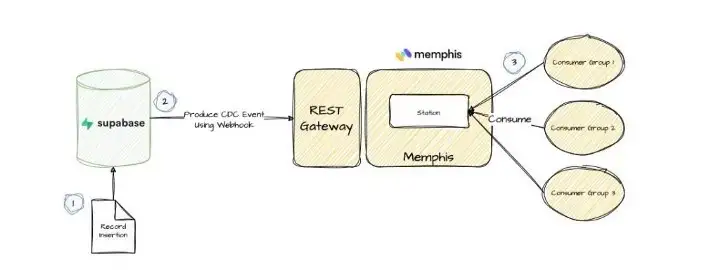
Step 1: Install Memphis Over Kubernetes
Memphis can be installed on any Kubernetes cluster above v1.20.
For this tutorial, I used Memphis Terraform to deploy a 3-node AWS EKS cluster with a Memphis cluster on top.
Output of AWS EKS creation:
Apply complete! Resources: 67 added, 0 changed, 0 destroyed.

Outputs:

cluster_endpoint = "https://CA2D8E9674B2025*******.gr7.eu-west-1.eks.amazonaws.com"
cluster_id = "memphis-cluster-ed****q7"
cluster_name = "memphis-cluster-ed****q7"
cluster_security_group_id = "sg-09a8f95********02"
region = "eu-west-1"
Output of Memphis cluster deployment:
To access Memphis using UI/CLI/SDK with service EXTERNAL-IP, use the following URLs:
Dashboard/CLI : http://a34d36344a12b48a7a9f1ef09z576023-1416400140.eu-west-1.elb.amazonaws.com:9000
Memphis broker: http://a34d36344a12b48a7a9f1ef09z576023-1416400140.eu-west-1.elb.amazonaws.com:6666 (Client Connections)Bonus: Create a DNS A record for the address above to work with a real hostname easily.
Reach the Memphis dashboard and initiate the cluster.
The address is the one with port 9000.
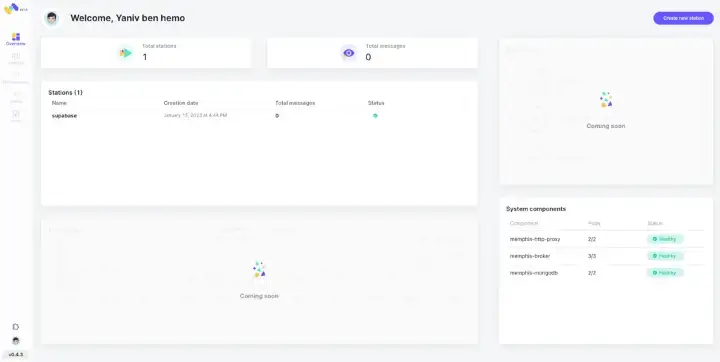
Step 2: Expose Memphis Rest Gateway
By default, Memphis terraform does not deploy an LB to the HTTP proxy pod.
To do it, we need to transform the memphis-http-proxy service from ClusterIP to LoadBalancer by running the following:
kubectl patch svc memphis-http-proxy -n memphis --type='json' -p '[{"op":"replace","path":"/spec/type","value":"LoadBalancer"}]'kubectl get svc
NAME TYPE CLUSTER-IP EXTERNAL-IP PORT(S) AGE
memphis-cluster ClusterIP None <none> 9000/TCP,7770/TCP,6666/TCP,8222/TCP 104m
memphis-cluster-external LoadBalancer 172.20.251.246 a34d36224a00b48a7a9f1ac09c576023-1416400140.eu-west-1.elb.amazonaws.com 9000:32173/TCP,6666:32013/TCP,7770:31214/TCP 102m
memphis-http-proxy LoadBalancer 172.20.131.157 a5ce9a9c1006a2d7a64faaa6949dcfbb-1553258514.eu-west-1.elb.amazonaws.com 4444:30686/TCP 104m
mongo ClusterIP None <none> 27017/TCP 104mLet’s save the newly created LB external IP of the HTTP proxy:
a5ce9a9c1006a2d7a64faaa6949dcfbb-1553258514.eu-west-1.elb.amazonaws.com
Step 3: Create a New Supabase Table
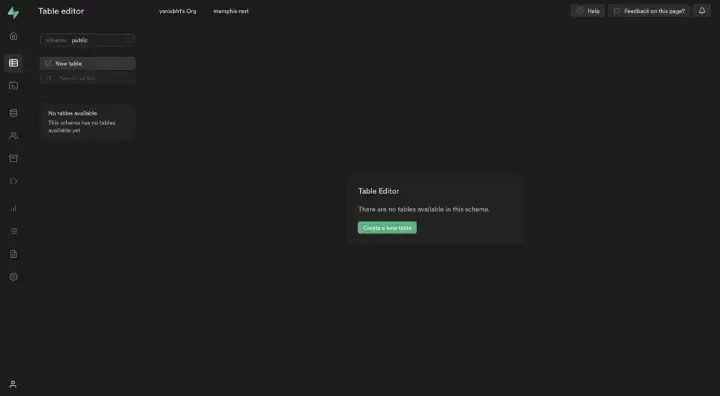
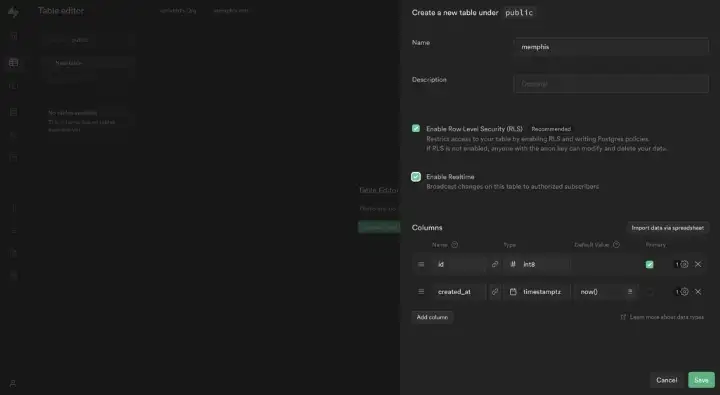
Step 4: Configure a Webhook for the Newly Created Table
First, we need to generate an “Application” type user on Memphis:
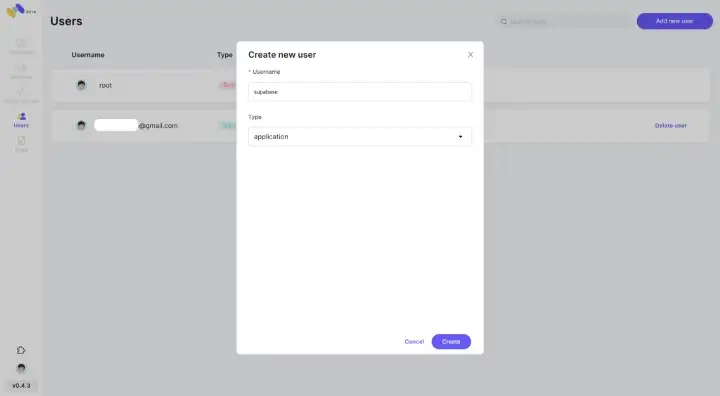
Please save both the username and connection token.
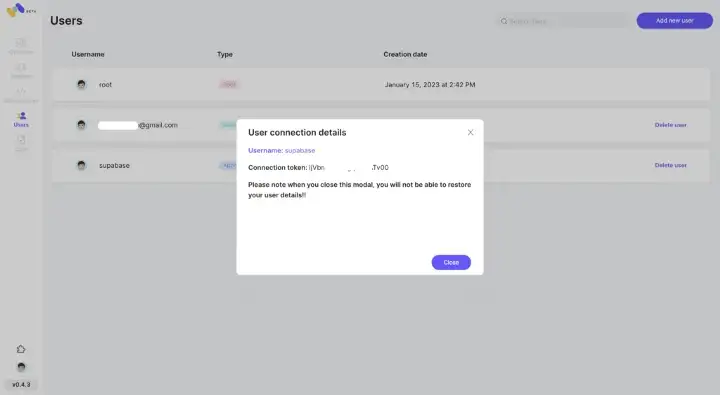
To generate a JWT token for producing events via HTTP, the following command needed to be run — (Will be replaced with API tokens soon)
curl --location --request POST 'a5ce9a9c9506a4c7a99faaa6949dcfbb-1553258514.eu-west-1.elb.amazonaws.com:4444/auth/authenticate' --header 'Content-Type: application/json' --data-raw '{
    "username": "supabase",
    "connection_token": "******************",
    "token_expiry_in_minutes": 600000,
    "refresh_token_expiry_in_minutes": 10000092
}'
The result will be the JWT token for the Supabase webhook. Save it.
{"expires_in":36000000000,"jwt":"eyJhbGciOiJIUzI1NiIsInR5cCI6IkpXVCJ9.eyJleHAiOjE3MDk4MTIzOTJ9.Xlxq56c0wsfOwMsFheUNPKrnECX4JX_vrz45su5JmVU"}Back to Supabase. Go to Database -> Webhooks -> Create a webhook
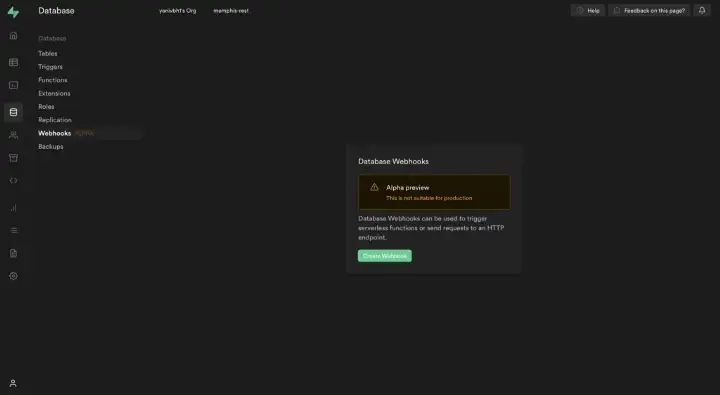
Configure it as follows:
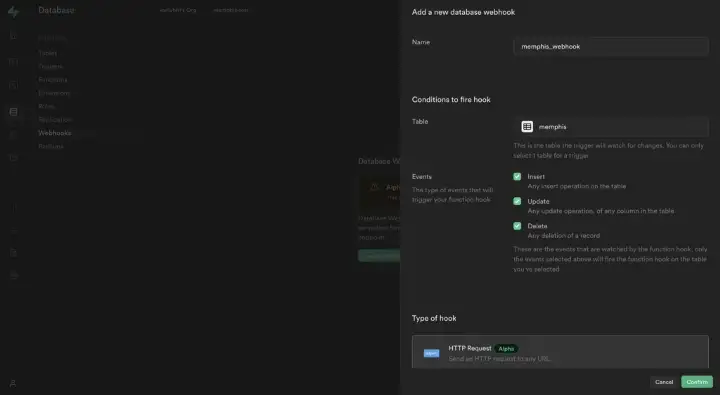
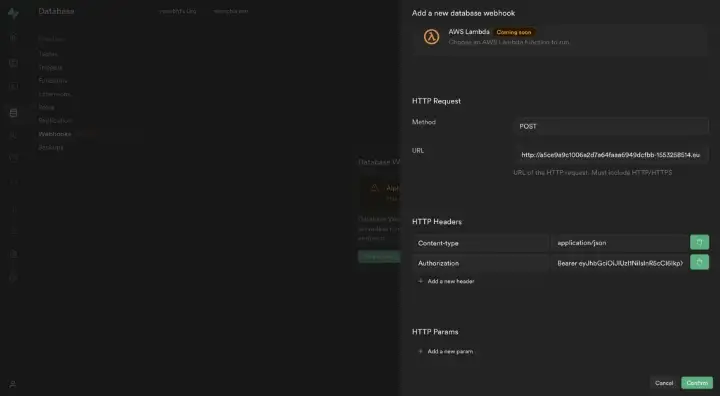
- Method: POST
- URL: http://<HTTP Proxy>:4444/stations/<some station name>/produce/single
- Headers:
- Content-type:application/json
- Authorization:Bearer <JWT Token>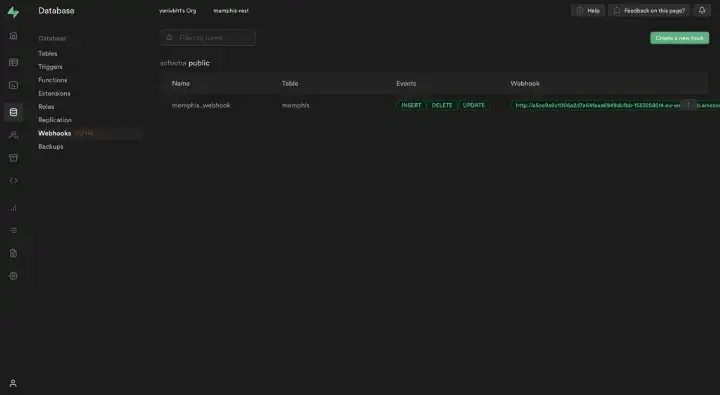
Step 5: Check for Incoming CDC Events
Let’s insert a new record into our table and delete it right after so we would get two events:
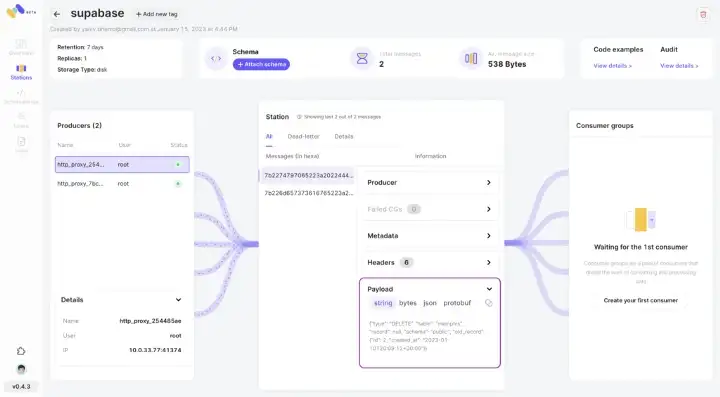
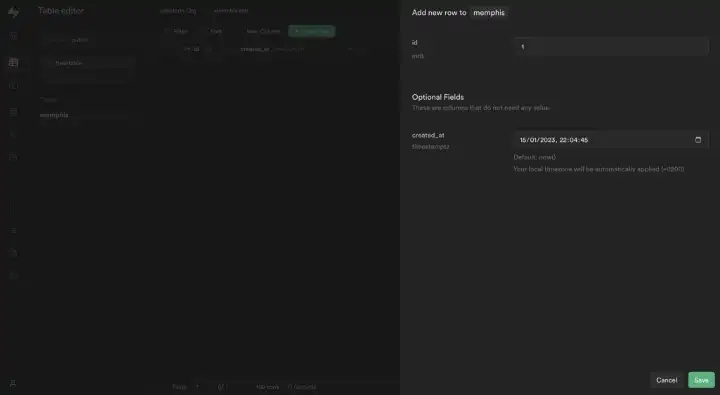 Going back to the Memphis dashboard and into the “supabase” station, events can be seen in the center panel and the parsed payload on the right bottom.
Have a great day!

