Data Exploration Using Serverless SQL Pool In Azure Synapse
Azure Synapse Analytics, formerly known as Azure SQL Data Warehouse, is a cloud-based analytics service provided by Microsoft Azure. It provides capabilities like data exploration, data analysis, data integration, advanced analytics, machine learning, etc., on the Azure Data Lake Blob Storage.
In this article, we will take a deep dive into the ingestion of data files into Azure Synapse, data analysis, and transformation of the files in Azure Synapse using a Serverless SQL Pool. This article expects you to have a basic understanding of Azure fundamentals. Open your Synapse workspace and have it ready. Let's go.
Ingest/View Files in the Azure Data Lake
1. On the left side of Synapse Studio, use the >> icon to expand the menu. This reveals the different pages within Synapse Studio that we'll use to manage resources and perform data analytics tasks.
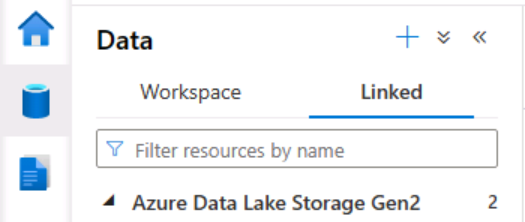
2. On the Data page, view the Linked tab and verify that your workspace includes a link to your Azure Data Lake Storage Gen2 storage account.

3. For this example, we are going to use free CSV files from NZ Govt Stats
4. Under the Azure Data Lake Storage Gen2, you should see your default storage account provisioned. Let us have a files/CSV folder created and upload the .csv files from the above link. For this example, we have uploaded the 'Business-employment-data-september-2022-quarter-csv.csv' file.
5. Once you uploaded a .csv file, right-click the CSV folder, then in the 'New SQL script' list on the toolbar, select 'Select Top 100 rows.' Review the Transact-SQL code that is generated.
SQL -- This is auto-generated code


SELECT     TOP 100 * FROM     OPENROWSET(         BULK 'https://datalakexxxxxxx.dfs.core.windows.net/files/csv/Business-employment-data-september-2022-quarter-csv.csv',


        FORMAT = 'CSV',


        PARSER_VERSION='2.0'     )


AS [result]
6. The above code uses the Azure OPENROWSET to read data from the CSV files in the files folder and retrieves the first 100 rows of data. In the connect to list, ensure the built-in is selected. It represents the built-in SQL pool that was created with our workspace. In the real world, the administration team at your organization would have created a named SQL Pool in your workspace. Then on the toolbar, use the Run button to run the SQL code and review the results, which should look like this.

In this case, the data files include the column names in the first row, so modify the query to add a HEADER_ROW = TRUE parameter to the WITH clause, as shown here (don't forget to add a comma after the previous parameter):
SELECT

    TOP 100 *

FROM

    OPENROWSET(

        BULK 'https://datalakexxxxxxx.dfs.core.windows.net/files/csv/Business-employment-data-september-2022-quarter-csv.csv',

        FORMAT = 'CSV',

        PARSER_VERSION='2.0',

        HEADER_ROW = TRUE

    ) AS [result]
Run the above query, and you should see the results below.

You can publish the results using the "Publish" button on the pane.
Transform Data Using CREATE EXTERNAL TABLE AS SELECT Statements
A simple way to use SQL to transform data in a file and persist the results in another file is to use a CREATE EXTERNAL TABLE AS SELECT statement. This statement creates a table based on the requests of a query, but the data for the table is stored as files in a data lake. The transformed data can then be queried through the external table or accessed directly in the file system (for example, for inclusion in a downstream process to load the transformed data into a data warehouse).
Create an External Data Source and File Format
By defining an external source in a database, you can use it to reference the data lake location where you want to store files for external tables. An external file format enables you to define the format for those files — Parquet, CSV, etc. To use these objects to work with external tables, you need to create them in a database other than the default master database.
1. In Synapse studio, on the 'Develop' page, in the '+' menu, select SQL script

2. In the new script pane, add the following code (replacing datalakexxxxxxx with the name of your data lake storage account) to create a new database and add an external data source to it.
--Database for Employment data

CREATE DATABASE Employment

COLLATE Latin1_General_100_BIN2_UTF8;

GO;

Use Employment;

GO;


-- External data is in the Files container in the data lake

CREATE EXTERNAL DATA SOURCE employment_data WITH (

    LOCATION = 'https://datalakeXXXXXXX.dfs.core.windows.net/files/csv/Business-employment-data-september-2022-quarter-csv.csv'

);


GO;


-- Format for table files

CREATE EXTERNAL FILE FORMAT ParquetFormat

    WITH (

            FORMAT_TYPE = PARQUET,

            DATA_COMPRESSION = 'org.apache.hadoop.io.compress.SnappyCodec'

        );


GO;
Modify the script properties to change its name to Create Employment DB, and publish it. Ensure that the script is connected to the built-in SQL pool and the master database, and then run it. Switch back to the Data page and use the ↻ button at the top right of Synapse Studio to refresh the page. Then view the Workspace tab in the Data pane, where a SQL database list is now displayed. Expand this list to verify that the Employment database has been created.

Expand the Employment database, its External Resources folder, and the External data sources folder under that to see the employment_data external data source you created.

In the properties pane, you can name the script like the one below and publish it. It will save the code, and the script will be saved so you can edit it later.

Create an External Table
In the Synapse studio, on the Develop page, in the '+' menu, select SQL script, and add the following code to retrieve and aggregate data from the CSV files by using the external data source. Note that the BULK path is now relative to the folder location (files folder) on which the data source is defined.
USE Employment;

GO;


SELECT Count(Series_reference) AS Series_count,

Period as period

FROM

    OPENROWSET(

        BULK 'csv/Business*.csv',

        DATA_SOURCE = 'employment_data',

        FORMAT = 'CSV',

        PARSER_VERSION = '2.0',

        HEADER_ROW = TRUE

    ) AS series_count

GROUP BY Period;
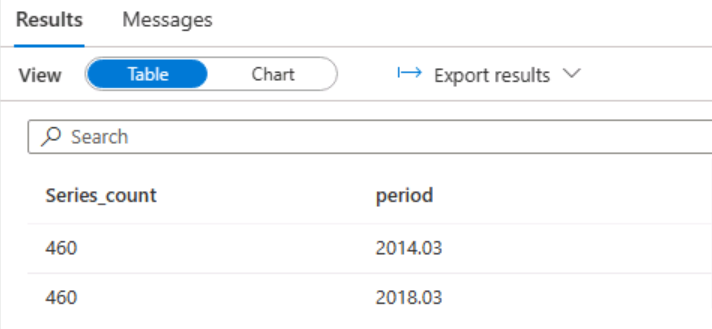
Run the script, and the results should show as below.

Modify the SQL code to save the results of the query in an external table like this:
USE Employment;

GO;


CREATE EXTERNAL TABLE Series_by_period

WITH (

    LOCATION = 'files/SeriesbyPeriod/',

    DATA_SOURCE = employment_data,

    FILE_FORMAT = ParquetFormat

)
AS

SELECT Count(Series_reference) AS Series_count,

Period as period

FROM
OPENROWSET(

        BULK 'csv/Business*.csv',

        DATA_SOURCE = 'employment_data',

        FORMAT = 'CSV',

        PARSER_VERSION = '2.0',

        HEADER_ROW = TRUE

    ) AS orders
GROUP BY Period;
Run the script. This time there's no output, but the code should have created an external table based on the results of the query. Name the script Create SeriesByPeriod Table and publish it.

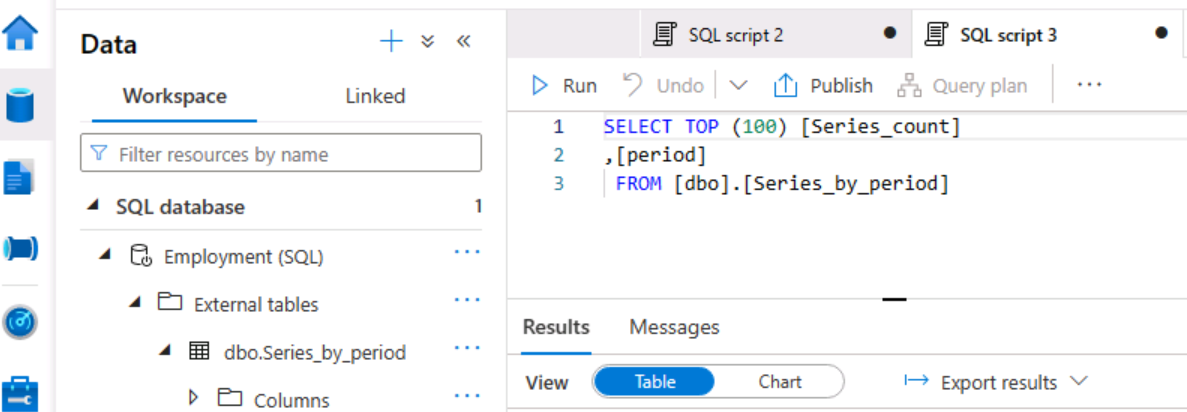
In the Data->Workspace menu for the Series_by_period table, select New SQL script > Select TOP 100 rows. Then run the resulting script and verify that it returns the aggregated Series Count by Employment Period data.


On the files tab containing the file system for your data lake, view the contents of the files folder (refreshing the view if necessary) and verify that a new SeriesbyPeriod folder has been created.

In the SeriesbyPeriod folder, observe that one or more files with names similar to F5C*** parquet have been created. These files contain the aggregated Series by Period data.

To verify this, you can select one of the files and use the New SQL script > Select TOP 100 rows menu to query it directly.
-- This is auto-generated code

SELECT

    TOP 100 *

FROM

    OPENROWSET(

        BULK 'https://datalakerg2vh64.dfs.core.windows.net/files/sales/SeriesbyPeriod/F5C90A74-1FA5-4F41-919D-BC5C09F2B2F0_24_0-1.parquet',

        FORMAT = 'PARQUET'

    ) AS [result]
Conclusion
We have demonstrated how to ingest data into Azure Data Lake Storage Gen2, and how to perform data analysis and data transformation activities in Azure Synapse Studio. This is very useful for Data Analysts to perform data analysis activities, Developers to check their code before automation, Architects and Data Engineers to understand the data and explore the datasets and create data pipelines, and Test Engineers to validate the data.


