How to Get the Most out of Heroku CI
Continuous integration and continuous delivery (CI/CD) are best practices in today's software engineering development process.
Continuous integration (CI) allows developers to automate running test suites and other jobs on each pull request created in their projects. These jobs must pass before merging the code changes into the master branch. This creates confidence in the master version of the code and ensures that one developer doesn't break things for every other developer working out of the same codebase.
Continuous deployment (CD) facilitates deploying changes into production immediately when new code is merged into the master branch. Gone are the days of only releasing code once per quarter, per month, or per week. By releasing code early and often, developers can deliver value to their customers at a faster pace. This strategy also makes it easier to identify issues in production and to pinpoint which commit introduced them.
There are many great tools for creating CI/CD pipelines. Travis CI is a popular open-source tool, and GitLab even comes with its own CI/CD features. Heroku offers a service called Heroku CI, which makes it a viable choice for developers already hosting and deploying their code through Heroku.
In this article, we'll go through the basic setup for getting up and running with Heroku CI, and then explore some advanced features like parallel test runs and automated browser tests.
Demo App
For this article, I've created a pun generator app. Dads everywhere, unite! The app is incredibly straightforward: With a click of a button, the app outputs a dad joke on the screen. To keep the code simple, I've created it with plain HTML and vanilla JS. The frontend is served by a Node.js and Express server.
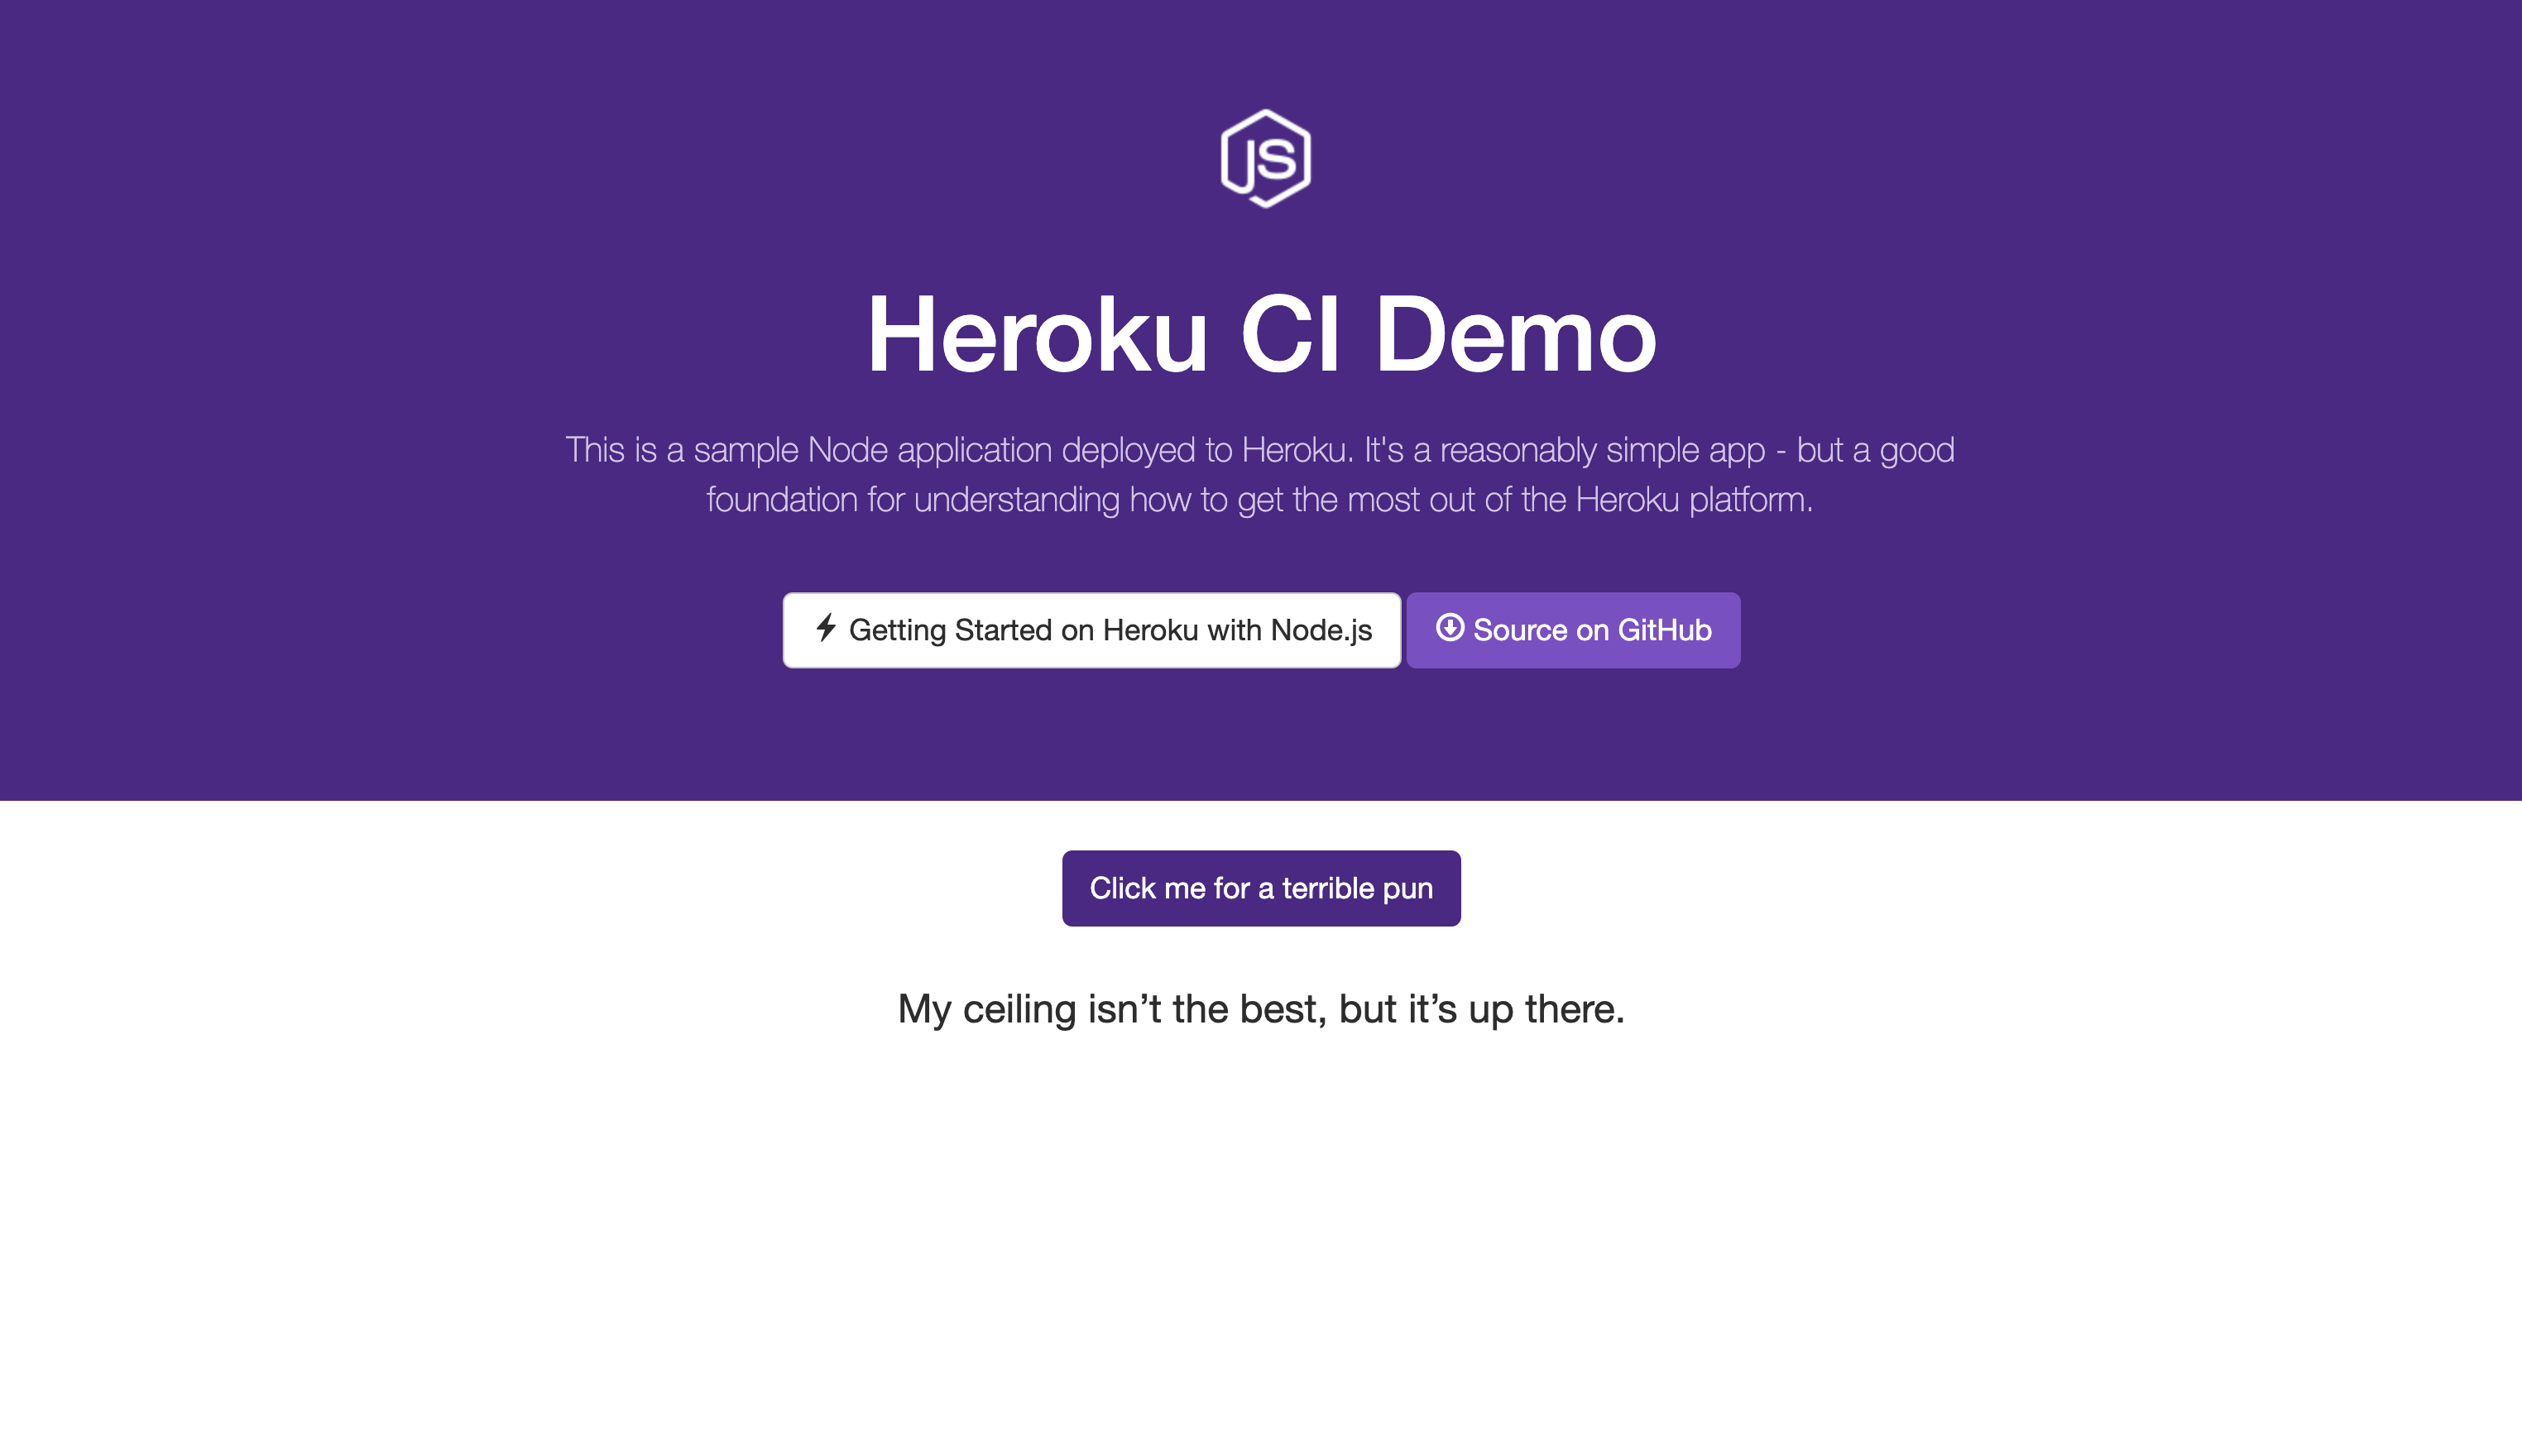
You can find all of the code on GitHub here.
Test Setup
To help bootstrap my app, I cloned the example Node.js app from Heroku in their getting started guide. I then wrote some HTML and added some JavaScript to handle the button click and the pun generation. I chose Jest as my unit testing framework, and I wrote tests using Kent Dodds' DOM Testing Library. I added an NPM script so that I can run my tests by entering the command npm test in my terminal. Running my tests locally generates output that looks like the following:

Basic CI Setup
Now that I have a test suite that I can run locally, I thought it would be nice if I could have it run each time I have new code to merge into my master branch. A CI/CD pipeline can automate that for me! The Heroku CI docs explain the setup in greater detail, so I'd recommend following the instructions found there, but here are the basic steps I followed:
- Pushed my code to a repo in GitHub
- Created a Heroku app for that repo
- Created a Heroku pipeline
- Connected the pipeline to my GitHub repo
- Enabled Heroku CI in the pipeline settings (In order to do this, you have to provide a credit card, because Heroku CI does come with some costs for using it.)
Fairly easy! Next, I created a new branch in my repo, added some new code, pushed it to that branch, and then opened up a pull request to merge my new branch into the master branch.
This is where the magic happens. At this point, I could see a section in my pull request in GitHub showing "checks" that need to pass. These "checks" are jobs running in the CI pipeline. In the screenshot below, you should notice the job for continuous-integration/heroku.
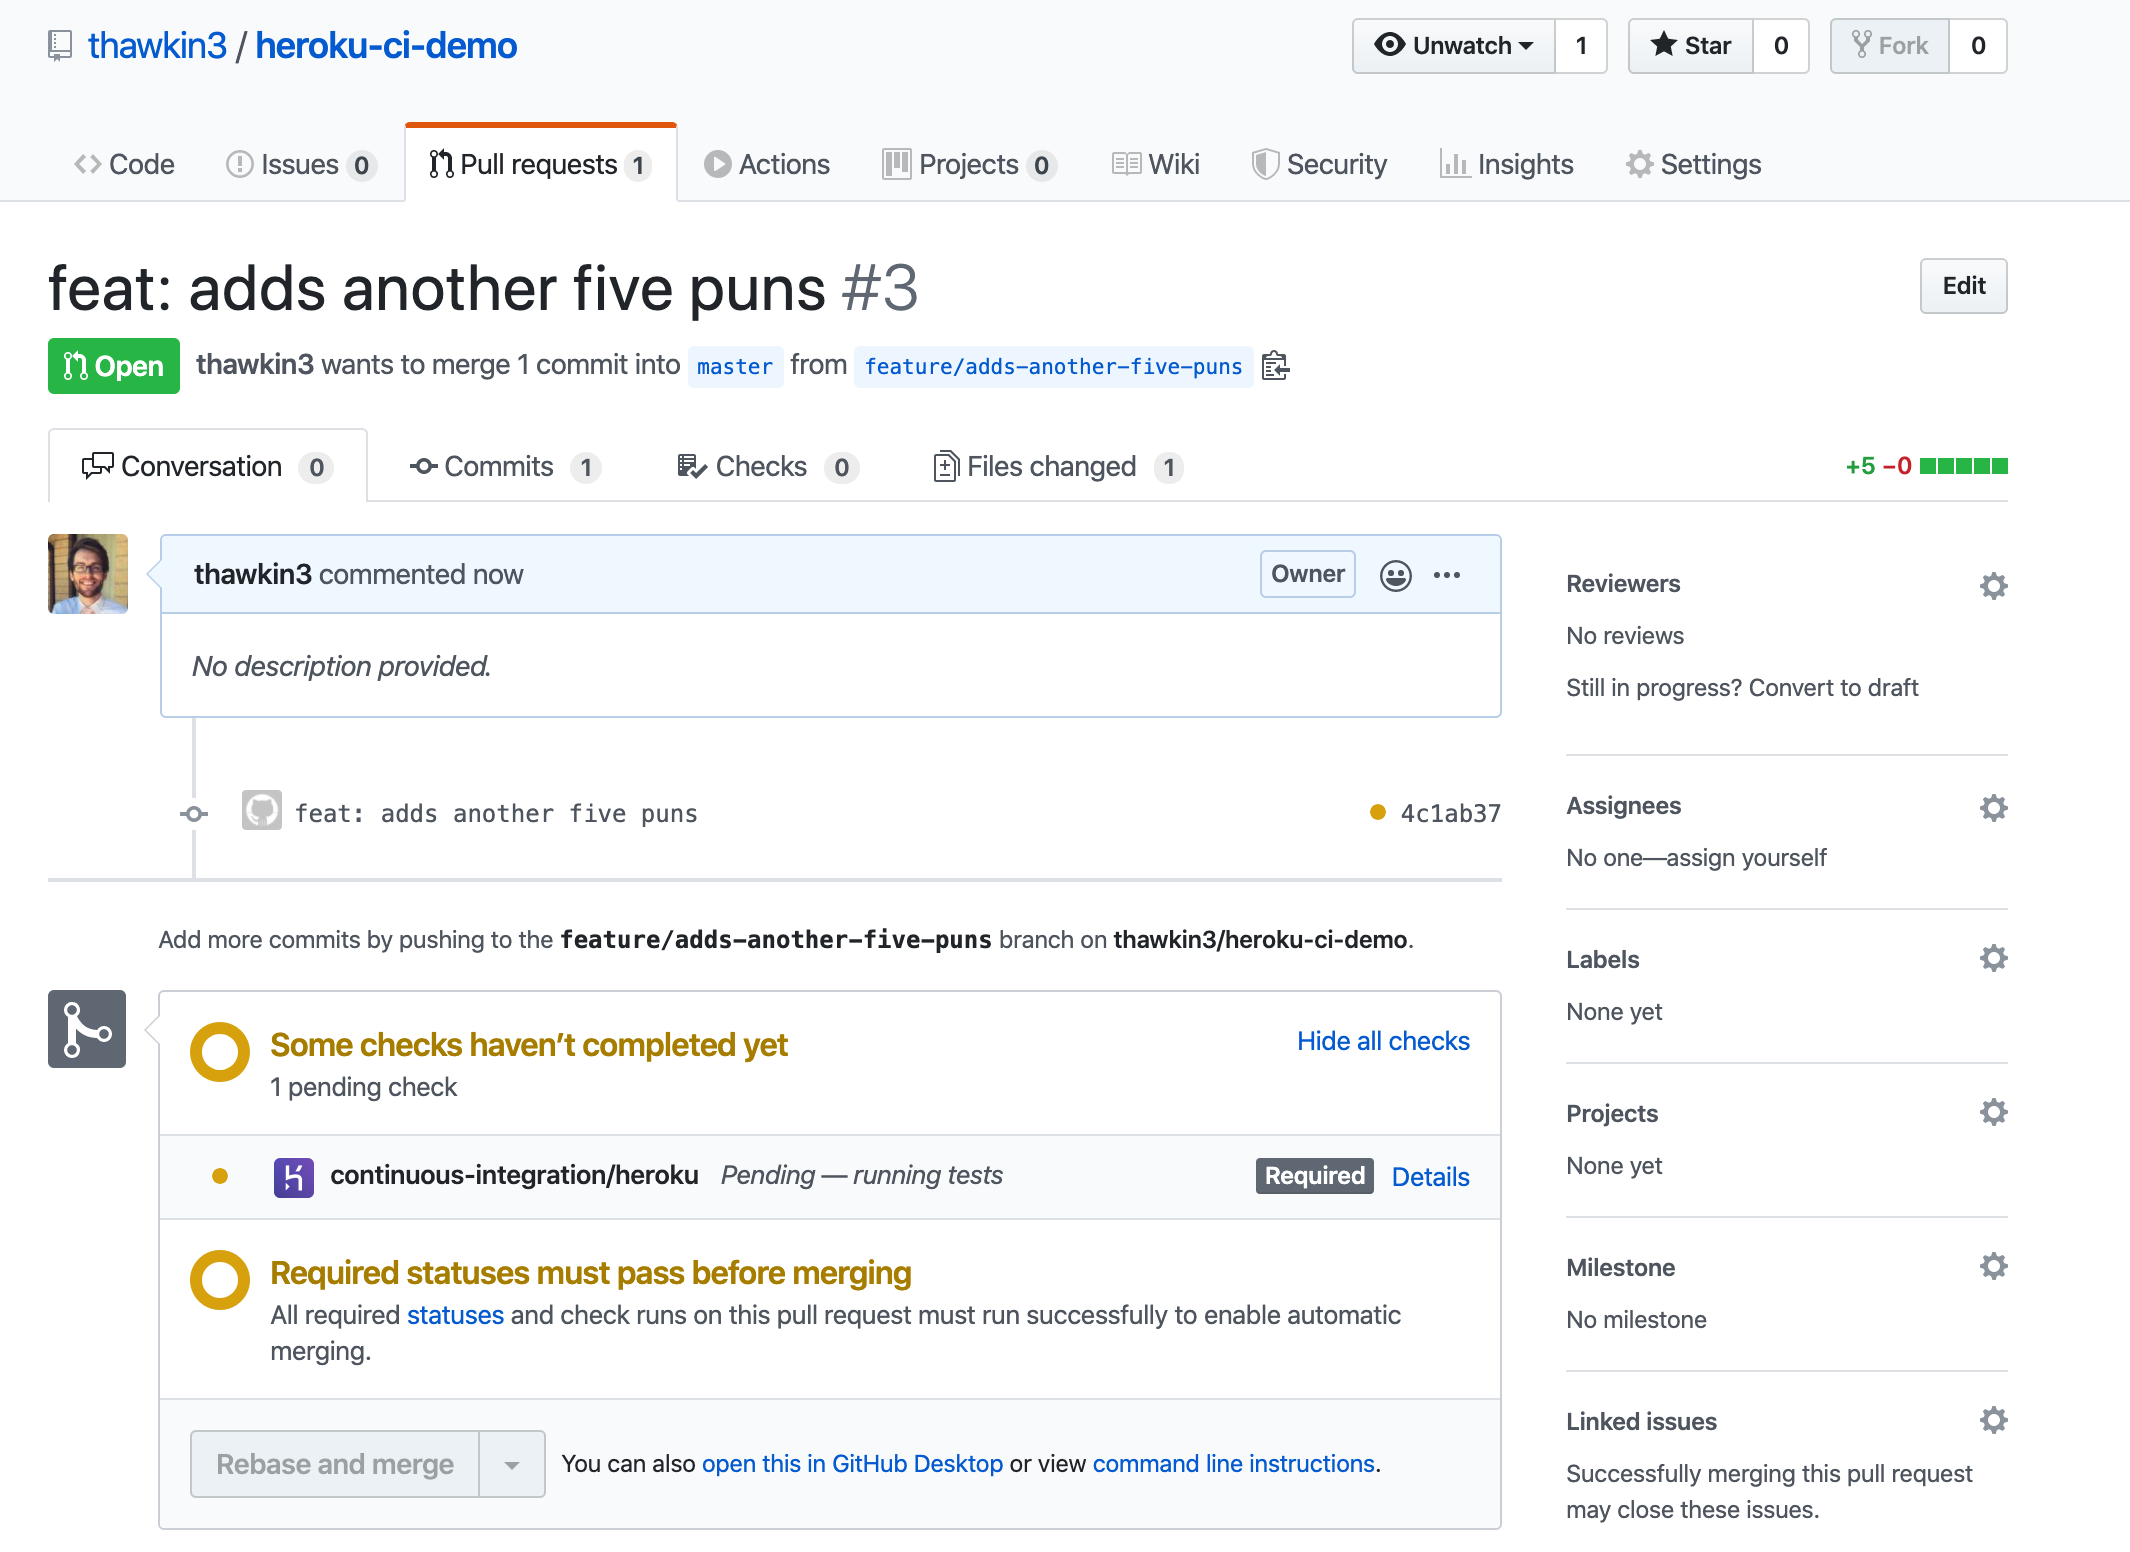
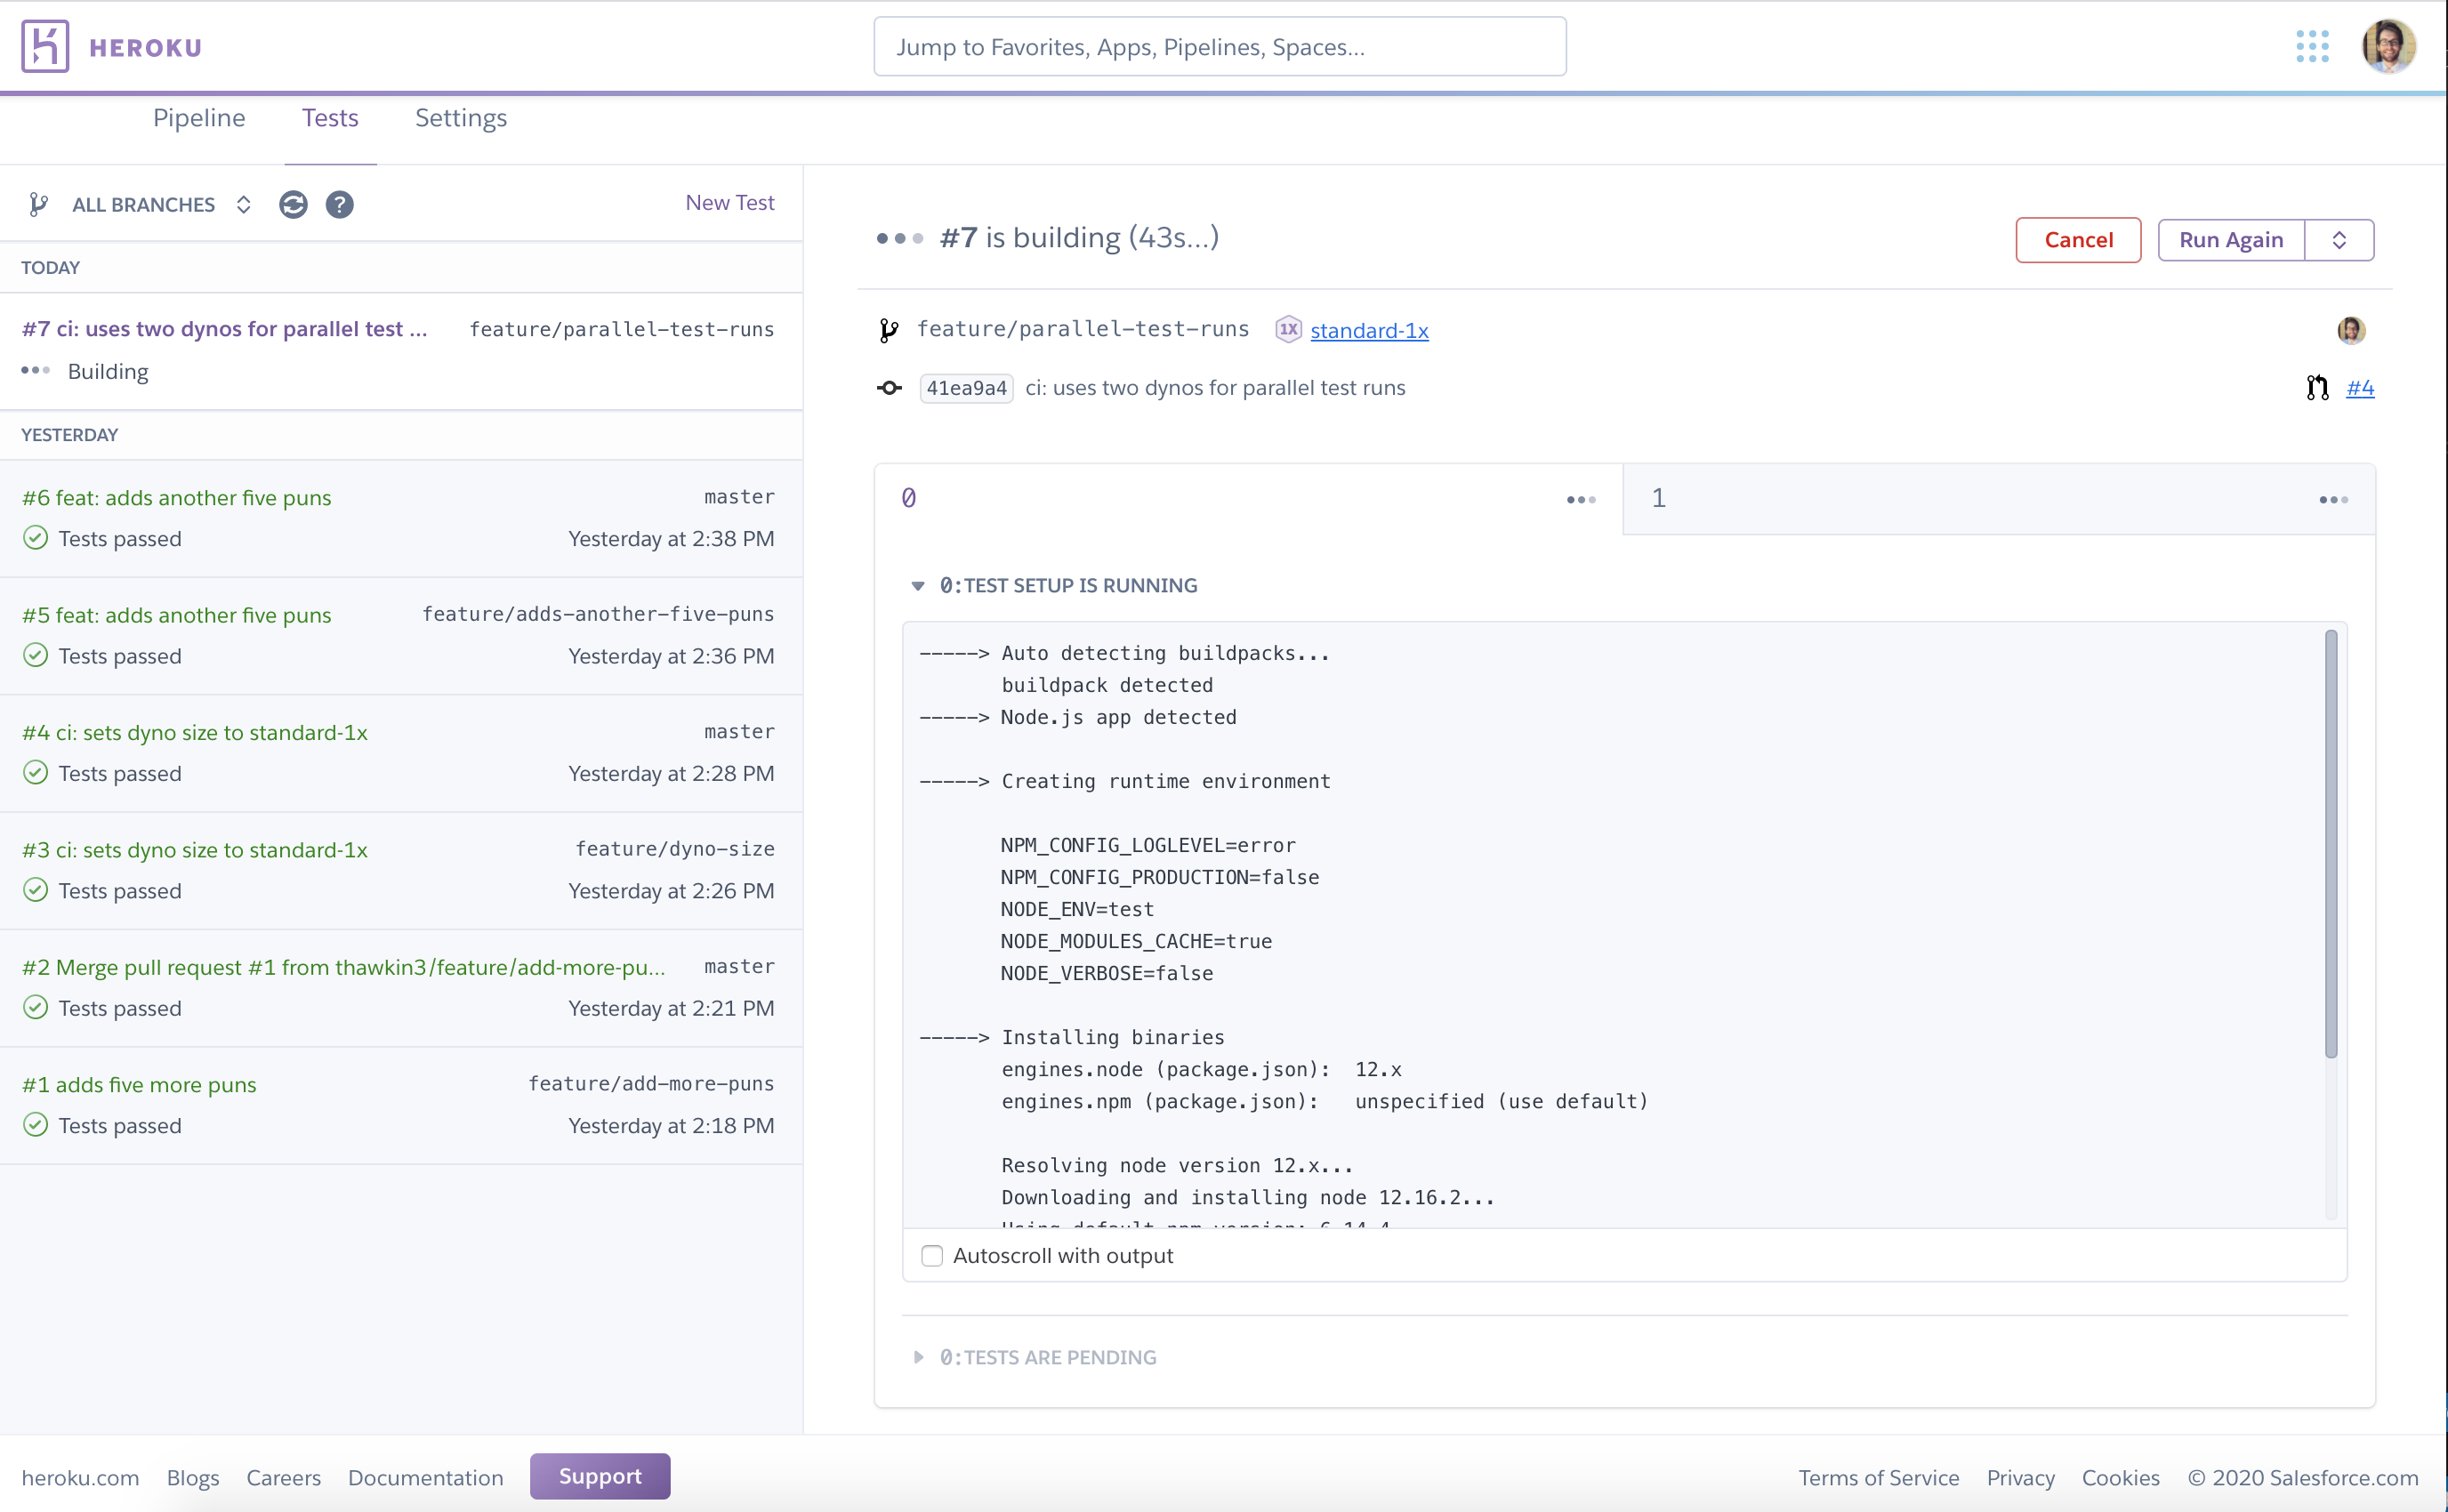
When I then hopped over to the Heroku pipeline dashboard, I could view the progress of the job as it ran my tests:
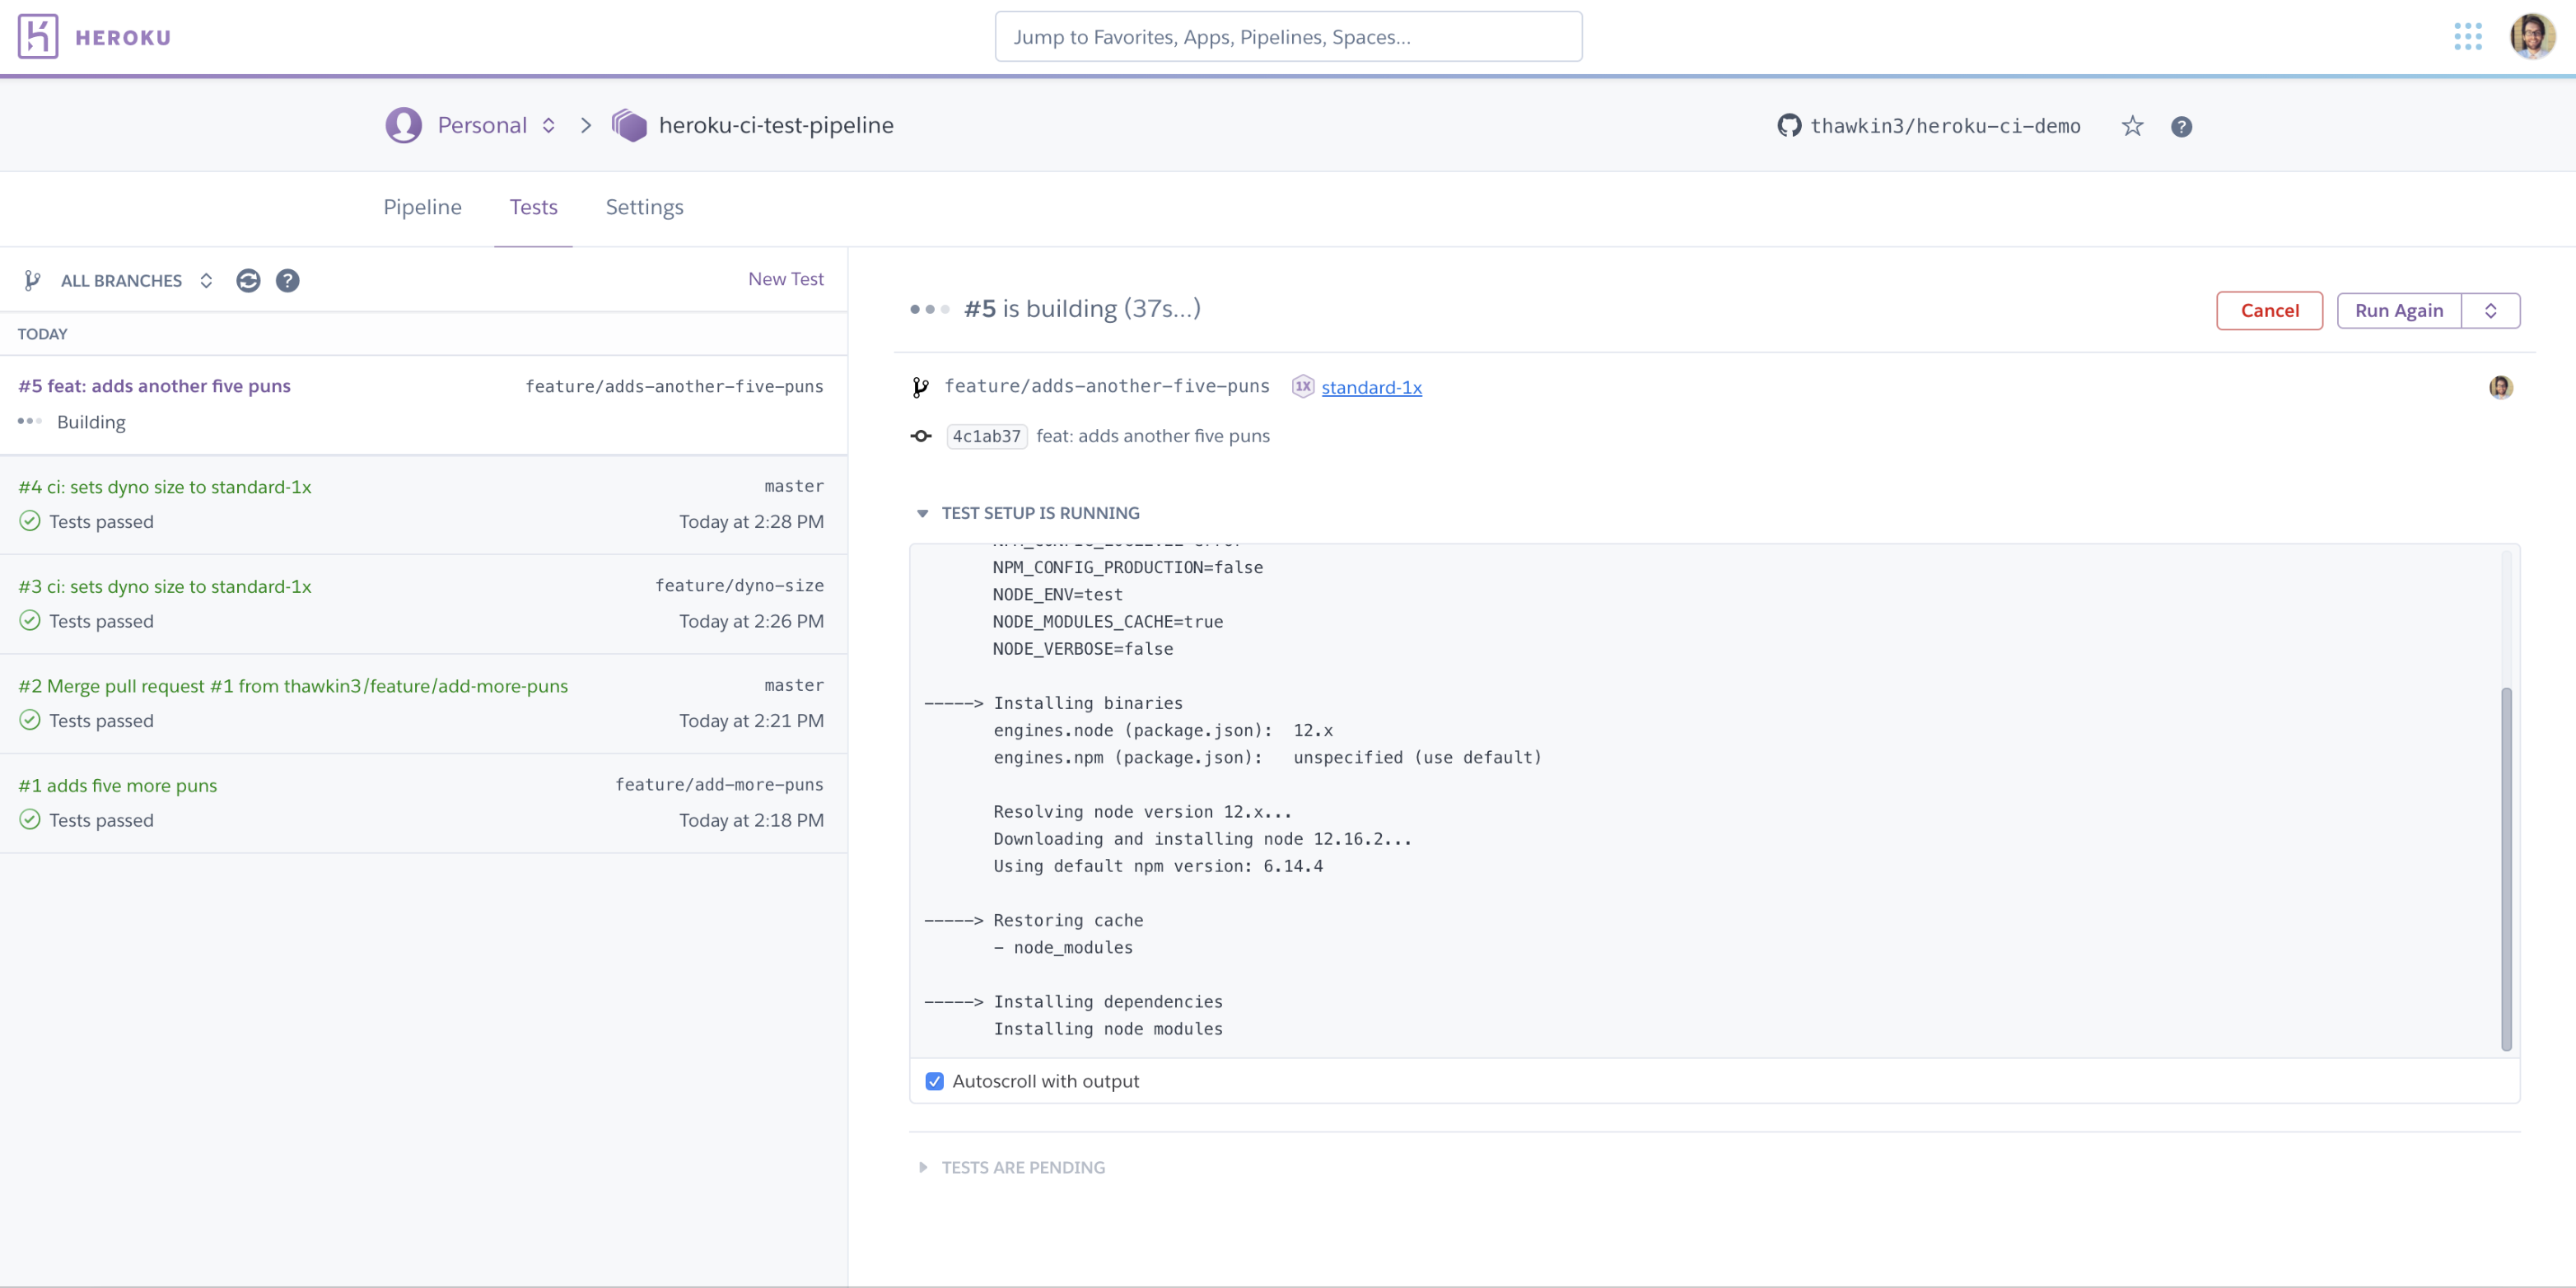
Once the job finished, I could then see a green checkmark back in GitHub as shown in the screenshot below:
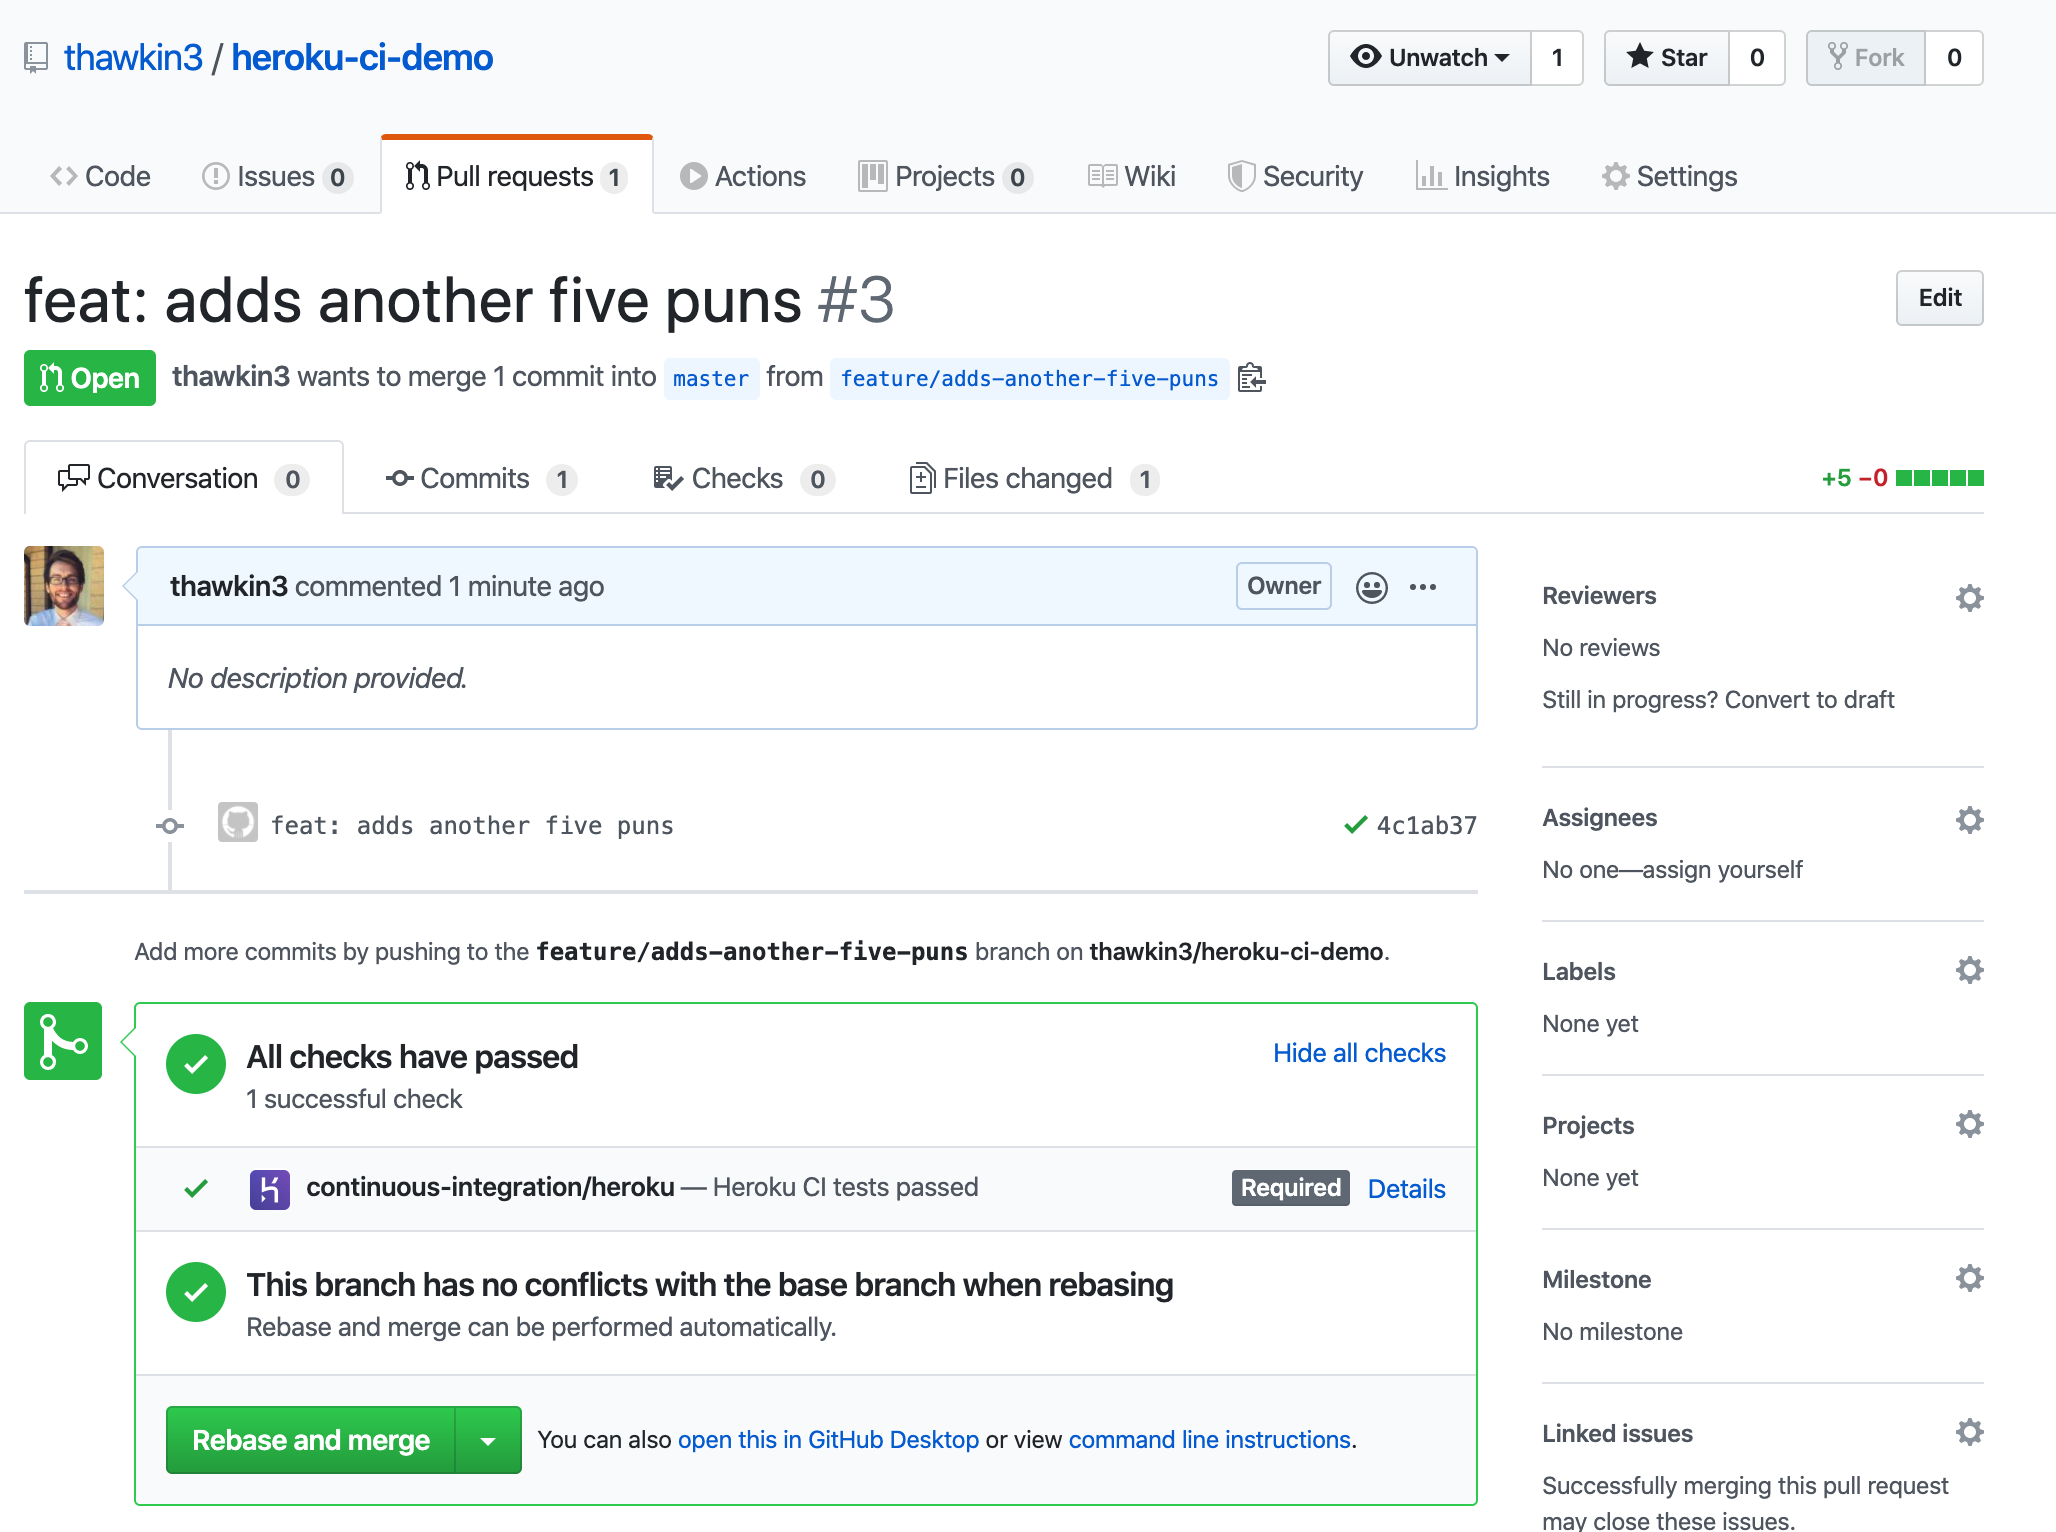
Now, I could merge my branch into the master branch with confidence. All the tests were passing, as verified by my Heroku CI pipeline.
Requiring Checks to Pass in GitHub
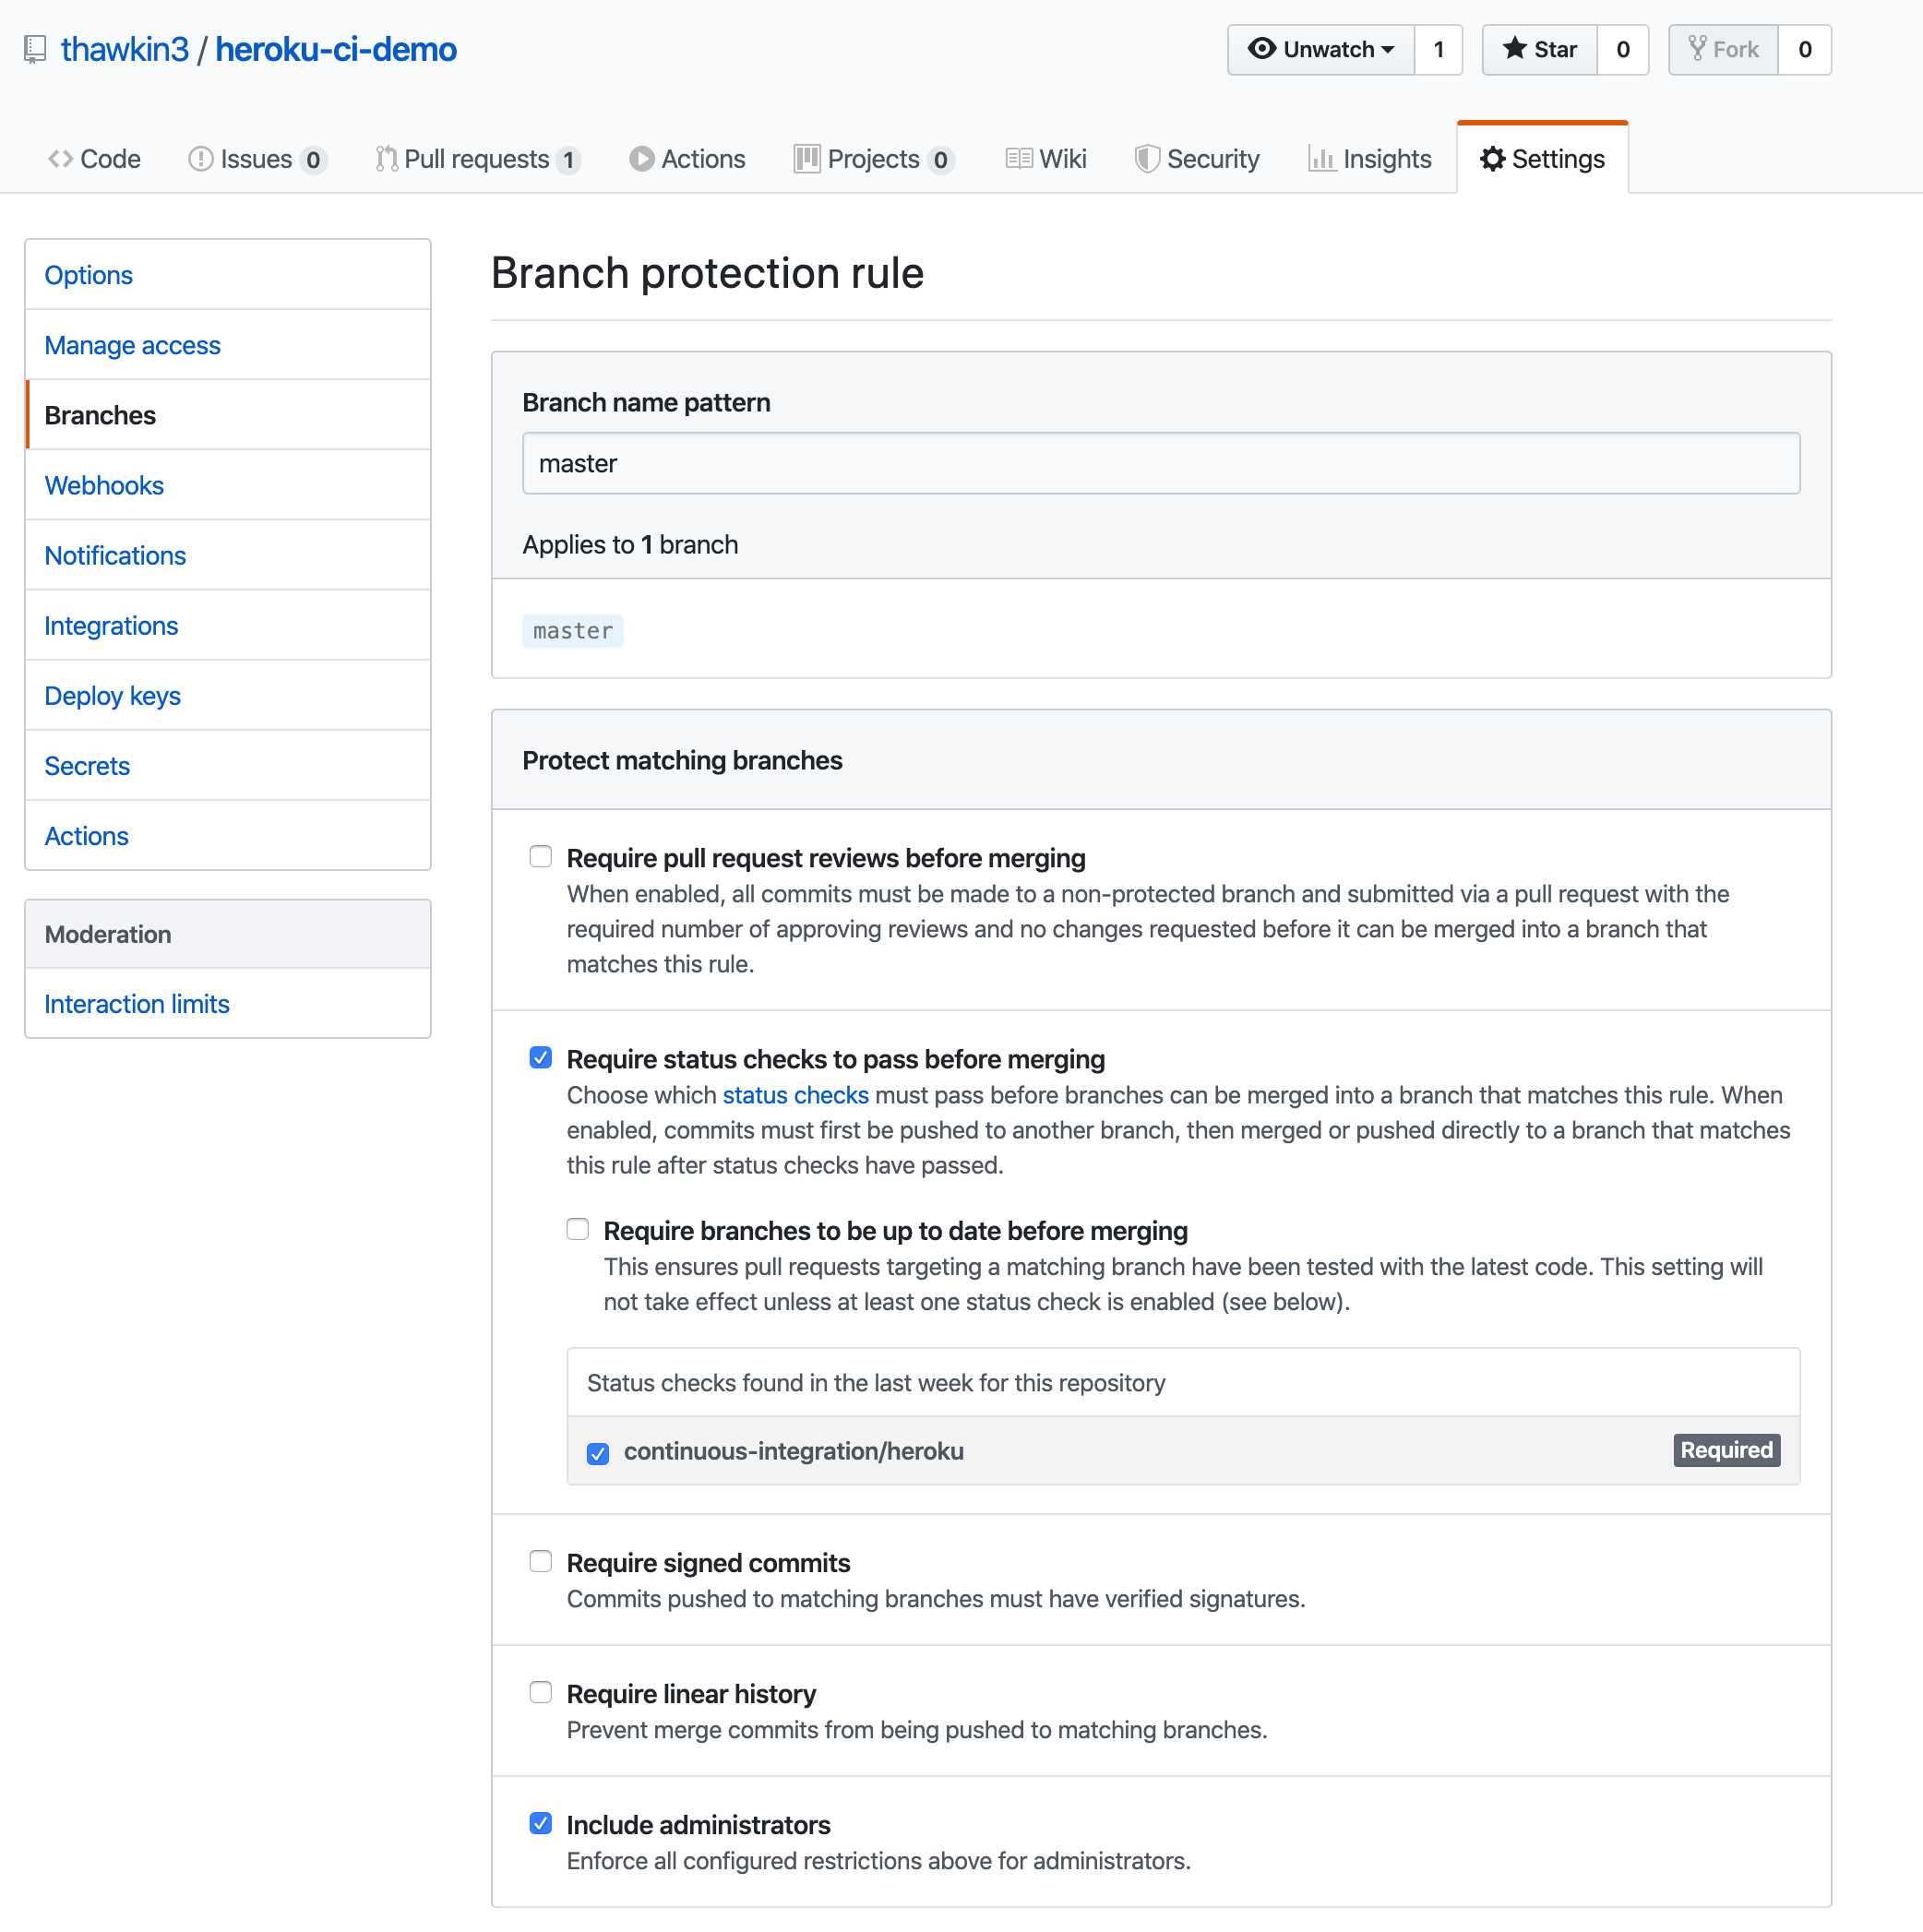
As a side note, you should notice in my GitHub screenshot above that the continuous-integration/heroku check is required to pass. By default, checks are not required to pass. Therefore, if you'd like to enforce passing checks, you can set that up in the settings for your specific repo.
Parallel Test Runs
Now that we've covered the basic setup for getting started with Heroku CI, let's consider a more advanced scenario: What if you have a large test suite that takes awhile to run? For organizations that have a large code base and have been writing tests for a long time, it's common to see a test suite take 5-10 minutes to run. Some test suites take more than an hour to run! That's a lot of time to wait for feedback and to merge your code.
CI pipelines should be quick so that they are painless to run. If you do have a large test suite, Heroku CI offers the ability to run your tests in parallel across multiple dynos. By running your tests in parallel, you can significantly cut down the time it takes to run the whole suite.
To set up parallel test runs, all you need to do is specify in your app.json file the quantity of dynos you want to run. I chose to use just two dynos, but you can use as many as you want! You can also specify the size of the dynos you use. By default, your tests run on a single "performance-m" dyno, but you can increase or decrease the size of the dyno if you're trying to control costs. In my case, I chose the smallest dyno that Heroku CI supports, which is the "standard-1x" size.
{
"environments": {
"test": {
"formation": {
"test": {
"quantity": 2,
"size": "standard-1x"
}
}
}
}
}
Now, when I added new code and created a new pull request, I could see my Heroku CI job was running on two dynos. For my tiny test suite of only three unit tests, this was definitely overkill. However, this kind of setup would be extremely useful for a larger time-consuming test suite. It's important to note that only some test runners support parallelization, so make sure the test runner you choose for your app includes this capability.
Automated Browser Tests with Cypress
In addition to running unit tests, you may also want to run integration tests and end-to-end tests on your app. Selenium and Cypress are popular end-to-end test frameworks, both of which are industry standard. The nice thing about Cypress for frontend developers is that you write your tests in JavaScript, so you don't need to learn Java like you would for Selenium.
Let's take a look at how we could configure Cypress to run a few end-to-end tests on the pun generator app and then include those tests in our Heroku CI pipeline.
First, I installed a few necessary dependencies by running npm install --save-dev cypress cross-env start-server-and-test.
Second, I added some more NPM scripts in my package.json file so that it looked like this:
xxxxxxxxxx
"scripts": {
"cypress:open": "cypress open",
"cypress:run": "cypress run --browser chrome",
"cypress:test": "start-server-and-test start http://localhost:5000 cypress:run",
"start": "cross-env PORT=5000 node index.js",
"test": "jest"
},
Third, I wrote a small Cypress test suite to test that the button in my app works correctly:
xxxxxxxxxx
describe('Pun Generator App', () => {
beforeEach(() => {
cy.visit('http://localhost:5000')
})
it('adds a dad joke to the page when the button is clicked', () => {
cy.contains('Click me for a terrible pun').click()
cy.contains('My ceiling isn’t the best, but it’s up there.')
})
it('tells the user when it is all out of puns', () => {
const button = cy.contains('Click me for a terrible pun')
for (let i = 0; i < 20; i++) {
button.click()
}
cy.contains("I'm all out of puns!")
})
})
I could now run npm run cypress:test locally to verify that my Cypress setup is working properly and that my end-to-end tests pass.
Finally, I modified my app.json file to include a new test script and appropriate buildpacks for Heroku CI to use. It's important to note that for JavaScript apps, Heroku CI uses the npm test command. If you don't specify a test script in the app.json file, then Heroku CI will just use the test script specified in your package.json file. However, I wanted Heroku CI to use a custom script that ran both Jest and Cypress as part of the test, so I wrote an override test script in app.json.
xxxxxxxxxx
{
"environments": {
"test": {
"formation": {
"test": {
"quantity": 1,
"size": "standard-1x"
}
},
"buildpacks": [
{ "url": "https://github.com/heroku/heroku-buildpack-google-chrome" },
{ "url": "heroku/nodejs" }
],
"scripts": {
"test": "npm test && npx cypress install && npm run cypress:test"
}
}
}
}
Unfortunately, I hit a snag on this last step. After several hours of reading, researching, and troubleshooting, I discovered that Heroku CI isn't currently compatible with Cypress. The Heroku docs on browser testing recommend using the --headless option rather than the deprecated default Xvfb option. However, while running Cypress inside of the Heroku CI pipeline, it still tries to use Xvfb. Using previous versions of Cypress and older (and deprecated) Heroku stacks like "cedar-14" yielded no better results.
It would appear that either Heroku or Cypress (or both) have some issues to address! Hopefully users running end-to-end tests with Selenium fare better than I did when trying to use Cypress.
Other Heroku CI Features
Now that we've discussed two of the main features, running tests in parallel and running browser tests, let's briefly look at a few other features of Heroku CI.
In-Dyno Databases
If your application relies on a database, then you'll likely need to use that database during testing. Heroku CI offers In-Dyno Databases, which are databases that are created inside of your test dynos during the CI pipeline test. These databases are ephemeral. This means that they only exist for the duration of the test run, and they're much faster than a normal production-ready database because the database queries don't pass over the network. These two benefits help your test suites to finish quicker, which speeds up your feedback loop and keeps your costs down.
Environment Variables
If you need to specify any non-confidential environment variables, you can add them to your app.json file like so:
xxxxxxxxxx
{
"environments": {
"test": {
"env": {
"NON_SECRET_VARIABLE": "abcd1234"
}
}
}
}
You would typically place private secrets in an .env file which you tell Git to ignore so that isn't checked into your source control. That way you aren't storing those values in your repo. Heroku CI adheres to this same principle by allowing you to store private environment variables directly in the Heroku CI Pipeline Dashboard rather than exposing them in the app.json file.
Debugging the CI Process
If you are running into issues while setting up your Heroku CI pipeline, you can use the heroku ci:debug command directly in your terminal to create a test run based on your project's last local commit. This allows you to inspect the CI environment and gives you greater insight into possible test setup problems. This command is especially helpful if you know that your tests are passing outside of the Heroku CI environment but failing when run in the Heroku CI pipeline. In this case, the issue likely lies in the CI setup itself.
Limitations
Although Heroku CI has a lot to offer, it does have some limitations. First, unlike other CI/CD tools such as Travis CI that are platform agnostic, you must host your app on Heroku dynos and use Heroku Pipelines in order to use Heroku CI. If you're already a Heroku user, this of course isn't a problem, and is actually a great benefit, because testing with Heroku CI is about as close as you can get to modeling a production environment for apps deployed through Heroku. However, it does mean that users of other platforms won't be able to consider switching to Heroku CI without moving a lot of their other infrastructure to Heroku.
Second, as mentioned above during my browser testing experiment, Heroku CI doesn't currently seem to be compatible with Cypress.
Third, Heroku CI doesn't support testing containerized builds with Docker.
For other limitations, you can consult Heroku's list of known issues.
Conclusion
By now, you should be comfortable with the basics of Heroku CI and understand some of the advanced features as well. For further questions, you can always consult the docs.
Once you've chosen your test tools and ensured their compatibility with Heroku CI, getting up and running should be a breeze. With Heroku CI you can create a software development system that enables high confidence and extreme productivity.
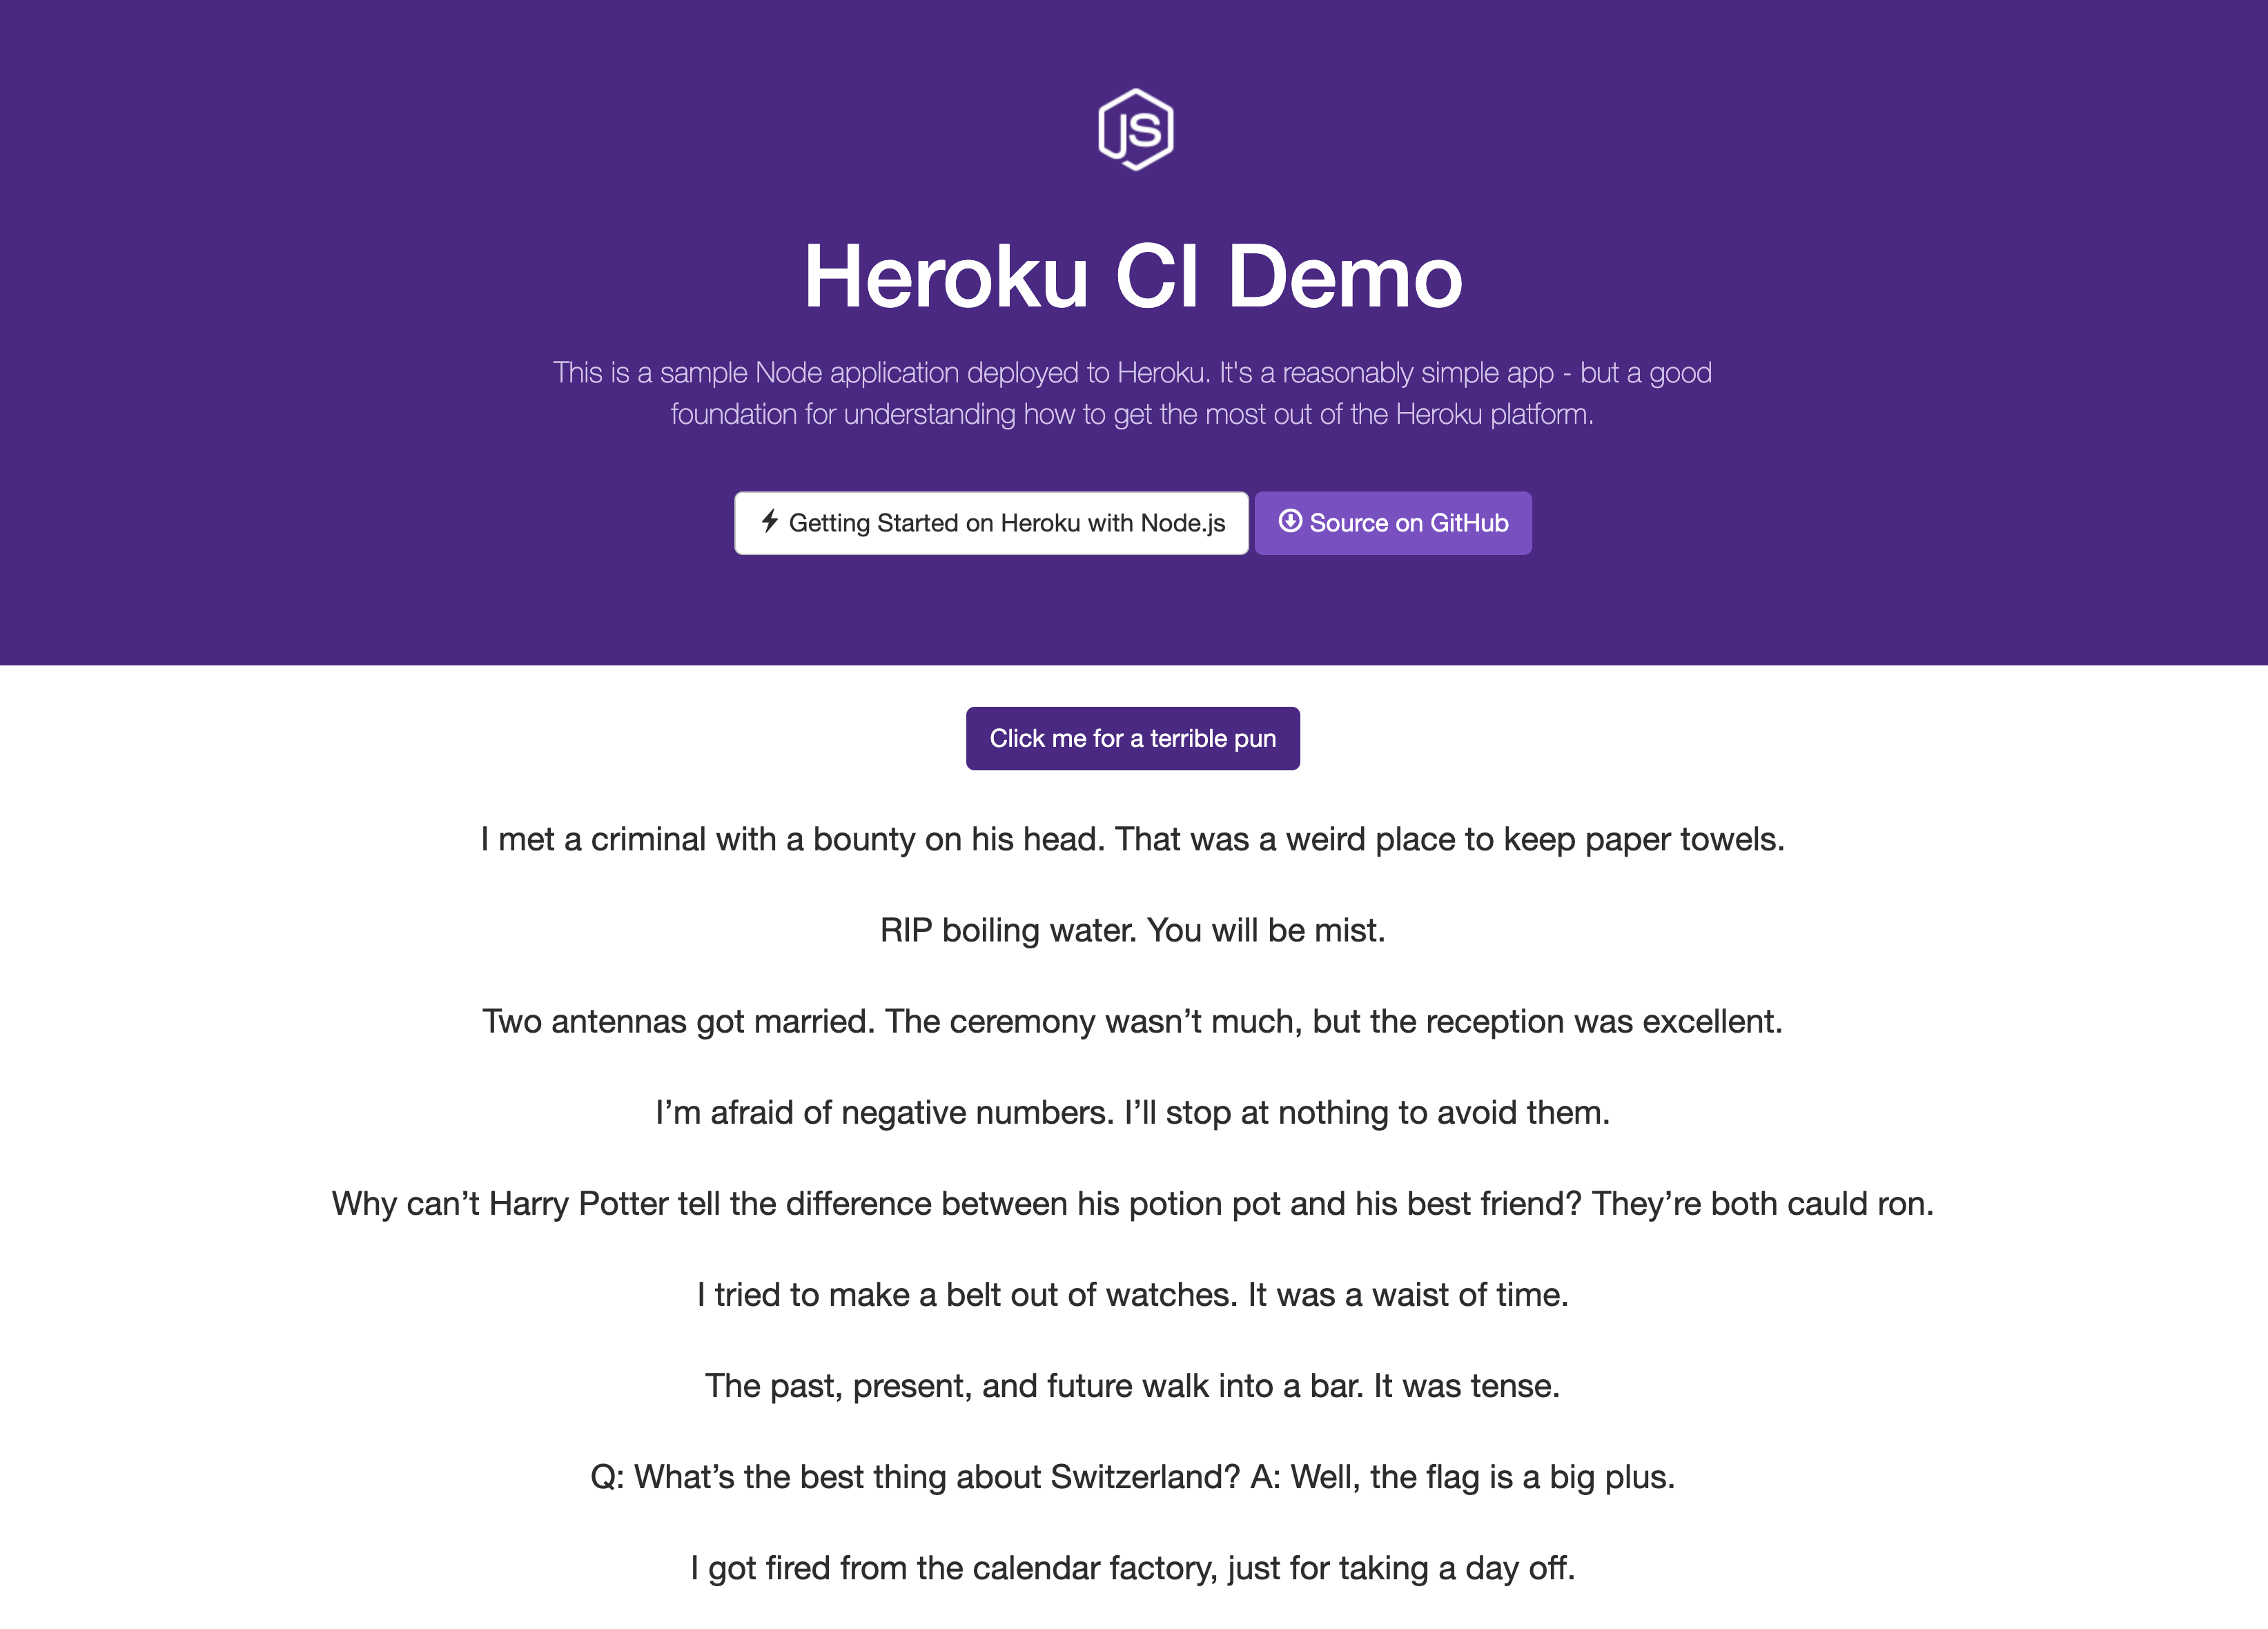
And now, without further ado, here are some more puns from our app:
