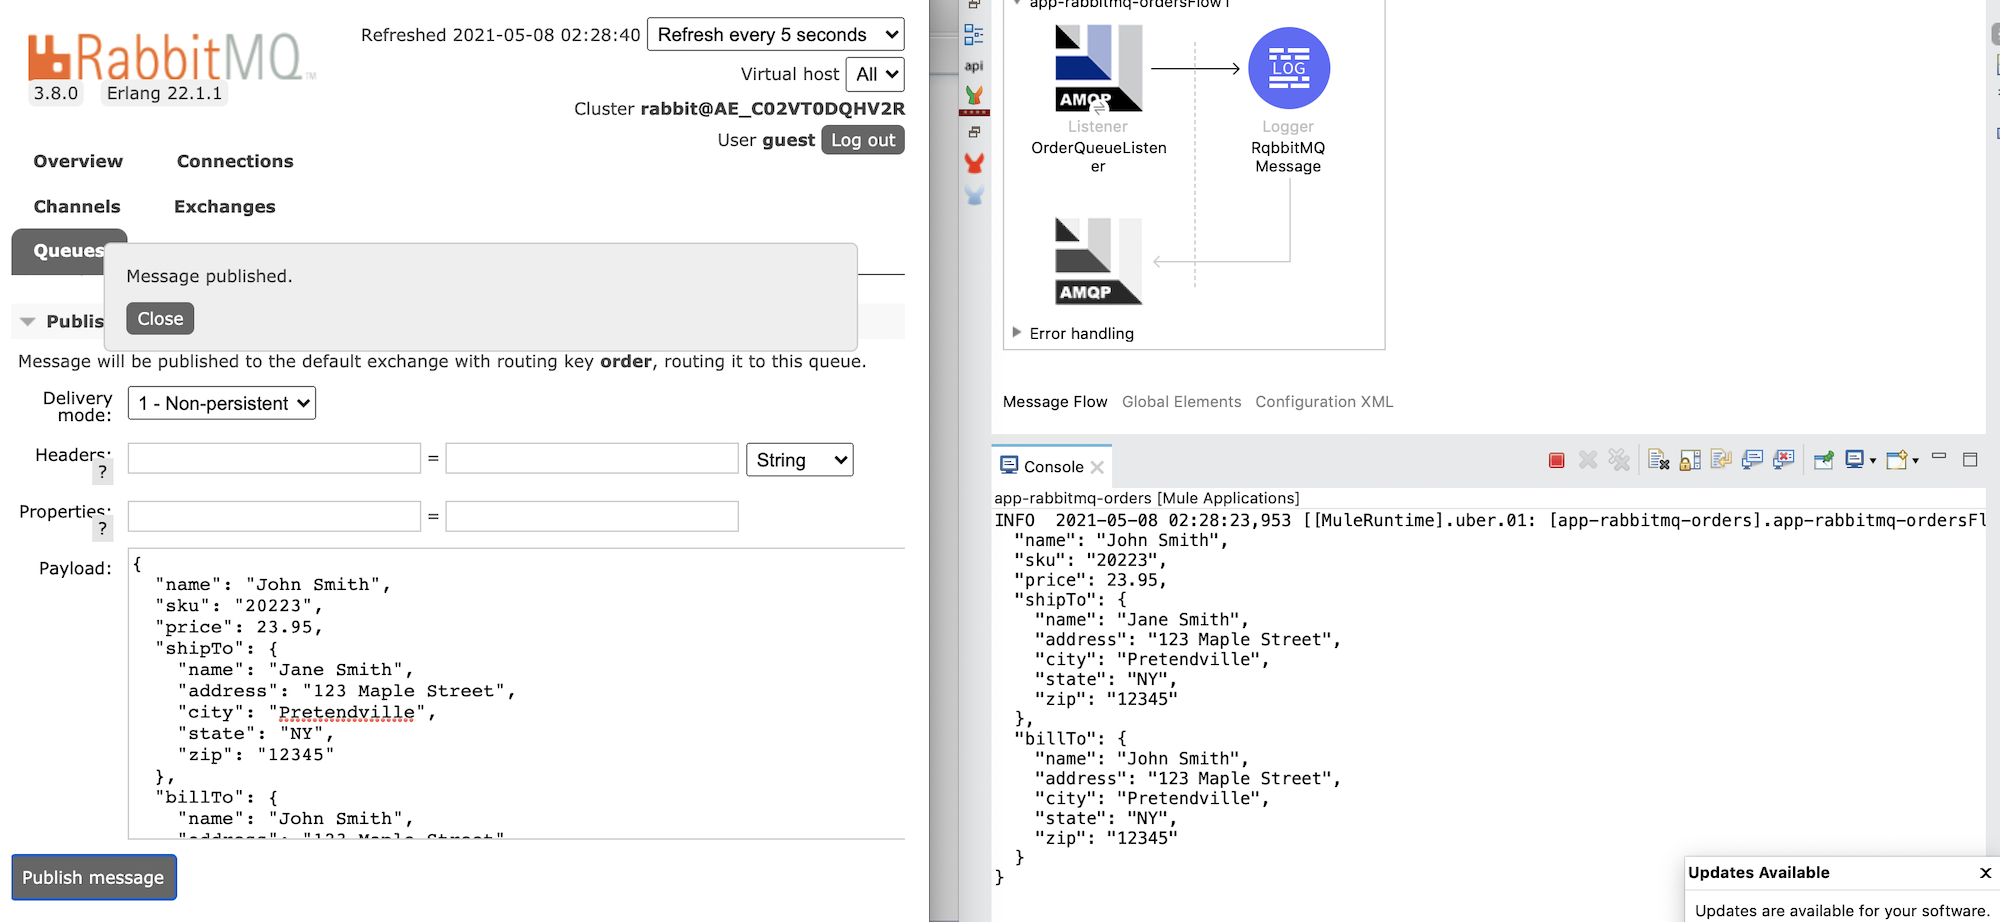
MuleSoft Integration With RabbitMQ
This article will explain in detail, how to integrate with RabbitMQ in MuleSoft and read messages from a queue.
Install and Setup RabbitMQ on Mac
In this section, I will explain how to install RabbitMQ on Mac, create a new queue and publish messages to the queue using the RabbitMQ portal.
Step 1: Install RabbitMQ.
brew install rabbitmq
Step 2: Start RabbitMQ Server.
Start RabbitMQ server in the foreground using the below command:
rabbitmq-server
Or start the server in the background using the below command:
brew services start rabbitmq
Step 3: Access RabbitMQ.
http://localhost:15672/

Enter both username and password as guest.
Step 4: Create New Queue.
http://localhost:15672/#/queues
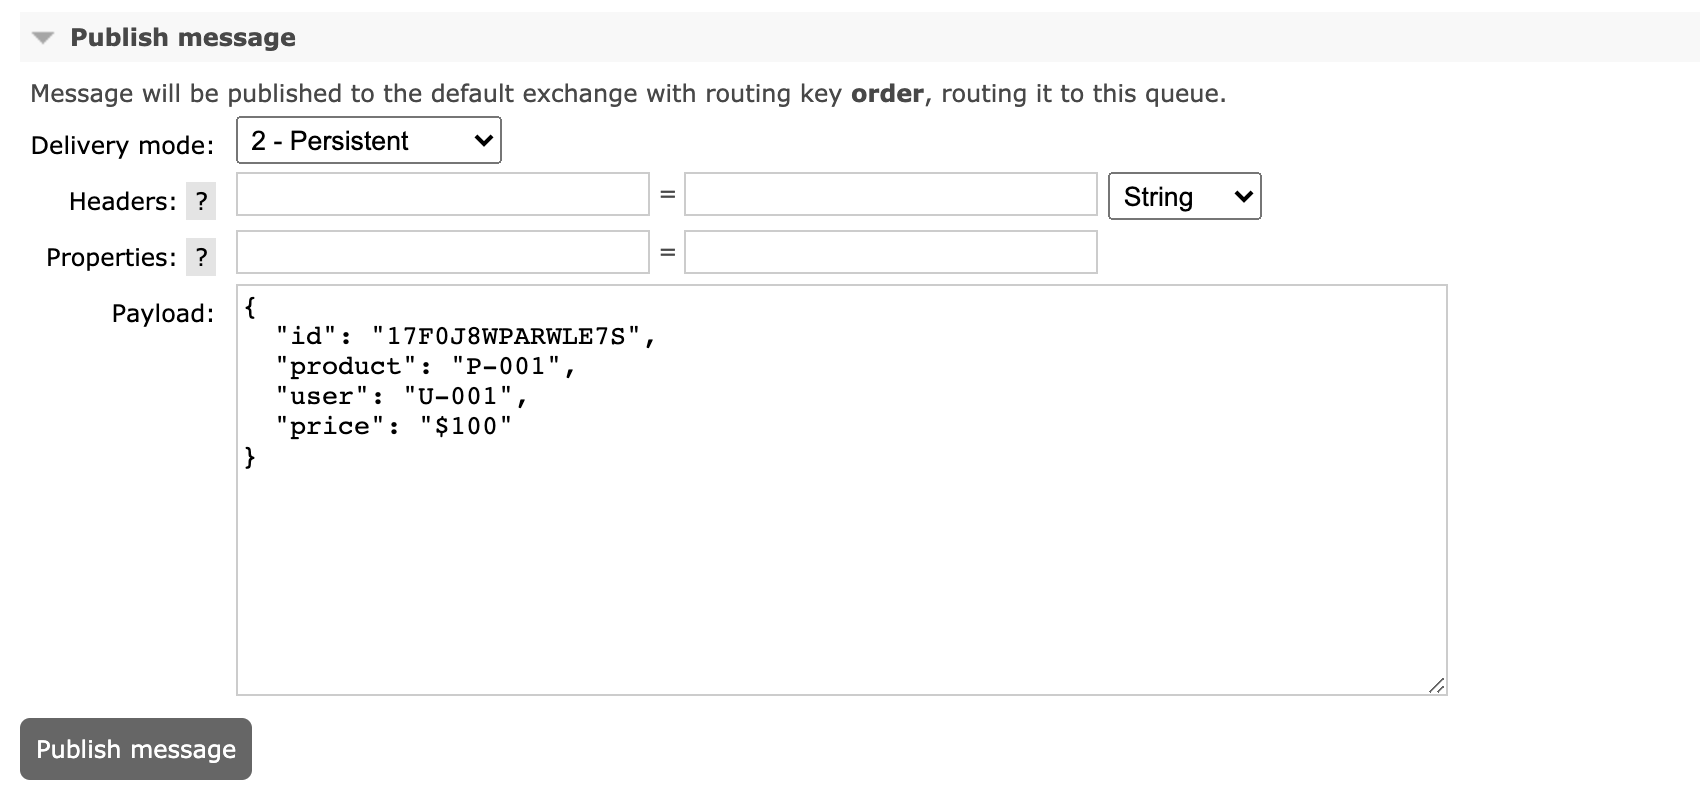
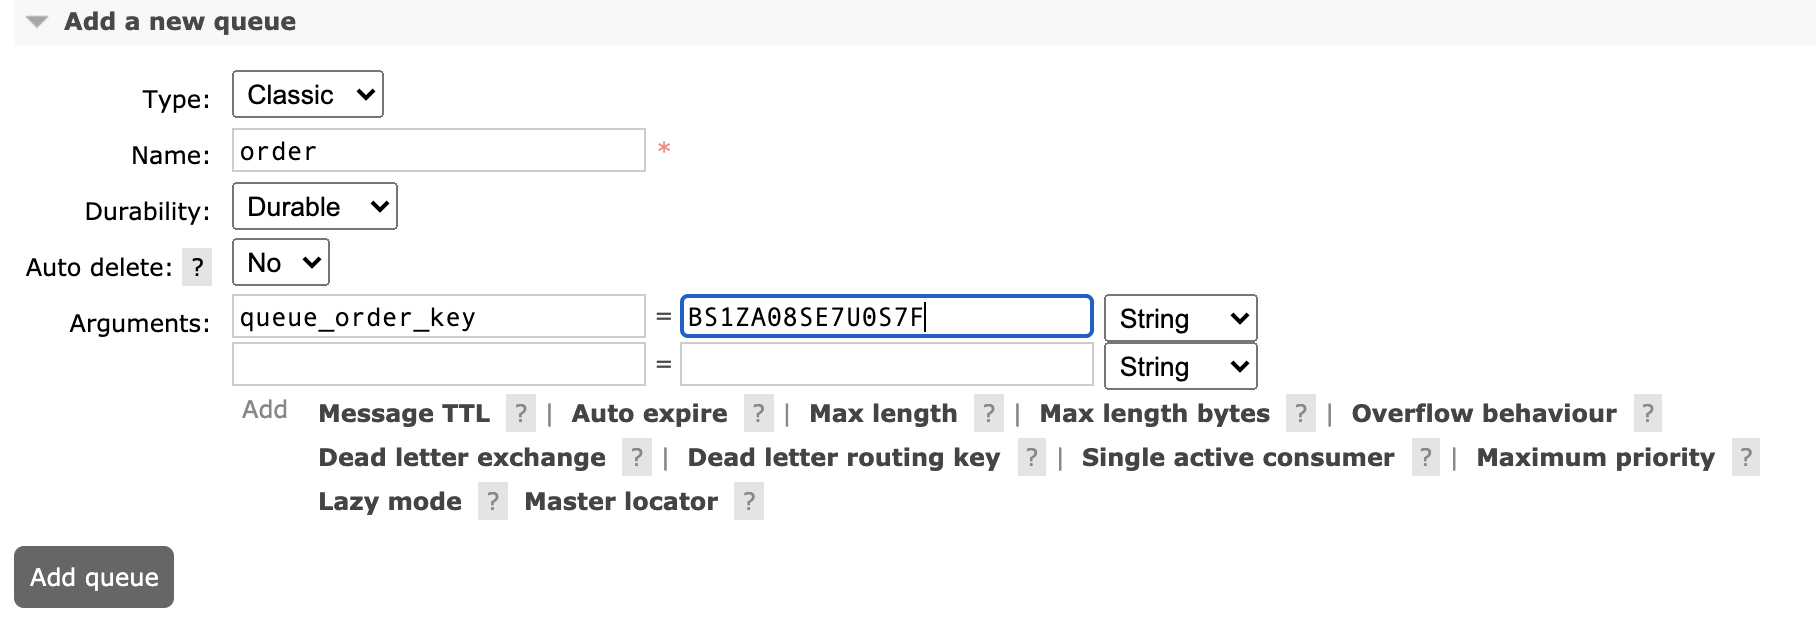 Step 5: Publish Message in Queue.
http://localhost:15672/#/queues/%2F/order
Setup Mule Application
In this section, I will explain how to create a new Mule application, listen on RabbitMQ queue, read a message from the queue.
Step 1: Create a new Mule 4 application:
Open Anypoint Studio click on File -> New -> Application Name (app-rabbitmq-orders).
Step 2: Install AMQP connector from the exchange: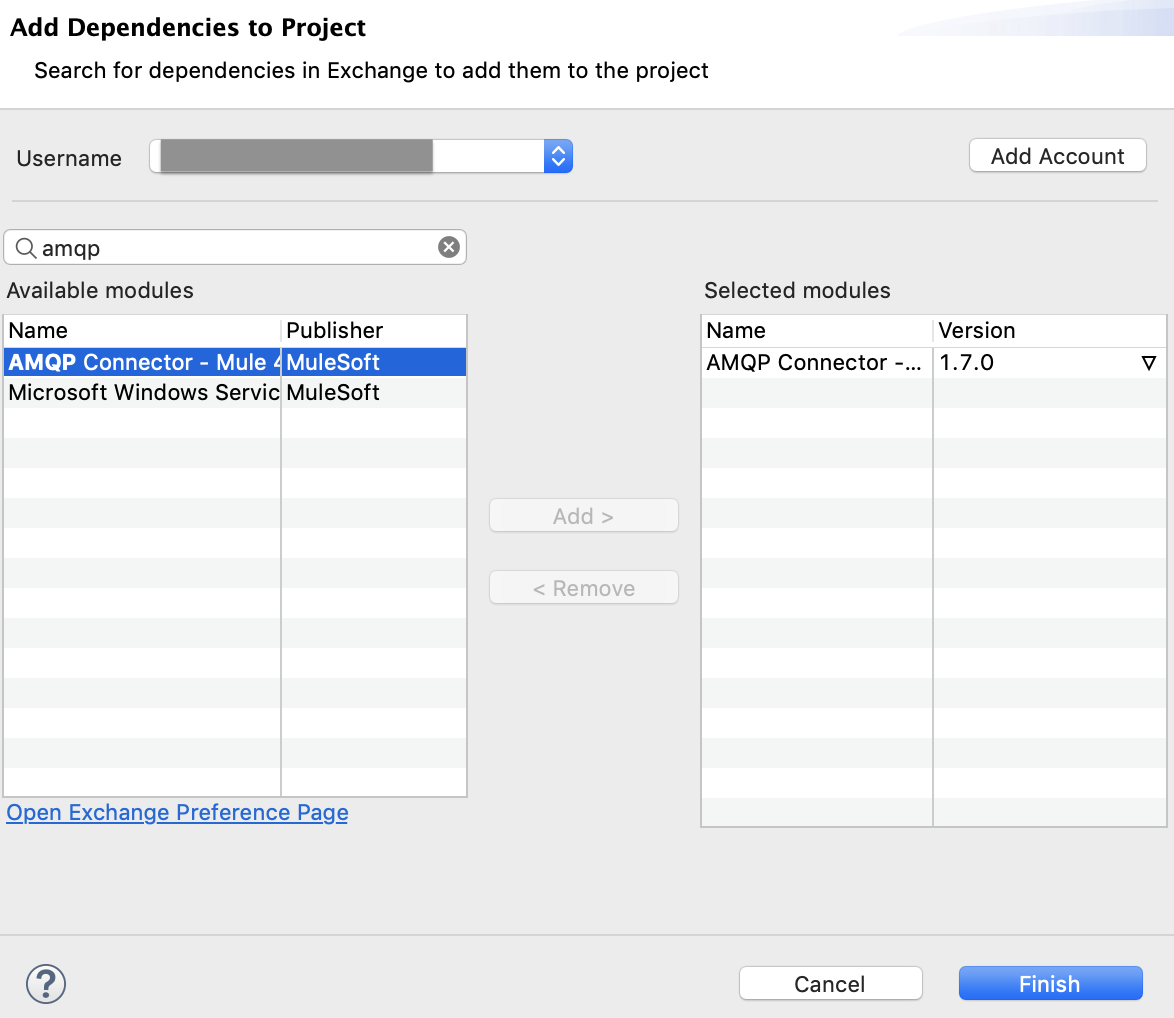
Step 3: Create flow to read the message from order queue: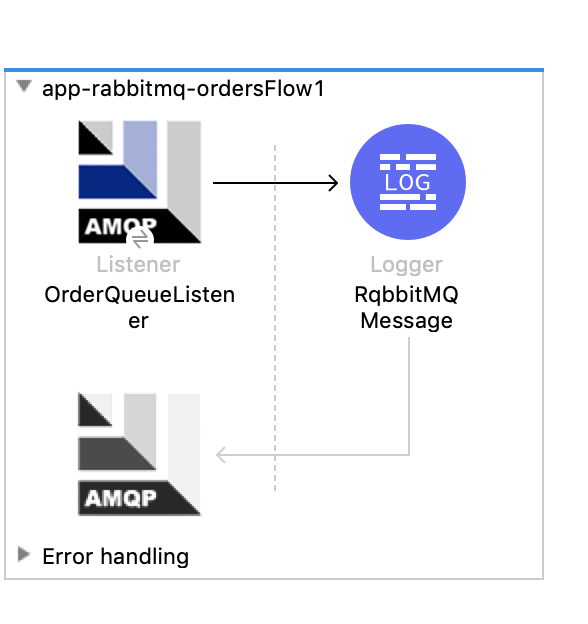
xxxxxxxxxx
<mule xmlns:amqp="http://www.mulesoft.org/schema/mule/amqp" xmlns="http://www.mulesoft.org/schema/mule/core"
xmlns:doc="http://www.mulesoft.org/schema/mule/documentation"
xmlns:xsi="http://www.w3.org/2001/XMLSchema-instance" xsi:schemaLocation="http://www.mulesoft.org/schema/mule/core http://www.mulesoft.org/schema/mule/core/current/mule.xsd
http://www.mulesoft.org/schema/mule/amqp http://www.mulesoft.org/schema/mule/amqp/current/mule-amqp.xsd">
<amqp:config name="AMQP_Config" doc:name="AMQP Config" doc:id="de2abf40-5ad2-4942-a874-99d12c486b4b" >
<amqp:connection host="localhost" username="guest" password="guest" />
</amqp:config>
<flow name="app-rabbitmq-ordersFlow1" doc:id="aa37df28-a708-4d2d-8ee1-ee8ca0c4dfd0" >
<amqp:listener doc:name="OrderQueueListener" doc:id="88ebbb66-8592-44f2-aee0-2d39ddb66d63" config-ref="AMQP_Config" queueName="order" ackMode="IMMEDIATE"/>
<logger level="INFO" doc:name="RqbbitMQ Message" doc:id="4b2c8676-8baf-4ba2-adee-e28f0f1edc06" message="#[payload]"/>
</flow>
</mule>
Step 4: Test the MuleSoft Application Listener