Topology Spread Constraints for Increased Cluster Availability and Efficiency

Running a large-scale application serving customers across multiple regions can be challenging. You can use different methods to control the Kubernetes scheduler, but if you long for high availability and efficiency across different failure domains, it’s time to explore topology spread constraints.
Optimizing performance and availability can be tricky even when your systems don’t comprise numerous data centers across different countries or continents. Node Selector, Node Affinity, Pod Affinity, and Anti-affinity can help you tame the Kubernetes scheduler, but they may be insufficient for setups with multiple failure domains like regions, zones, and nodes.
By configuring topology spread constraints, you can ensure that your workloads stay online even if there is an outage or hardware failure in one zone. They can also let you gain a much finer level of control over your Pods’ distribution and support rolling update workloads and scaling replicas smoothly.
Here’s how Pod topology spreads work in Kubernetes clusters and how to use them.
Explaining Pod Topology Spreads
Although the name may initially sound like a philosophical concept, when it comes to the cloud, topology refers to the arrangement of elements within a network.
By configuring Pod topology spreads, you get fine-grained control over the distribution of pods across the failure domains.
A failure domain refers to a set of resources that can be negatively impacted in case of a failure. In the context of Kubernetes, there are three main types of such domains:
- Node failure domain refers to individual nodes within a cluster. If a node fails or becomes unreachable, it can affect the Pods running on it.
- Availability Zone failure domain represents distinct zones within a cloud provider’s infrastructure.
- Region failure domain involves a broader geographical region and comprises multiple Availability Zones (AZs).
Let’s now consider two examples to clarify their significance better.
Mitigating Different Failure Domains With Pod Topology Spreads
First, imagine a cluster of twenty nodes. You want to run a workload that automatically scales its replica number. It can scale anywhere from two to twenty Pods, and you want to run those replicas on as many separate nodes as possible. This approach helps to minimize the risk of a node failure affecting the workload.
Then let’s think about an application with fifteen replicas running on three nodes in the same Availability Zone, with five Pods on each node. You’ve mitigated the node failure risk, but clients interacting with the workload come from three distinct zones — and traffic spanning different AZs results in higher latency and network costs.
You can reduce them by distributing Pods across nodes in different AZs and routing clients to the instances inside the relevant zone. Deploying the workload in multiple zones in addition to running in on several nodes further decreases the risk of a failure affecting your Pods.
Normally, you’d want to distribute workloads evenly across every failure domain. You can configure that with pod topology constraints — and to do so, use the spec.topologySpreadConstraints field.
How Pod Topology Spread Constraints Work
Here’s an example of a pod topology spread constraint:
apiVersion: v1
kind: Pod
metadata:
  name: example-pod
spec:
  # Configure a topology spread constraint
  topologySpreadConstraints:
    - maxSkew: <integer>
      minDomains: <integer> # optional;
      topologyKey: <string>
      whenUnsatisfiable: <string>
      labelSelector: <object>
      matchLabelKeys: <list> # optional;
      nodeAffinityPolicy: [Honor|Ignore] # optional;
      nodeTaintsPolicy: [Honor|Ignore] # optional;
You can find a full explanation of each element in the Kubernetes documentation. For now, let’s just briefly outline the obligatory fields:
- maxSkew is the degree to which your Pods can be distributed unevenly across all zones. Its value must be more than zero.
- topologyKey is the key of node labels. Nodes with the same label and values belong to the same topology. Each topology instance is a domain to which the scheduler tries to assign a balanced number of pods.
- whenUnsatisfiable lets you decide what to do with a Pod when it doesn’t satisfy your spread constraint:
1. DoNotSchedule instructs the scheduler not to schedule it.
2. ScheduleAnyway tells the scheduler to schedule it and prioritize the nodes minimizing the skew. - labelSelector allows finding matching Pods. The number of Pods in their corresponding topology domain is based on the Pods matching the label selector.
Pod Topology Spread’s Relation to Other Scheduling Policies
Before topology spread constraints, Pod Affinity and Anti-affinity were the only rules to achieve similar distribution results. But their uses are limited to two main rules:
- Prefer or require an unlimited number of Pods to only run on a specific set of nodes;
- Try to avoid running more than one Pod on the same node.
As a more flexible alternative to Pod Affinity/anti-Affinity, topology spread constraints let you separate nodes into groups and assign Pods using a label selector. They also allow you to instruct the scheduler on how (un)evenly to distribute those Pods.
Topology spread constraints can overlap with other scheduling policies like Node Selector or taints. The last two fields of a pod topology spread let you decide on the nature of these relations:
- nodeAffinityPolicy lets you decide how to treat your Pod’s nodeAffinity and nodeSelector when calculating the topology spread skew. You get two options:
1. Honor only includes nodes matching nodeAffinity and nodeSelector.
2. Ignore, ignoring these settings and including all nodes in the calculations.
The Honor approach is the default if you leave this field empty. - nodeTaintsPolicy indicates how you wish to treat node taints when calculating pod topology spread skew. Here you also get two options: Honor or Ignore, with the latter being followed if you leave this field empty.
How to Use Topology Spread Constraints
Pod spread constraints rely on Kubernetes labels to identify the topology domains that each node is in.
For example, a node may have labels like this:
region: us-west-1
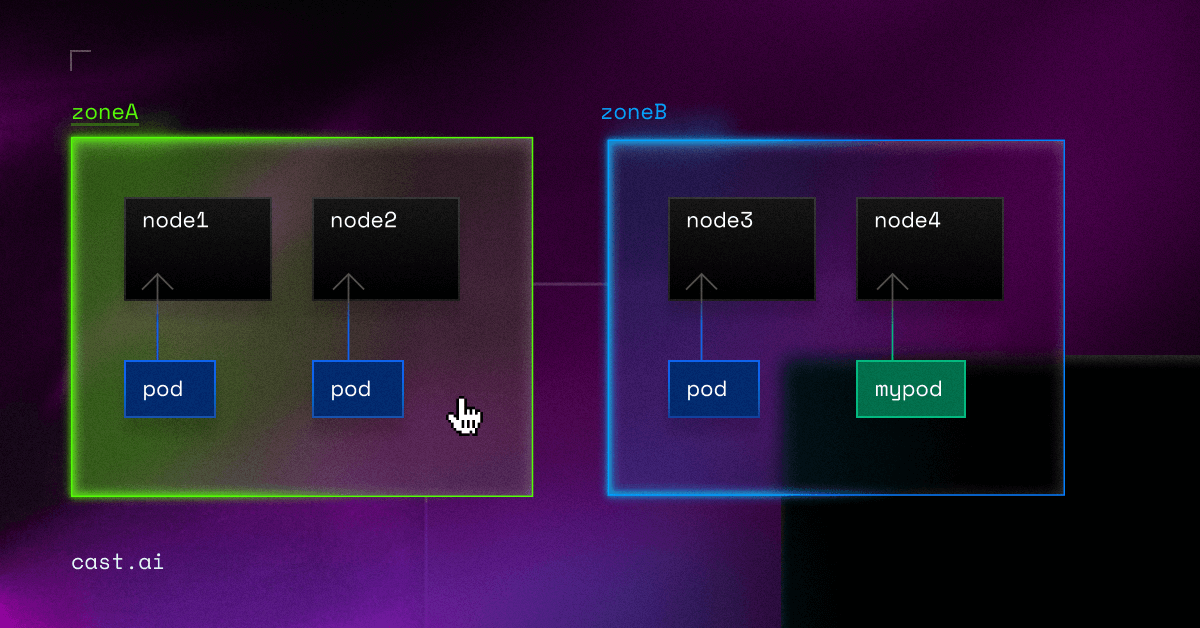
zone: us-west-1aSo if you have a cluster with four nodes with the following labels:
NAME    STATUS   ROLES    AGE     VERSION   LABELS
node1   Ready    <none>   2m26s   v1.16.0   node=node1,zone=zoneA
node2   Ready    <none>   7m48s   v1.16.0   node=node2,zone=zoneA
node3   Ready    <none>   2m55s   v1.16.0   node=node3,zone=zoneB
node4   Ready    <none>   2m43s   v1.16.0   node=node4,zone=zoneB
Then the cluster view would be like this:
+---------------+---------------+
|     zoneA     |     zoneB     |
+-------+-------+-------+-------+
| node1 | node2 | node3 | node4 |
+-------+-------+-------+-------+
You can check the Kubernetes documentation for more examples of topology spread constraints.
Applying labels can get messy, so you need a mechanism to ensure consistent labeling. To avoid having to apply labels manually, most clusters automatically populate well-known labels such as kubernetes.io/region.
When there is more than one topologySpreadConstraint describing a Pod, all these constraints get combined using a logical AND operation. The Kubernetes scheduler then looks for a node satisfying all these constraints.
Toward More Affordable Efficiency and Fault-Tolerance
Topology spread constraints help to ensure high availability and fault-tolerance in distributed systems. When combining them with CAST AI’s ability to identify and provision cheaper nodes, you can also benefit in terms of optimizing costs.
Here’s an example of a workload deployment utilizing spot instances for cost savings and topology spread constraints for increased fault-tolerance:
apiVersion: apps/v1
kind: Deployment
metadata:
  name: nginx-deployment
spec:
  selector:
    matchLabels:
      app: nginx
  replicas: 8
  template:
    metadata:
      labels:
        app: nginx
    spec:
      tolerations:
        - key: scheduling.cast.ai/spot
          operator: Exists
      nodeSelector:
        scheduling.cast.ai/spot: "true"
      topologySpreadConstraints:
        - maxSkew: 1
          topologyKey: topology.kubernetes.io/zone
          whenUnsatisfiable: DoNotSchedule
          labelSelector:
            matchLabels:
              app: nginx
      containers:
        - name: nginx
          image: nginx:1.14.2
          resources:
            requests:
              memory: "1024Mi"
              cpu: "500m"
Following this configuration, CAST AI’s Autoscaler will find and provision the most affordable instances that fit the workload in different availability zones.
After the deployment, workloads get distributed across nodes in different availability zones:
NAME                                STATUS    NODE                                   ZONE
nginx-deployment-76789fc756-28js7   Running   gke-cluster-07-03-cast-pool-263bc096   us-central1-a
nginx-deployment-76789fc756-6dt2x   Running   gke-cluster-07-03-cast-pool-263bc096   us-central1-a
nginx-deployment-76789fc756-7crcj   Running   gke-cluster-07-03-cast-pool-bb05def6   us-central1-b
nginx-deployment-76789fc756-7zx6z   Running   gke-cluster-07-03-cast-pool-e2f8a420   us-central1-c
nginx-deployment-76789fc756-8k546   Running   gke-cluster-07-03-cast-pool-e2f8a420   us-central1-c
nginx-deployment-76789fc756-bnzbq   Running   gke-cluster-07-03-cast-pool-e2f8a420   us-central1-c
nginx-deployment-76789fc756-jm658   Running   gke-cluster-07-03-cast-pool-bb05def6   us-central1-b
nginx-deployment-76789fc756-jmmdj   Running   gke-cluster-07-03-cast-pool-bb05def6   us-central1-b
As a result, your workload will keep running on the most cost-efficient resources even if a failure occurs in one of the zones.
If spot instances become unavailable, the Fallback feature can temporarily move your Pods to on-demand resources to ensure continued running.
Topology Spread Constraints: Limitations and Solutions
Topology spread constraints promise a greater level of distribution of pods across domains, but as with many other K8s aspects, they come with some nuances.
First, there is no guarantee that your constraints remain satisfied when Pods are removed. This could happen, for example, when scaling down a deployment leads to an imbalanced Pod distribution.
By default, the K8s scheduler doesn’t know all of your cluster’s zones or other topology domains. They are determined from the existing nodes in the cluster. This could lead to a problem in autoscaled clusters when a node pool or group scales to zero nodes. Topology domains need at least one node to be considered by autoscalers.
One workaround to these challenges is to use a cluster autoscaler aware of Pod topology spread constraints and the overall domain set like CAST AI.
The platform supports the zone topology key topology.kubernetes.io/zone, enabling your pods to be spread between availability zones and taking advantage of cloud redundancy. Read more in the documentation.
Conclusion
Topology spread constraints are an important asset in the Kubernetes user’s weaponry. Knowing how to use them helps you deploy and run more efficient and highly available workloads.
