Cross-Region AWS EFS Data Transfer Using AWS DataSync

Background
AWS DataSync is an AWS data transfer service that makes copying data much simpler, automated, and faster between NFS, S3, and EFS. AWS DataSync now supports automatic, efficient, and secure copying of files between two Amazon EFSs residing in two different AWS Regions. DataSync can be used to perform one-off migrations and also schedule base migrations for recovery and backups. Additionally, DataSync is ten times faster than all other open-source tools available.
In this blog, we will provide a step by step guide on how to transfer data between an AWS EFS in one AWS Region to an AWS EFS in another AWS Region.
To being, you'll need an Amazon AWS account, and source and destination AWS EFSs configured in two different AWS Regions.
How to Transfer Data EFS-to-EFS Within Cross Region
Deploy the DataSync Agent
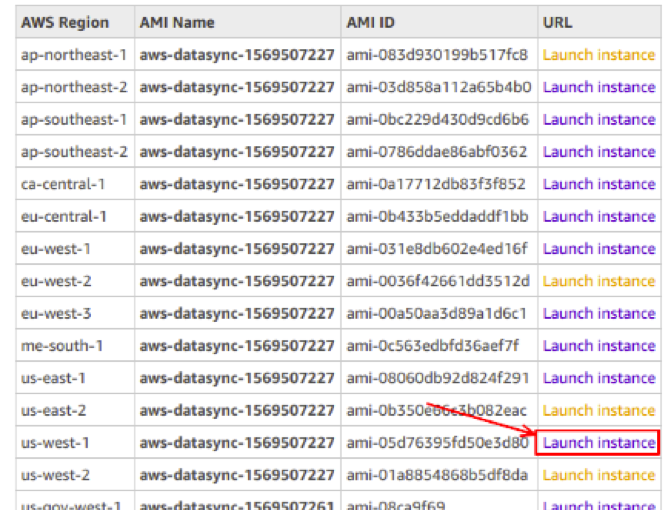
- Deploy the agent in the source region that has access to both the source and destination EFS. Go to the AWS Agent AMI List and select your AMI by AWS Region. For us-west-1, click on the Launch instance in front of the us-west-1.
2. Select your instance type. AWS recommends using one of the following instance types.
m5.2xlarge—for tasks that will transfer up to 20 million files.
m5.4xlarge—for tasks that will transfer more than 20 million files.
3. On the Configure Instance Details for Network page, choose "VPC" where your source EFS file system is located. Set "Auto-assign Public IP" to "Enable."
4. Choose "Next: Add Storage." The agent does not require additional storage, so you can skip this step and choose "Next: Add tags."
5. Make sure that the selected security group allows inbound access to HTTP port 80 from the web browser being used to activate the agent.
The security group of the source EFS allows inbound traffic from the agent and the agent allows outbound traffic to the source EFS. The traffic uses the standard NFS port, 2049. Finish by choosing "Review and Launch."
Activate the AWS DataSync Agent
- Go to the activation screen and enter the agent’s IP/domain name in the Agent address box and choose "Get key."
- When activated, the activation key will be displayed on the screen. If activation fails, make sure to check the security group of the agent is configured properly.
- Then choose "Create agent."

Configure the Locations for Source and Destination
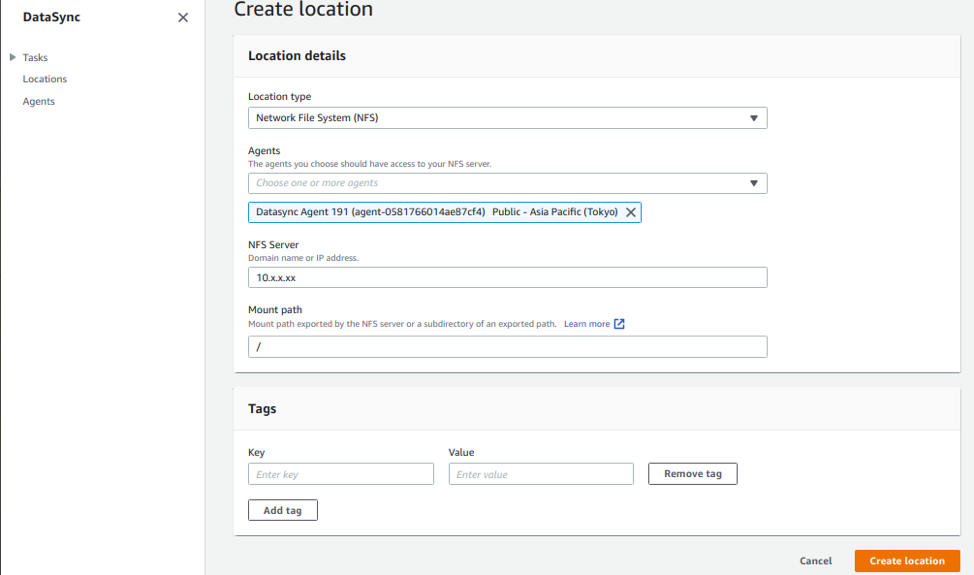
To create a source location:
- On the Location page, choose "Create location."
- Select "NFS server" from the Location type.
- Select your Agents from the list. You can add more than one agent.
- For the NFS server, enter the IP address of the source EFS address.
- For "Mount path," if you want all the files, enter "/"; otherwise select your desired path.
- Choose "Create location."
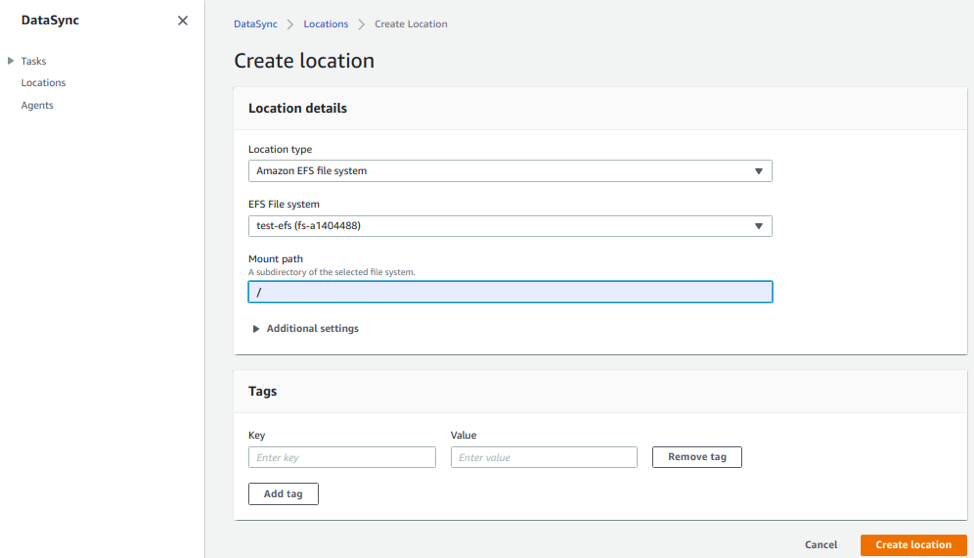
To create a destination location:
- On the Location page, choose "Create location."
- Select "EFS" from the Location type.
- Select your EFS File System from the list.
- For the NFS server, enter the IP address of the source EFS address.
- For the "Mount path," if you want the files to be copied to the root directory, enter "/" otherwise determine a path.
- Choose "Create location."
Create a Data Transfer Task
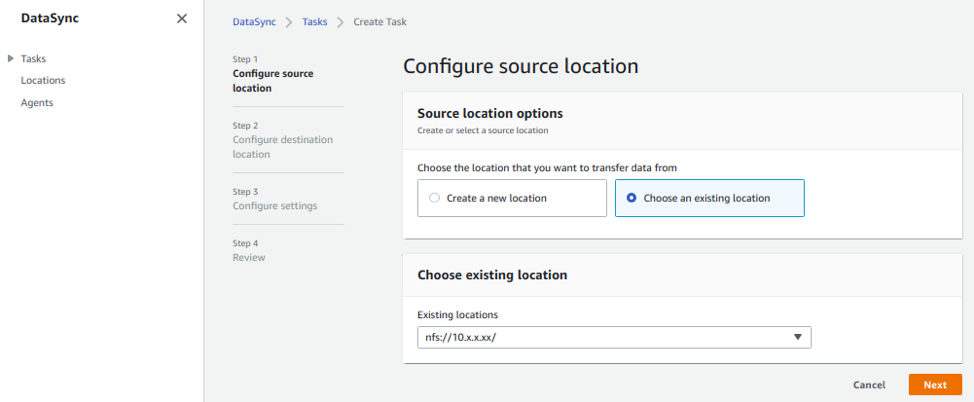
- From the navigation pane, choose "Task," and click on "Create task."
- On the "Configure source location" page, choose an existing location and select the source location we created above.
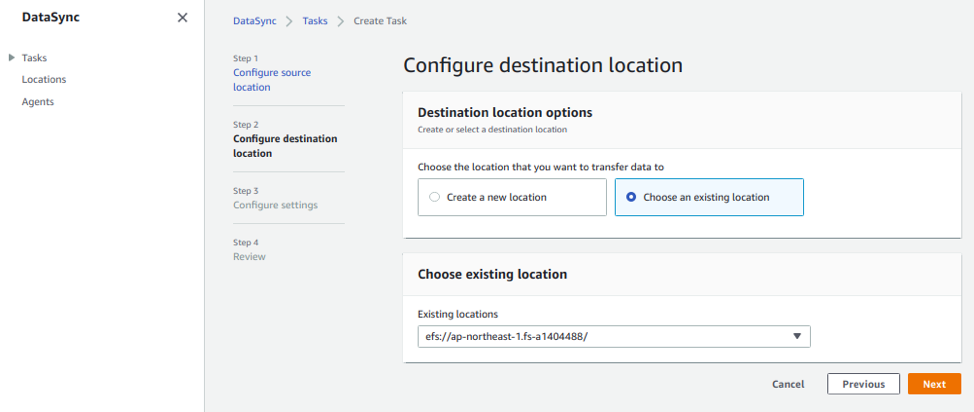
- Click "Next" and you will be prompted to select a destination. Choose an existing location and select the destination location we created above.
- Choose "Next" and enter a name for the "Task Name."
- Choose "Next" and choose "Create task."
Start the Transfer
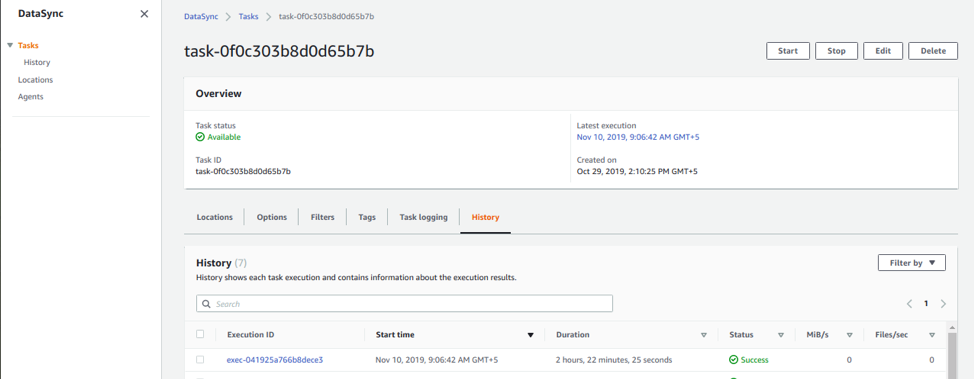
From the navigation pane, choose "Tasks," select your task, and click on "Start" to start data transfer.
