Building a Rest API With AWS Gateway and Node.js
AWS Gateway is a powerful tool for building APIs that scale to meet the demands of modern web and mobile applications. With AWS Gateway, you can create RESTful APIs that expose your data and business logic to developers, who can then build rich, interactive applications that consume your API.
REST API is an industry standard for building scalable, distributed web applications. With AWS Gateway, you can easily build a REST API that supports both GET and POST methods, as well as complex query parameters. You can also add support for other HTTP methods, such as PUT, DELETE, and HEAD.
Using AWS Gateway, you can quickly create APIs that are secure and robust. You can also use it to deploy your code to a production environment with minimal effort. Additionally, AWS Gateway allows for seamless integration with other AWS services, such as S3 and DynamoDB, enabling you to easily add complex functionality to your APIs.
Prerequisites
Before building a RESTful API with AWS Gateway, you should have the following in place:
- Create an AWS account if you don’t have one already.
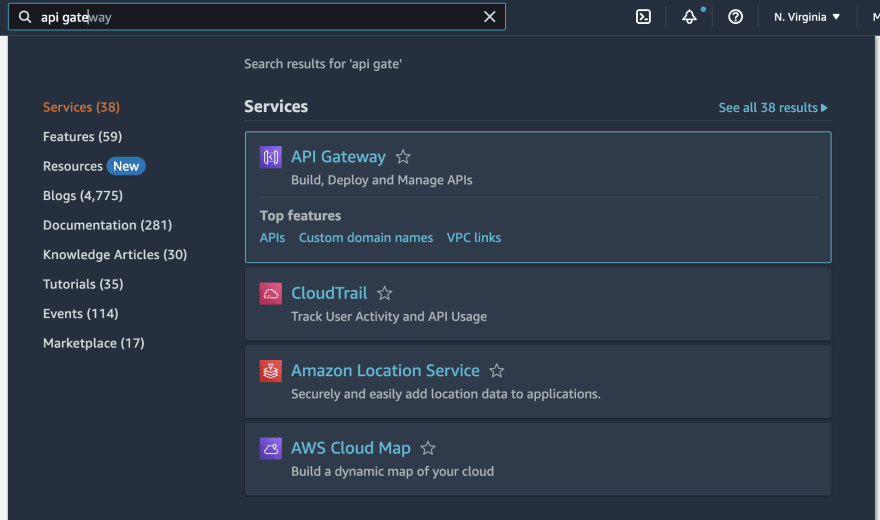
- Log in to the AWS Management Console and navigate to the Amazon API Gateway service.
-
Click on “Create API” and select “REST API.”

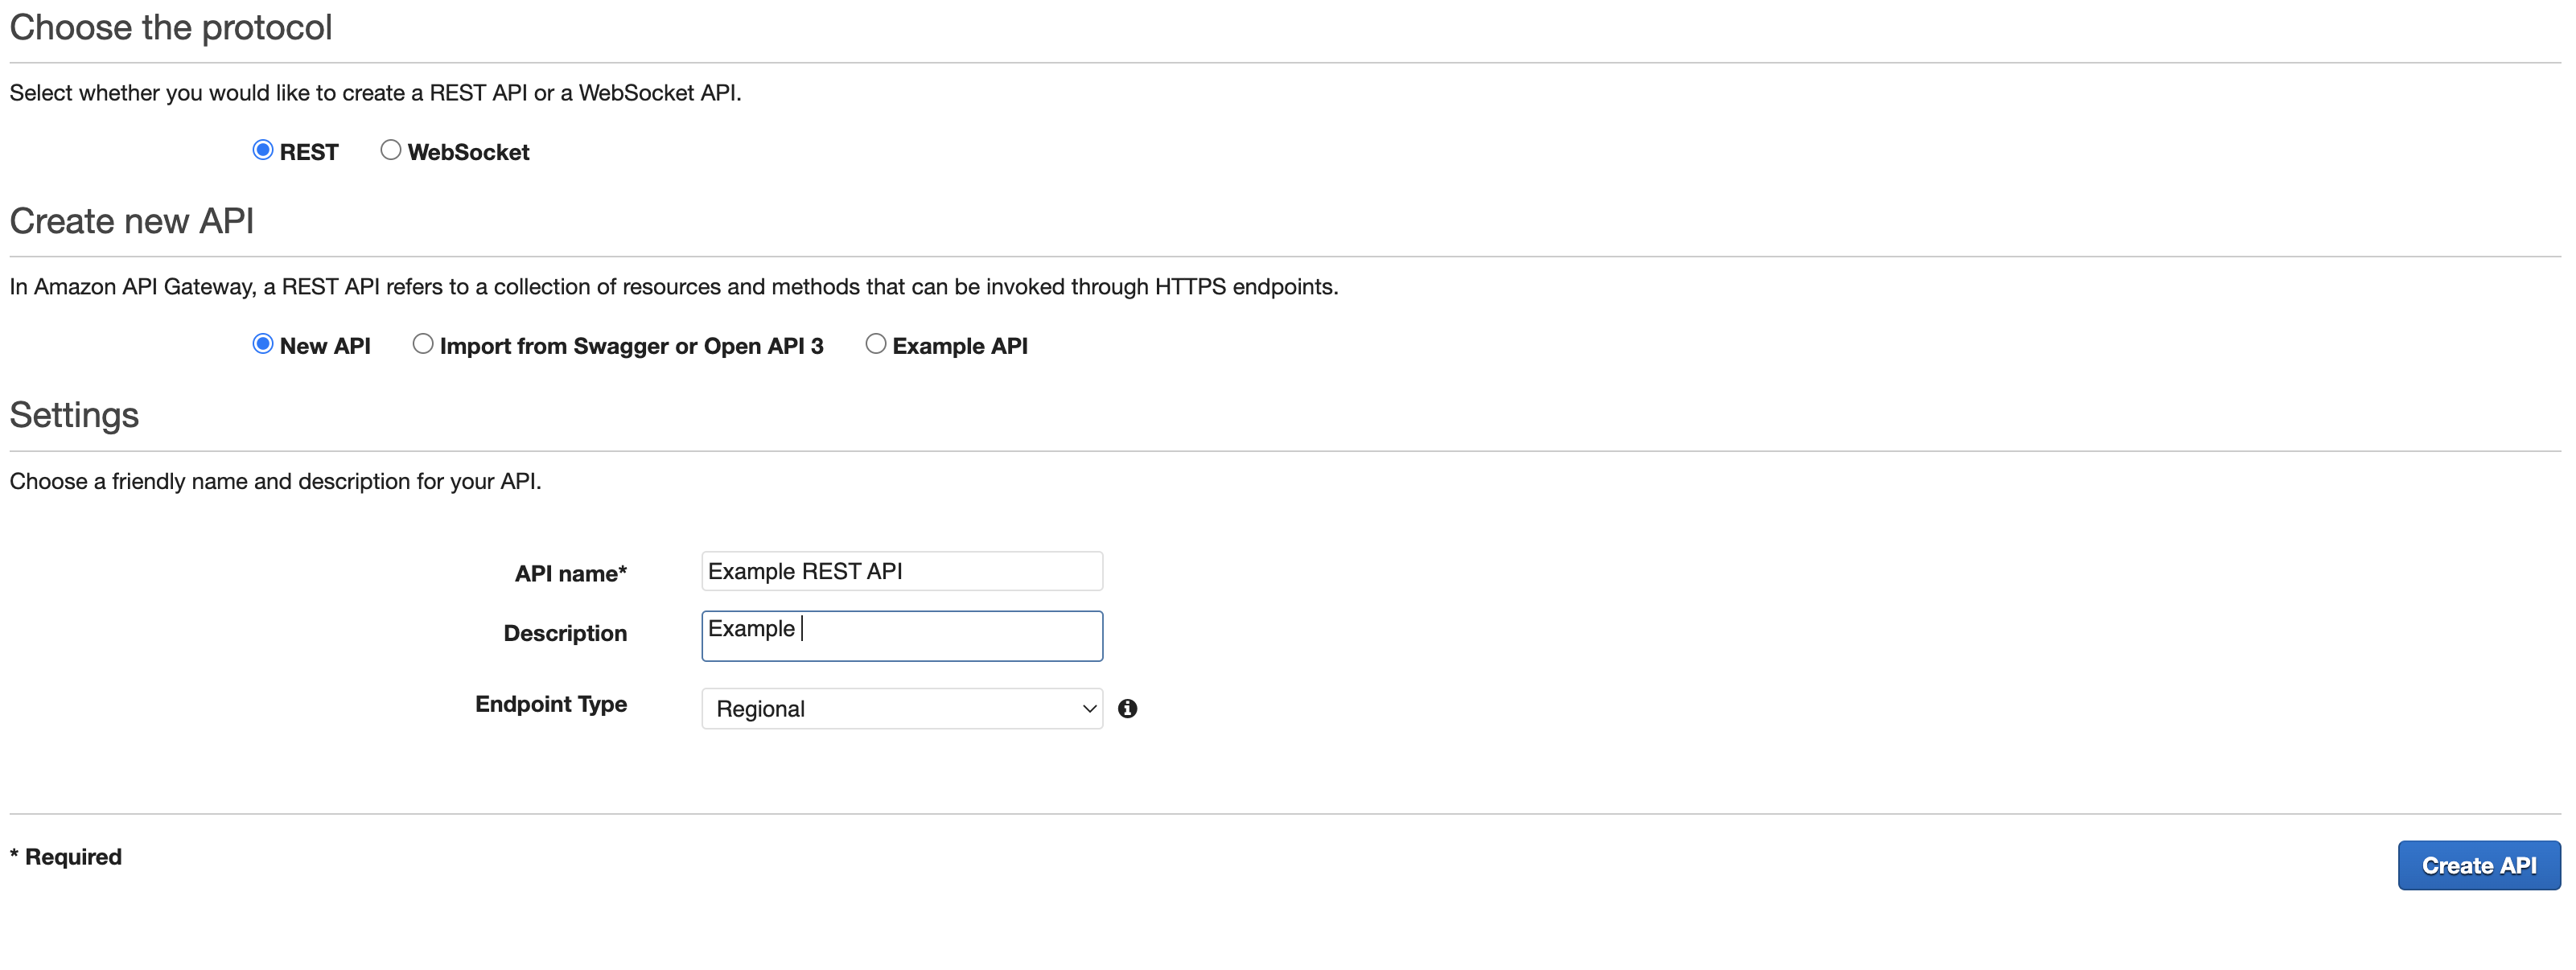
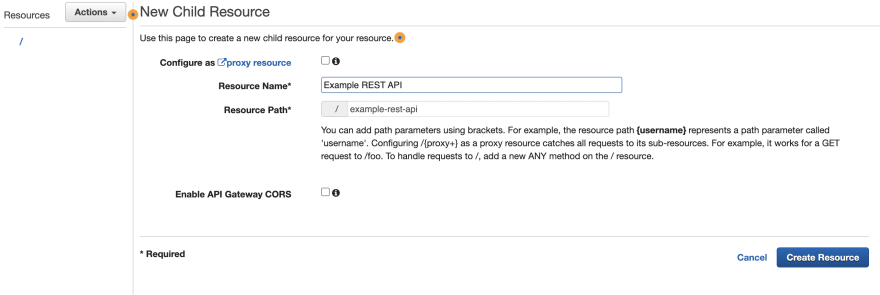
- Click on “Actions,” and define the resource and click “Create Resource.”
- Select the newly created resource and click on “Create Method.”
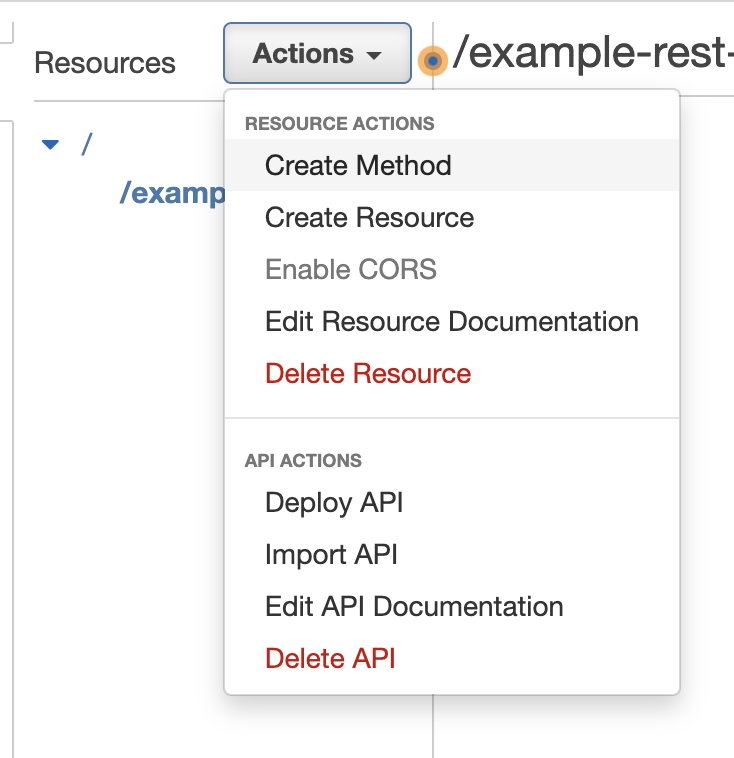
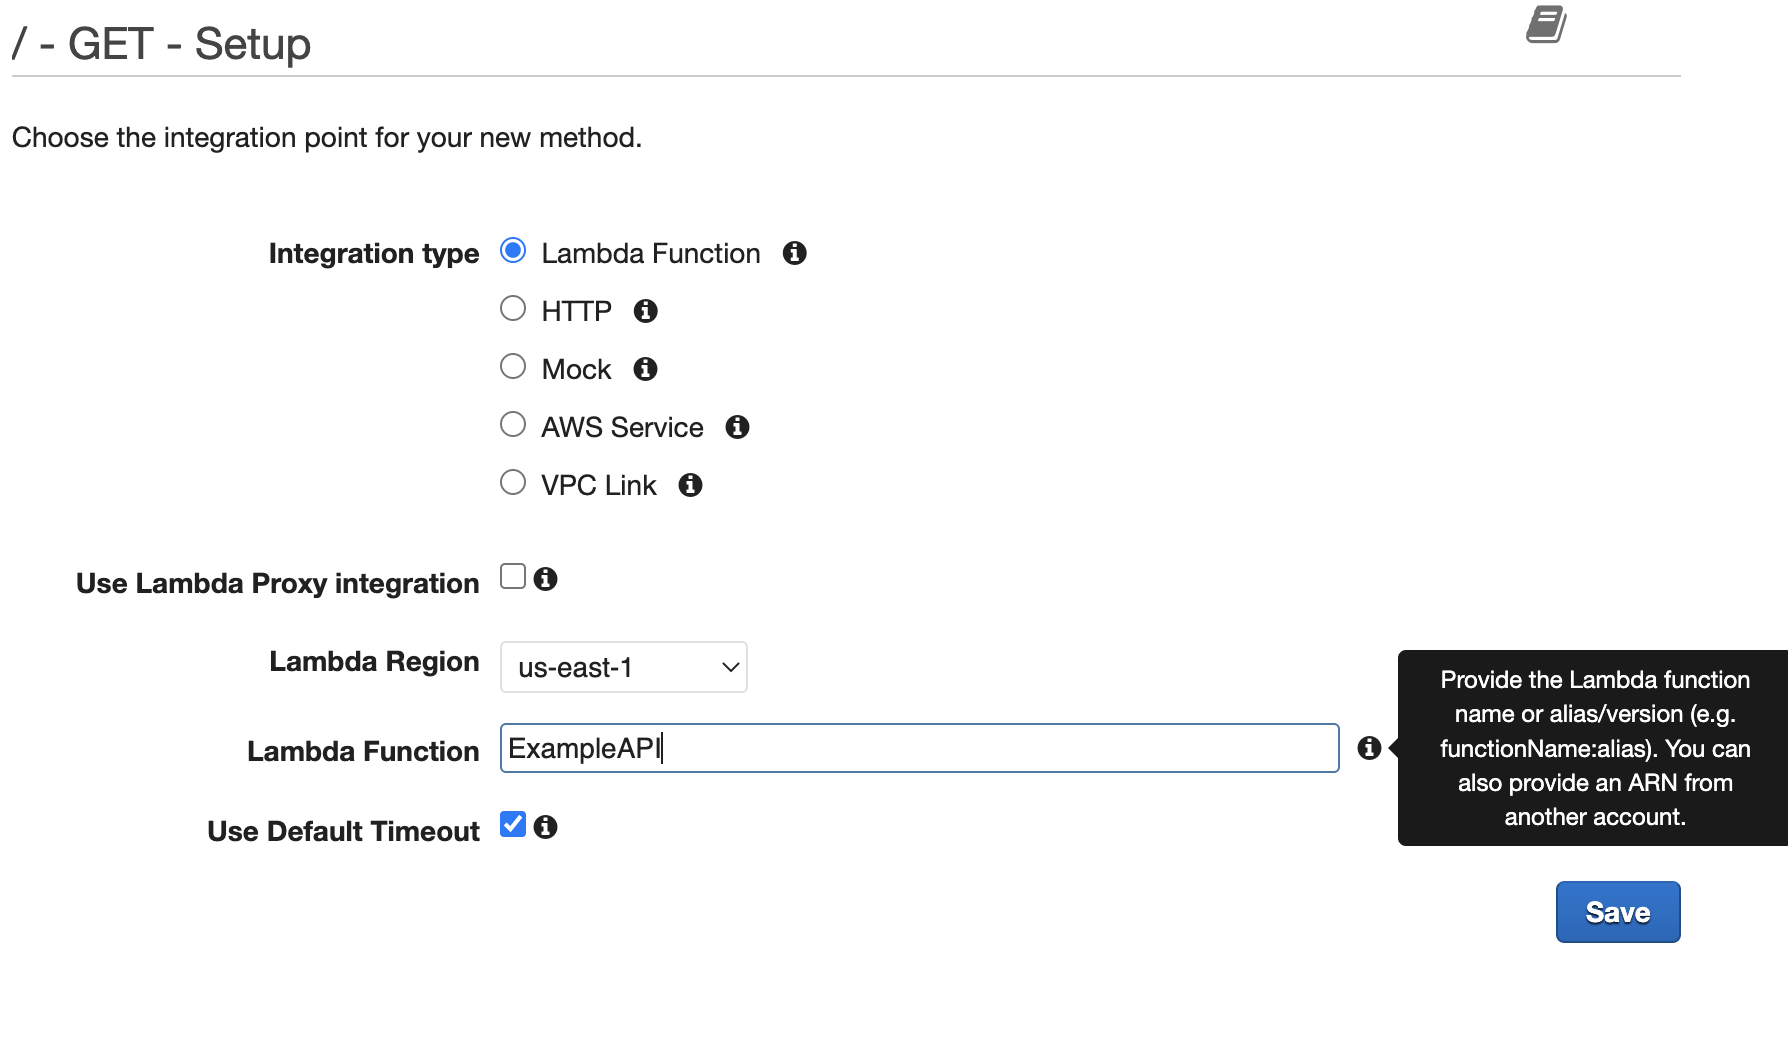
- Choose the HTTP verb (e.g., GET, POST, PUT, etc.) and click on the checkmark to create the method.
- In the “Integration type” section, select “Lambda Function” and enter the name of the Lambda function you want to use to handle the API requests. Click on “Save” to create the API.
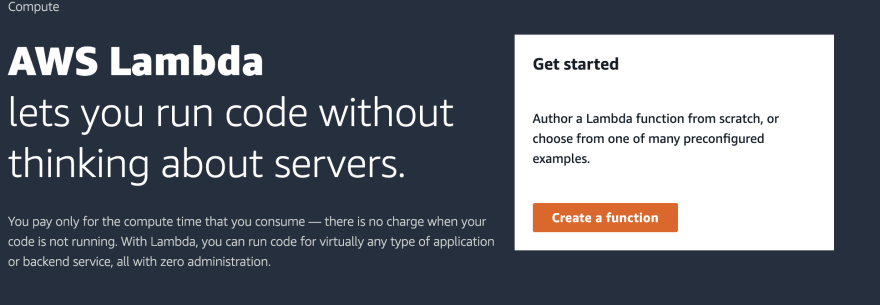
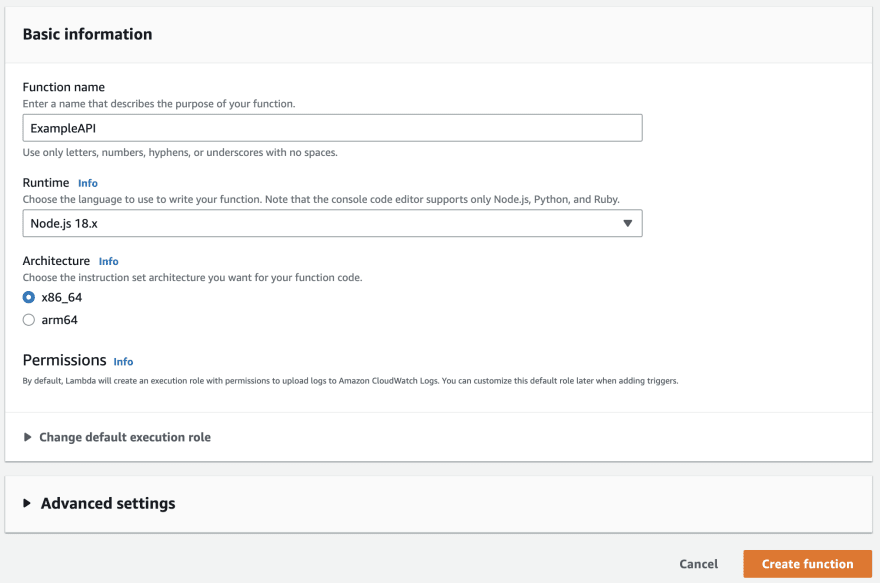
- Select Node from the Runtime Dropdown.
Code Example
let user = {
    firstName: "John",
    lastName: "Smith",
    location: "Bay Area"
}
export const handler = async(event) => {
    // TODO implement
    console.log(">>>> Inside Lambda Function....");
    if(event.httpMethod === "GET")
    {
        getUserRecord(event);
    }
    if(event.httpMethod === "POST")
    {
        createUserRecord(event)
    }
    const response = {
        statusCode: 200,
        body: JSON.stringify({
            user_details: user
        })
    };
    return response;
};
function getUserRecord (event) {
    const response = {
        statuscode: 200,
        body: JSON.stringify({
            user_details: user
        })
    };
    return response;
}
function createUserRecord(event) {
    const body = JSON.parse(event.body);
    const response = {
        statusCode: 200,
        body:JSON.stringify({
            message: "successfully created",
            details: body
        })
    };
    return response;
}
The code first creates an object called user that contains some properties like firstName, lastName, and location.
Then the handler function checks the HTTPMethod property of the event object; if it’s “GET,” it calls the getUserRecord function, and if it’s “POST,” it calls the createUserRecord function.
Both getUserRecord and createUserRecord functions take the event object as input and return the response object.
In the getUserRecord function, it creates a response object with a statusCode of 200 and a body that contains a JSON object with user_details property which is the user object created at the beginning.
In the createUserRecord function, it first parse the event.body which is a string, into a JSON object and then creates a response object with a statusCode of 200 and a body that contains a JSON object with message and details properties.
Deploy the API by clicking on “Actions” and selecting “Deploy API.”

Select a deployment stage (e.g., “prod” or “test”) and click on “Deploy.” Use the generated API endpoint to make requests to your API.
Running and Testing The Code in Postman
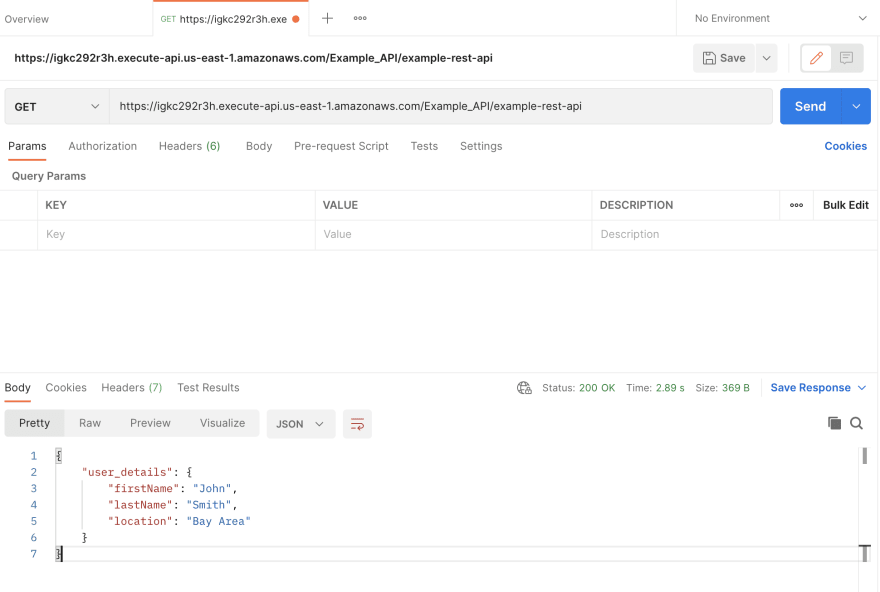
Now, our API is up and running. You can send a test HTTP request through Postman. By sending a request to your invoke URL, you should see a 200 OK status code. For this test, no request body is needed for the incoming request.
Wrapping Up
With that, we’ve created a simple RESTful API using AWS Lambda. This code can then be expanded on as needed to build APIs for your applications.

