MQTT Messaging With Java and Raspberry Pi
In December 2021, I had the chance to write a three-post blog series for HiveMQ. They provide an MQTT compatible message broker you can install yourself, or through a cloud service they provide. That cloud service is free to connect up to 100 devices! Even for the most enthusiastic maker, that’s a lot of microcontrollers or computers!
You can find example code for many programming languages on the HiveMQ site, but as a Java and Raspberry Pi fan, I wanted to add some extra examples. The full descriptions are available on the HiveMQ blog, so let me give you a short overview here on DZone to give you an idea of the possibilities.
Sensor Data From Raspberry Pi to HiveMQ Cloud With Java and Pi4J
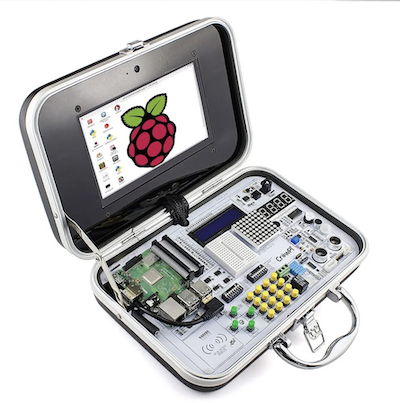
The first blog describes a data-publisher application and the full sources are available on GitHub. We will read the data from different sensors and send their values to HiveMQ Cloud. Because every “maker” will have his/her own ideas and wishes for a project, we will not focus on components and wiring, but use an easy starter kit that is perfect for this demo project: the CrowPi. This pre-wired kit makes it very easy to get started with electronics programming as all the components are pre-assembled and wired. At least that’s one thing you don’t need to worry about or can mess up, if the sensor doesn't work as expected, it's most probably an error in your code...

By combining the CrowPi with example Java-code from the Pi4J project and the HiveMQ MQTT-library, it becomes very easy to send values from the sensors either periodically or on events.
Visualize Sensor Data on a TilesFX Dashboard
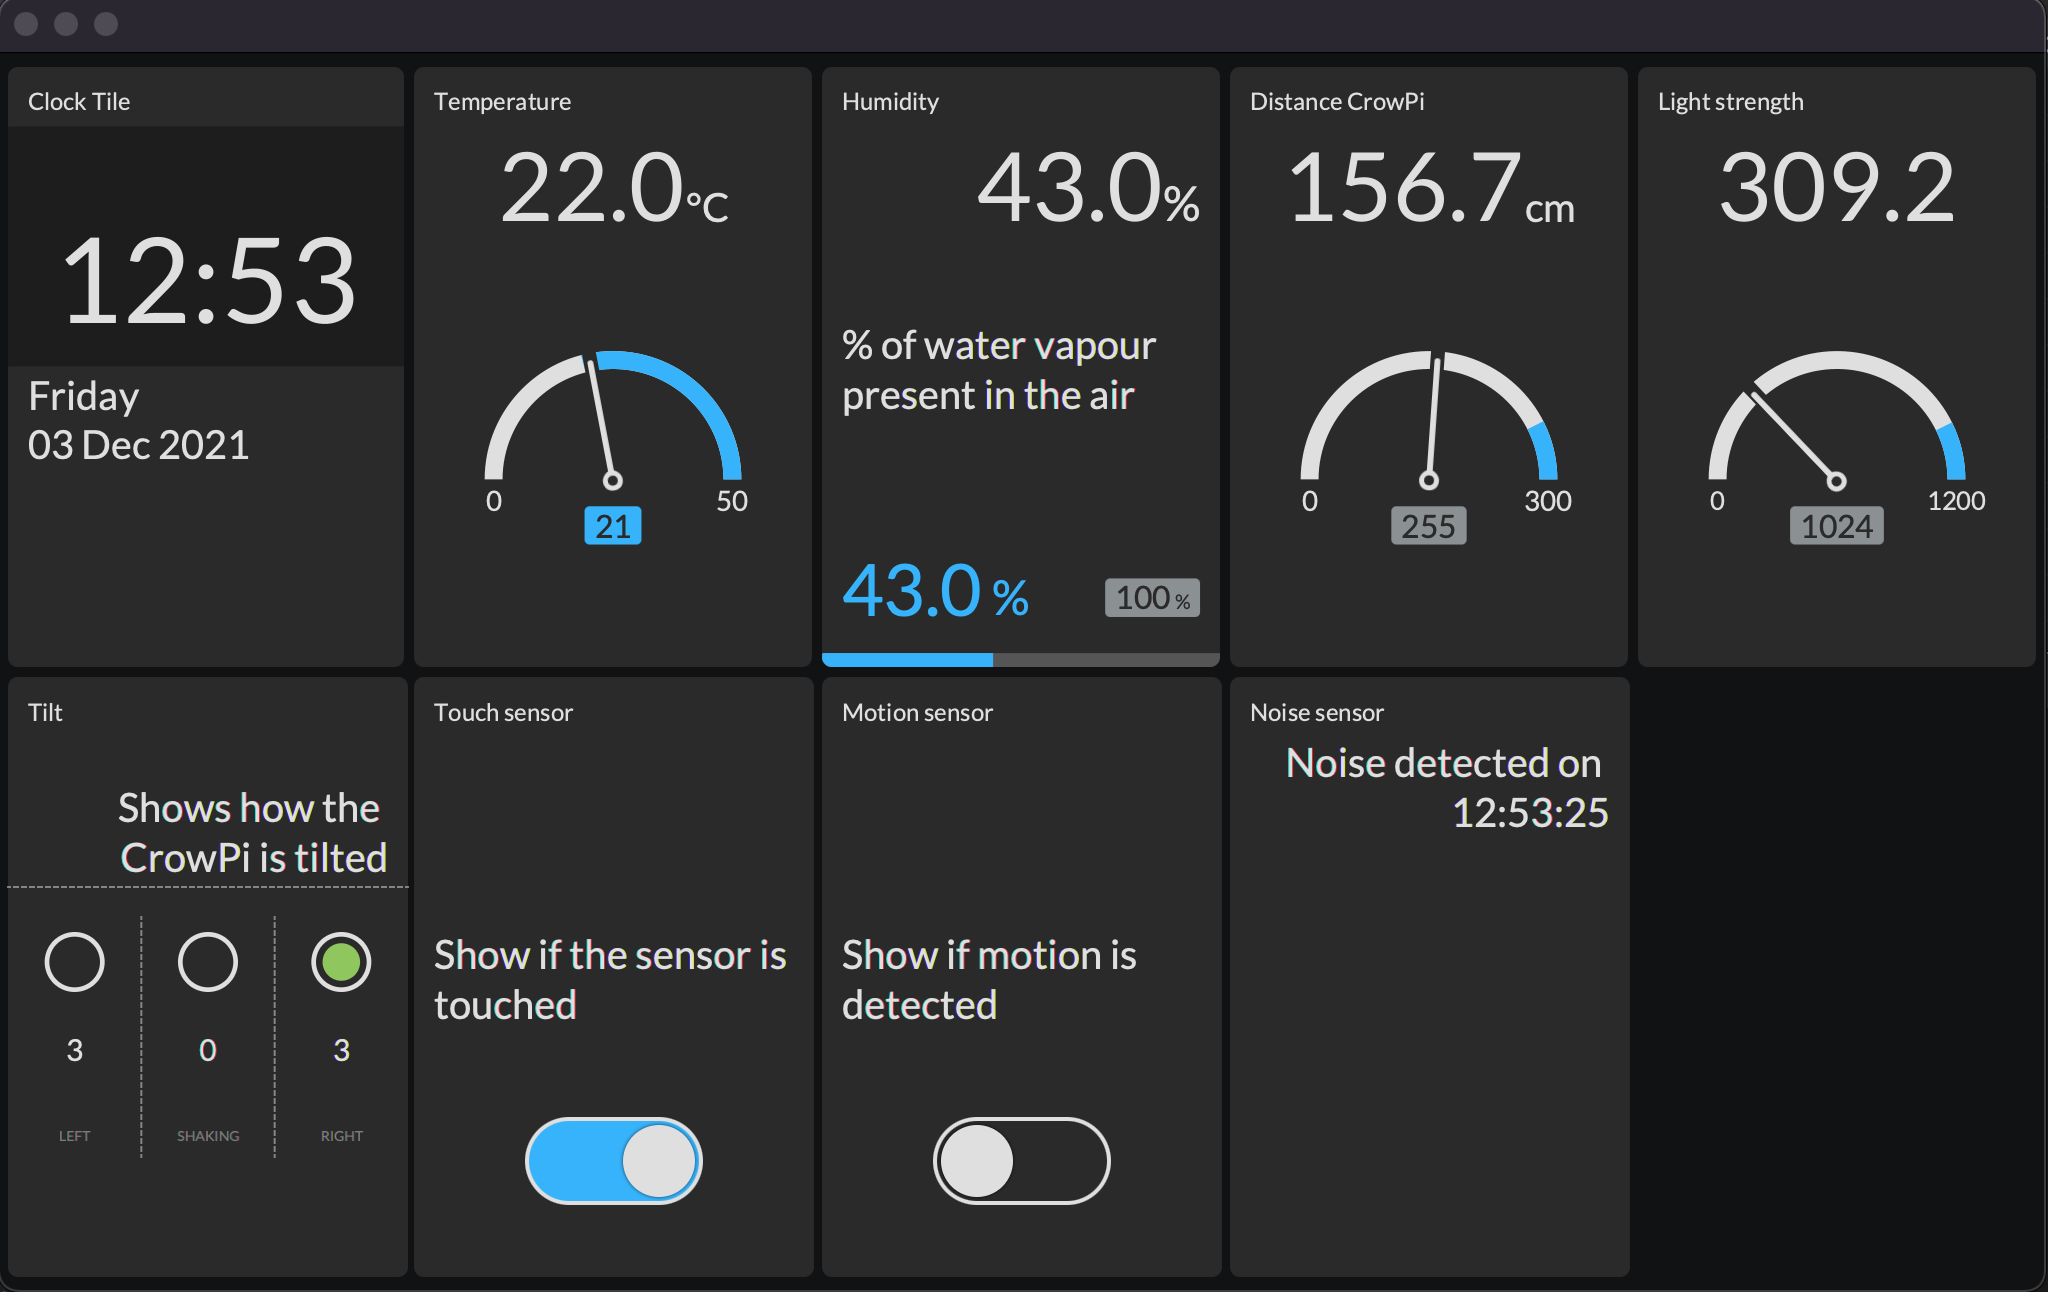
In the second blog post, a JavaFX dashboard application is created that connects to the message broker and visualizes all the data in a nice overview.

This application doesn't use any specific functionality of the Raspberry Pi as it doesn't connect directly to the sensors, so it can also run on any PC. The advantage to run on a Raspberry Pi is the price. Imagine you want to have this dashboard always on to monitor a set of devices. In that case, a cheap version of the Raspberry Pi and a small screen are sufficient to run this application.
Sending Sensor Data From Raspberry Pi Pico
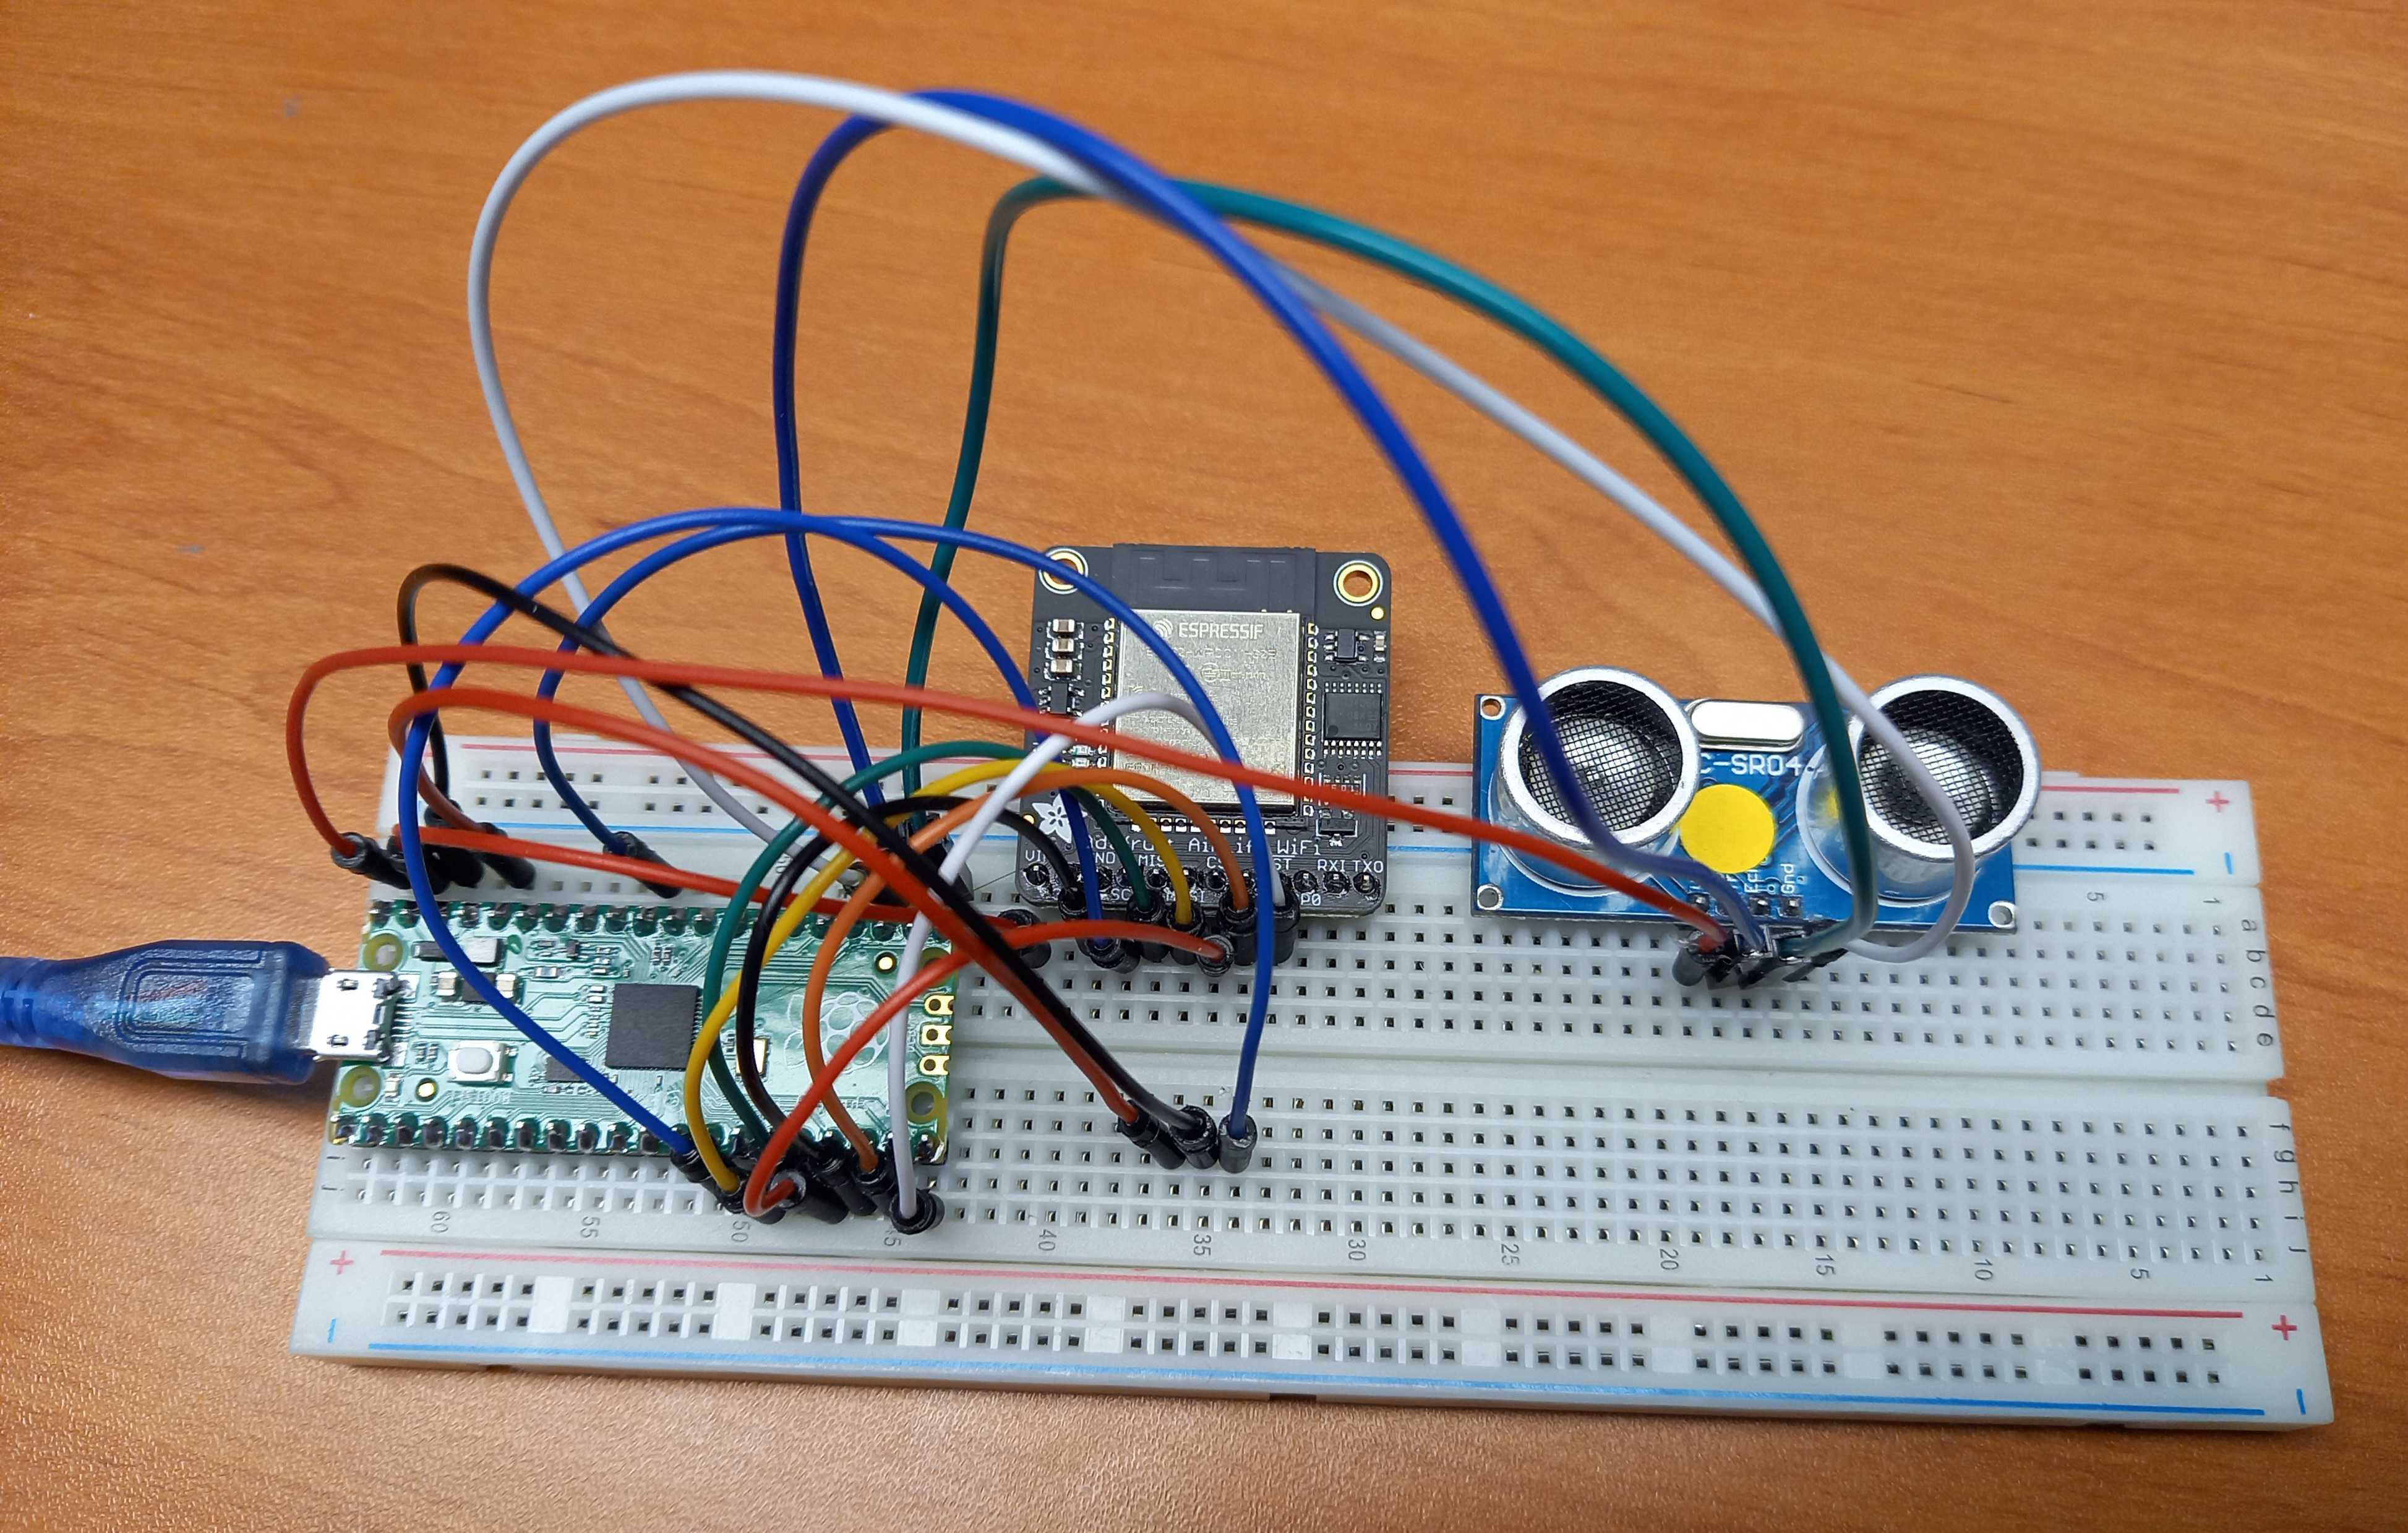
The third post uses a completely different type of board: the Raspberry Pi Pico that was launched in early 2021. This isn't a full Linux PC like the other Raspberry Pi boards, but a microcontroller, comparable to an Arduino. The Pico is a small and versatile board with the RP2040 microcontroller chip that has been developed by Raspberry Pi itself. This RP2040 features a dual-core Arm Cortex-M0+ processor with 264KB internal RAM and support for up to 16MB of off-chip Flash, combined with a wide range of GPIOs (supporting I2C, SPI, and programmable I/O (PIO)). But the biggest surprise of this Pico: the price of only $4!
By using an "Adafruit AirLift WiFi" module, a distance sensor, and CircuitPython, it is possible to send sensor values with MQTT to HiveMQ cloud with a single and simple source file.

The original article contains a lot of extra info, the sources, etc. and the end result looks like this:
Conclusion
MQTT is a great way to exchange data between devices. If you want to run this locally, you can install Mosquitto (a light-weight MQTT Message Broker) on a Raspberry Pi. But if you are looking for an installation/update-free solution, HiveMQ Cloud is worth investigating as it is free for up to 100 clients.

