Xamarin.Forms — Working With Firebase Storage
Introduction
Xamarin.Forms code runs on multiple platforms, each of which has its own filesystem. This means that reading and writing files are most easily done using native file APIs on each platform. Alternatively, embedded resources are also a simpler solution to distribute the data files with an app.
Firebase
Firebase gives you functionality like analytics, databases, messaging, and crash reporting so you can move quickly and focus on your users.
Firebase is a backend platform for building web, Android, and iOS applications. It offers a real-time database, different APIs, multiple authentication types, and a hosting platform. This is an introductory tutorial which covers the basics of the Firebase platform and explains how to deal with its various components and sub-components.
Build Apps With Firebase
Real-time Database
Notifications
Authentication
Hosting
Prerequisites
Visual Studio 2017 (Windows or Mac)
Setting Up a Xamarin.Forms Project
Start by creating a new Xamarin.Forms project. You’ll learn more by going through the steps yourself.
Choose the Cross-platform App project under Visual C#-->Cross-platform in the New Project dialog.
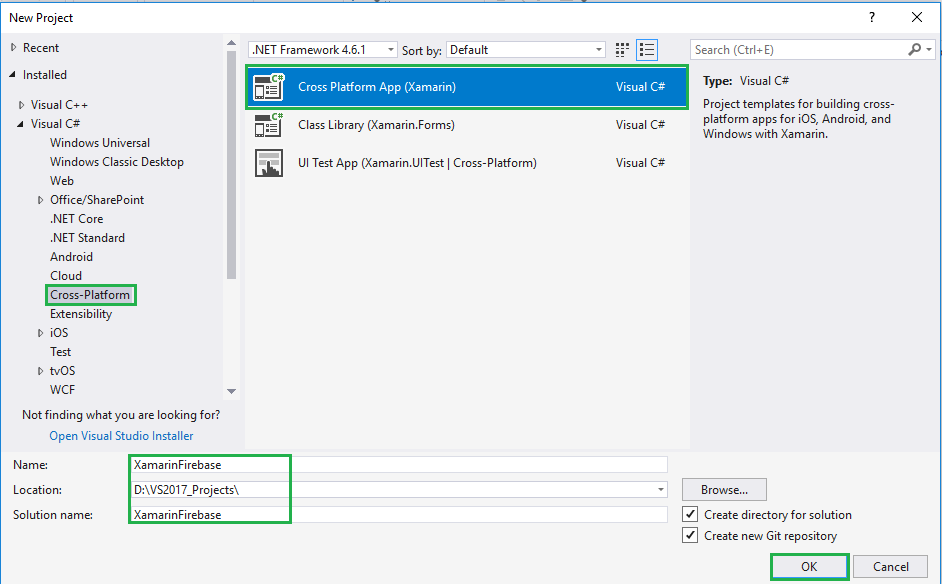
Now select the Blank App and choose Portable Class Library (PCL).
Subsequently, go to the solution. There, you'll find all the files and sources of your project (PCL). Now, select XAML page and double-click to open the MainPage.Xaml page.
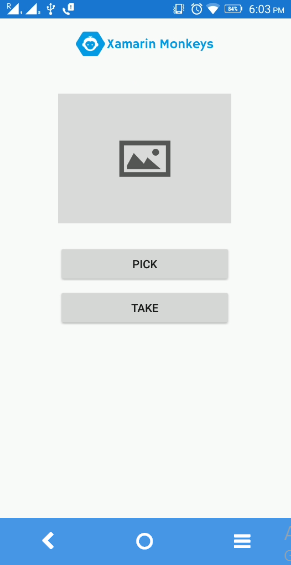
You now have a basic Xamarin.Forms app. Click the Play button to try it out.
Create a Project in Firebase
In this step, create a project in Firebase. Go to this link.
Click "Add Project."

Now, give the project name and select your country then read the terms. Afterward, click "Create project."
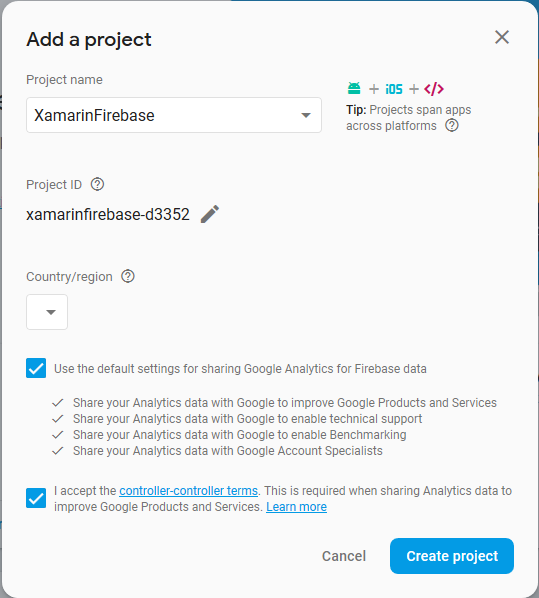
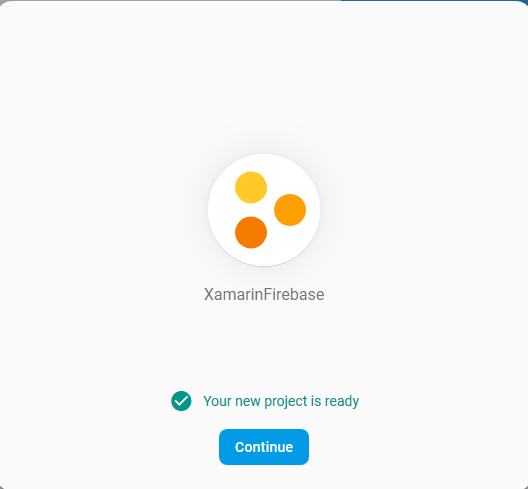
Now, your project is ready. Click continue.
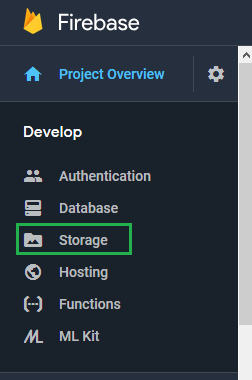
In this step, choose Storage under the Project Overview.
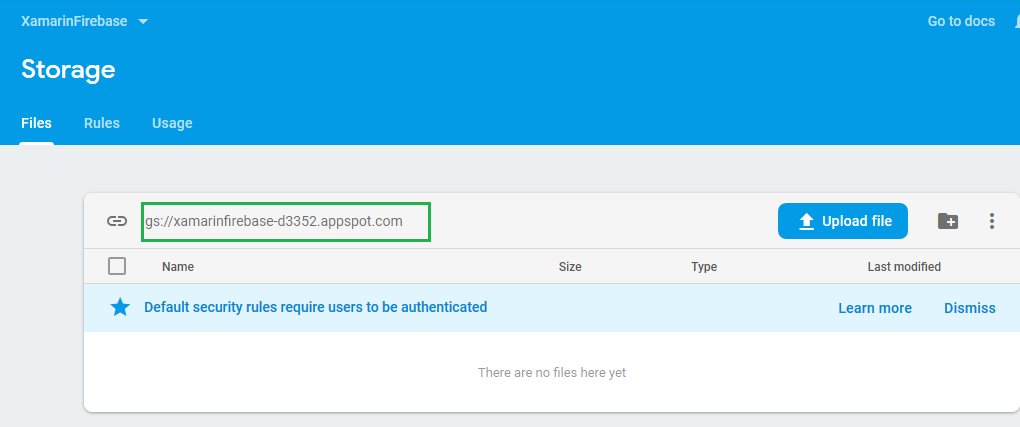
In this step, you can copy the API URL.
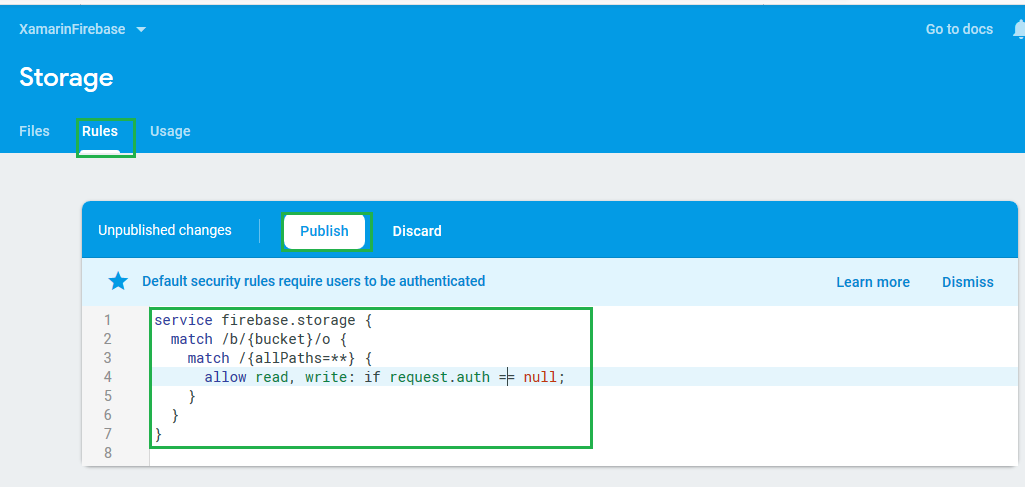
Now, you will change the following Storage Rules Afterward, click "Publish."
Setting Up the User Interface
Go to MainPage.Xaml and write the following code.
MainPage.xaml
<?xml version="1.0" encoding="utf-8" ?>
<ContentPage xmlns="http://xamarin.com/schemas/2014/forms"
             xmlns:x="http://schemas.microsoft.com/winfx/2009/xaml"
             xmlns:local="clr-namespace:XamarinFirebase"
             x:Class="XamarinFirebase.MainPage">
    <ContentPage.Content>
        <StackLayout HorizontalOptions="CenterAndExpand" VerticalOptions="StartAndExpand">
            <Image x:Name="imgBanner"></Image>
            <Image x:Name="imgChoosed" HeightRequest="200"></Image>
            <Button x:Name="btnPick" Text="Pick" Clicked="btnPick_Clicked"></Button>
            <Button x:Name="btnStore" Text="Store" Clicked="btnStore_Clicked"></Button>
        </StackLayout>
    </ContentPage.Content>
</ContentPage>
Click the Play button to try it out.
NuGet Packages
Now, add the following NuGet packages:
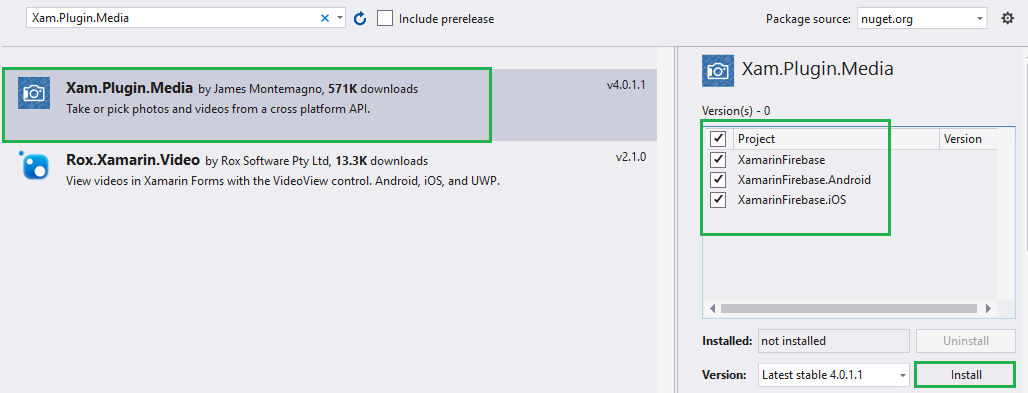
Xam.Plugin.Media
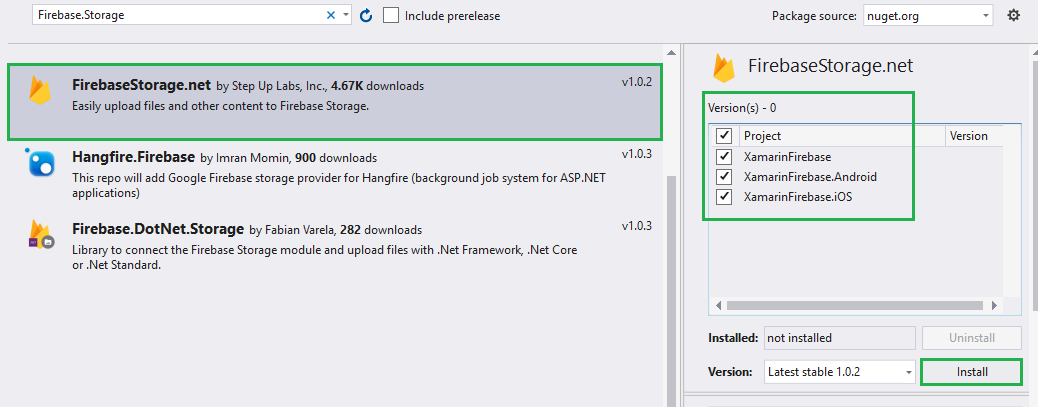
Firebase.Storage
Go to Solution Explorer and select your solution. Right-click and select "Manage NuGet Packages for Solution."
Xam.Plugin.Media
Firebase.Storage
Permissions — for Android
In this step, give the required permissions to your app. These are the required permissions for this app:
CAMERA
READ_EXTERNAL_STORAGE
WRITE_EXTERNAL_STORAGE
AndroidManifest.xml
<?xml version="1.0" encoding="utf-8"?>
<manifest xmlns:android="http://schemas.android.com/apk/res/android" android:versionCode="1" android:versionName="1.0" package="com.companyname.XamarinFirebase">
   <uses-sdk android:minSdkVersion="15" />
    <uses-permission android:name="android.permission.CAMERA" />
    <uses-permission android:name="android.permission.READ_EXTERNAL_STORAGE" />
    <uses-permission android:name="android.permission.WRITE_EXTERNAL_STORAGE" />
<application android:label="XamarinFirebase.Android">
    <provider android:name="android.support.v4.content.FileProvider" android:authorities="com.companyname.XamarinFirebase.fileprovider" android:exported="false" android:grantUriPermissions="true">
        <meta-data android:name="android.support.FILE_PROVIDER_PATHS" android:resource="@xml/file_paths"></meta-data>
    </provider>
  </application>
</manifest>
In this step, create an XML file under Resource-->xml folder to get file paths.
Go to Solution—>Android —>Right click—>New—>Xml—> file_paths.xml.
Now, write the following code to get the file paths:
file_paths.xml
<?xml version="1.0" encoding="utf-8" ?>
<paths xmlns:android="http://schemas.android.com/apk/res/android">
  <external-files-path name="my_images" path="Pictures" />
  <external-files-path name="my_movies" path="Movies" />
</paths>
Pick an Image
Now, write the following code to pick an image from your device.
MainPage.xaml.cs
 private async void btnPick_Clicked(object sender, EventArgs e)
        {
            await CrossMedia.Current.Initialize();
            try
            {
                file = await Plugin.Media.CrossMedia.Current.PickPhotoAsync(new Plugin.Media.Abstractions.PickMediaOptions
                {
                    PhotoSize = Plugin.Media.Abstractions.PhotoSize.Medium
                });
                if (file == null)
                    return;
                imgChoosed.Source = ImageSource.FromStream(() =>
                {
                   var imageStram = file.GetStream();
                    return imageStram;
                });
                await StoreImages(file.GetStream());
            }
            catch (Exception ex)
            {
                Debug.WriteLine(ex.Message);
            }
        }
Store the Image to Firebase
Now, write the following code to store images to Firebase.
MainPage.xaml.cs
private async void btnStore_Clicked(object sender, EventArgs e)
        {
            await StoreImages(file.GetStream());
        }

        public async Task<string> StoreImages(Stream imageStream)
        {
            var stroageImage = await new FirebaseStorage("xamarinfirebase-d3352.appspot.com")
                .Child("XamarinMonkeys")
                .Child("image.jpg")
                .PutAsync(imageStream);
            string imgurl = stroageImage;
            return imgurl;
        }
Full Code — MainPage.Xaml.cs
MainPage.Xaml.cs
using Firebase.Storage;
using Plugin.Media;
using Plugin.Media.Abstractions;
using System;
using System.Collections.Generic;
using System.Diagnostics;
using System.IO;
using System.Linq;
using System.Text;
using System.Threading.Tasks;
using Xamarin.Forms;

namespace XamarinFirebase
{
    public partial class MainPage : ContentPage
    {
        MediaFile file;
        public MainPage()
        {
            InitializeComponent();

            imgBanner.Source = ImageSource.FromResource("XamarinFirebase.images.banner.png");
            imgChoosed.Source = ImageSource.FromResource("XamarinFirebase.images.default.jpg");
        }

        private async void btnPick_Clicked(object sender, EventArgs e)
        {
            await CrossMedia.Current.Initialize();
            try
            {
                file = await Plugin.Media.CrossMedia.Current.PickPhotoAsync(new Plugin.Media.Abstractions.PickMediaOptions
                {
                    PhotoSize = Plugin.Media.Abstractions.PhotoSize.Medium
                });
                if (file == null)
                    return;
                imgChoosed.Source = ImageSource.FromStream(() =>
                {
                   var imageStram = file.GetStream();
                    return imageStram;
                });
                await StoreImages(file.GetStream());
            }
            catch (Exception ex)
            {
                Debug.WriteLine(ex.Message);
            }
        }

        private async void btnStore_Clicked(object sender, EventArgs e)
        {
            await StoreImages(file.GetStream());
        }

        public async Task<string> StoreImages(Stream imageStream)
        {
            var stroageImage = await new FirebaseStorage("xamarinfirebase-d3352.appspot.com")
                .Child("XamarinMonkeys")
                .Child("image.jpg")
                .PutAsync(imageStream);
            string imgurl = stroageImage;
            return imgurl;
        }
    }
}
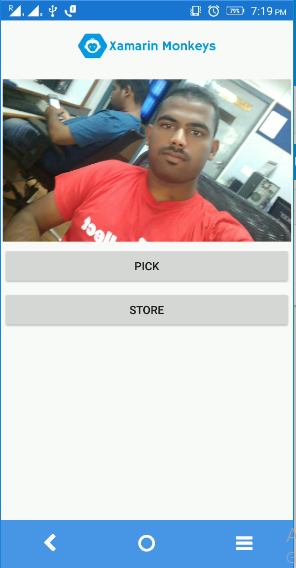
Click the Play button to try it out.
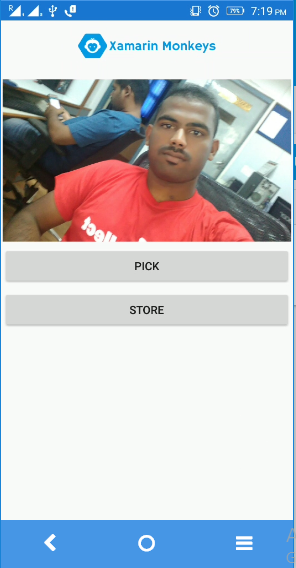
Now, go see your Firebase app.
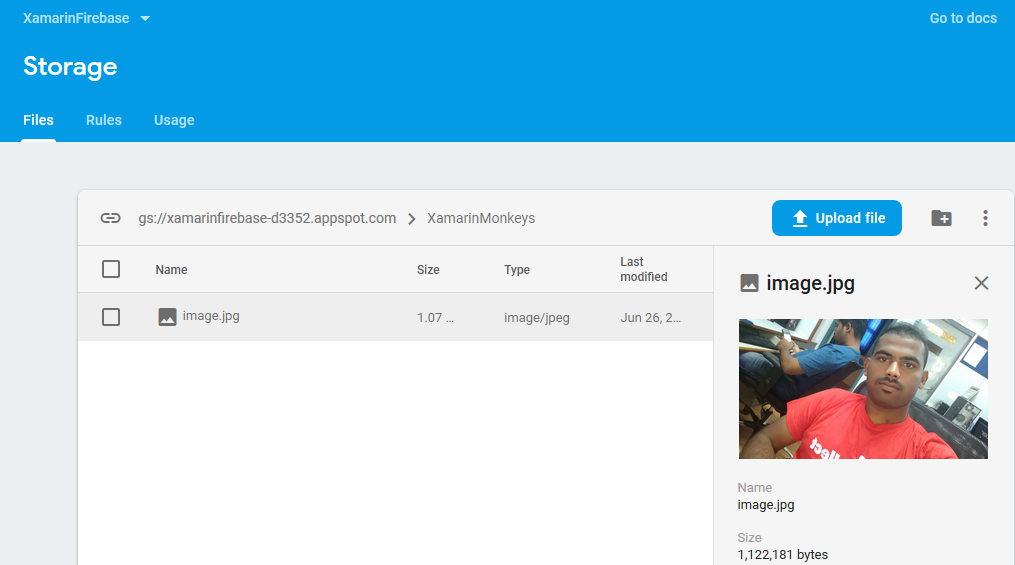
I hope you now understand how to use Firebase storage in Xamarin.Forms.
Thanks for reading. Please share comments and feedback.

