Advanced Basics: Bootstrap 4 With ASP.NET Core TagHelpers
The title of this post, Advanced Basics, takes the basics and fundamental concepts of what a developer has learned, whether it be a technique or library, and extends it exponentially to advance it to be something more efficient and useful for future projects.
We kick this post off by combining some Bootstrap with ASP .NET Core TagHelper goodness to provide a worthy post (maybe even a series? See below for more).
With Bootstrap being the dominant CSS library for grid layouts, components, and prototyping web pages, it's meant to make design (translation: CSS) easier for developers when building web applications.
Personally, I still can't believe it's been eight years since Bootstrap's inception.
Developers and designers alike continue to make great strides using this CSS/JavaScript library. There are a vast number of websites dedicated to this awesome library to extend Bootstrap even further.
However, developers usually want a quick prototype of a page and to not spend all of our time looking up Bootstrap components and layout syntax. We want to use the tools we find familiar to build websites relatively quick.
ASP.NET Core TagHelpers
ASP.NET Core introduced TagHelpers back in 2015 and presented a new way to write HTML through your own custom HTML tags. Even though they've been around for four years, they give developers a better way to write HTML code and allows the encapsulation of components into "server-side" controls (for you WebForm fans out there).
You may have seen some of the other TagHelpers posts I've written: creating A/B tests, Smart Links, Scheduled Links, and Image Layouts.
Since I know how everyone loves CSS, I thought we could make some Bootstrap TagHelpers to leverage (and speed up) the design of websites along with some tips and techniques along the way.
This post will focus on Bootstrap 4.1.3.
Where to Start
Our first stop with Bootstrap is the container. Even though this is merely a simple DIV, we can use this as our first component. It's a simple demonstration to show the fundamentals of how TagHelpers work.
Containers include a DIV with a class specifying either "container" or "container-fluid".
<div class="container">
<!-- Content here -->
</div>
or
<div class="container-fluid">
...
</div>
This makes our TagHelper extremely easy.
Let's build out our class and call it the ContainerTagHelper (snazzy name, right?)
[HtmlTargetElement("container")]
public class ContainerTagHelper: TagHelper
The attribute HtmlTargetElement presents a "signature" to our TagHelper. This is how Core identifies TagHelpers in your HTML. Our new ContainerTagHelper also inherits all of the functionality from the base TagHelper class.
Simple, right?
Next, we need some settings for our container. Even though it's a simple TagHelper, we do need to account for some attributes.
[HtmlAttributeNotBound, ViewContext]
public ViewContext ViewContext { get; set; }

[HtmlAttributeName("id")]
public string Id { get; set; }

[HtmlAttributeName("fluid")]
public bool IsFluid { get; set; }
Placing these inside our TagHelper gives Core an indication of what other attributes could be used inside the HTML. For example, defining a DIV is great, but leaving it without an id makes it more difficult for JavaScript to work with on the client-side.
This gives us the following syntax:
<container id="myContainer" fluid>We don't need all of the attributes. We could just have a container tag, but in this example, we add an id and fluid attribute.
One thing I like to add to my TagHelpers is the ViewContext. This was brought over from the olden days of ASP.NET MVC HtmlHelpers. After trying to figure out how to get the ViewContext into a TagHelper, I realized I was trying too hard.
By placing a ViewContext attribute on a ViewContext property, ASP.NET Core automatically property-injects the ViewContext into your class (I found this out when building out the A/B TagHelper Tests).
We Need Process!
Finally, we need a way to build the HTML based on our component. We need to process it.
Every TagHelper has a Process and ProcessAsync method you can override. Personally, I recommend the ProcessAsync because we want to maximize the throughput of our components.
public override async Task ProcessAsync(TagHelperContext context,
    TagHelperOutput output)
{
    var childData = (await output.GetChildContentAsync()).GetContent();

    output.TagName = "div";
    output.Attributes.Add("class",
        IsFluid ? "container-fluid" : "container");

    if (!string.IsNullOrEmpty(Id))
    {
        output.Attributes.Add("id ", Id);
    }

    output.Content.SetHtmlContent(childData);
}
Since this is a container and other components are nested below it, we process the ChildContent first and retrieve the container's contents and place it into childData.
We replace the old container tag with a new Tag of DIV, insert the class based on the fluid property, and finally, if there is an ID used, add the ID attribute to the DIV.
using System.Threading.Tasks;
using Microsoft.AspNetCore.Mvc.Rendering;
using Microsoft.AspNetCore.Mvc.ViewFeatures;
using Microsoft.AspNetCore.Razor.TagHelpers;

namespace BootstrapTagHelperLib.Layout
{
    [HtmlTargetElement("container")]
    public class ContainerTagHelper: TagHelper
    {
        [HtmlAttributeNotBound, ViewContext]
        public ViewContext ViewContext { get; set; }

        [HtmlAttributeName("id")]
        public string Id { get; set; }

        [HtmlAttributeName("fluid")]
        public bool IsFluid { get; set; }

        public override async Task ProcessAsync(TagHelperContext context,
            TagHelperOutput output)
        {
            var childData = (await output.GetChildContentAsync()).GetContent();

            output.TagName = "div";
            output.Attributes.Add("class",
                IsFluid ? "container-fluid" : "container");

            if (!string.IsNullOrEmpty(Id))
            {
                output.Attributes.Add("id ", Id);
            }

            output.Content.SetHtmlContent(childData);
        }
    }
}
As you can see, there's not much to this TagHelper.
A Test Run
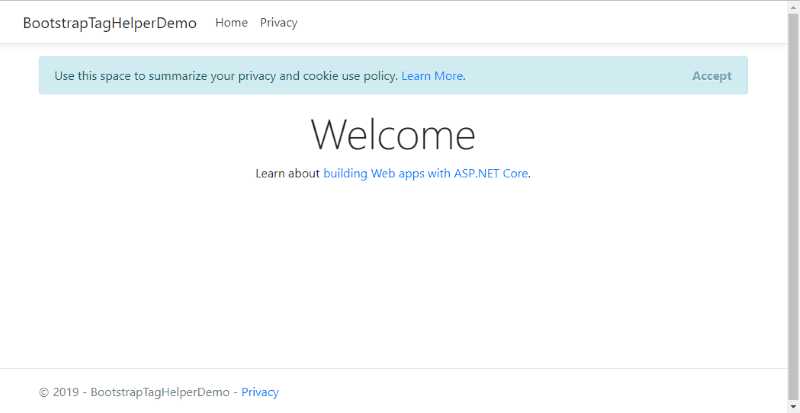
As you know, when you create a brand new ASP.NET Core 2.2 project, there's a new screen layout for Core 2.2 and the project uses Bootstrap. Woo hoo!

So why not use this project as a test run?
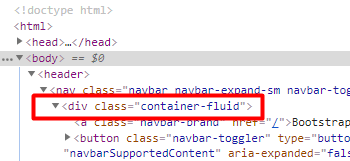
I went into the source and replaced all containers with a Container TagHelper. On some of them, I added a fluid attribute.

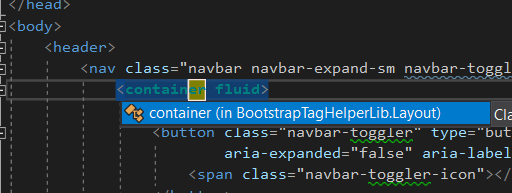
Now, did you notice the IntelliSense in Visual Studio?
As with every other class library, when you reference the library, Visual Studio's IntelliSense provides all of the assistance to help you find your TagHelpers.
After including the library and running the project, we now have a complete container, TagHelper.

While it's not much of a TagHelper, it explains how to include nested content into a TagHelper and that will be useful later.
What Is the Point of TagHelpers?
At first, I didn't see TagHelpers as something a developer would deem useful, but over time, I started to see where they could really save time.
- Since these are server-side components, they give the developer a semi-transitional path from the old WebForms ASCX days.
- If you are building a CMS, implementing custom TagHelpers to encapsulate complex functionality would be as easy as including them in the CMS as HTML tags. The server would render them and, presto, instant HTML. I'm pretty sure the user would find this extremely helpful instead of cut-and-pasting JavaScript/CSS/HTML based on a developer's component specification.
- TagHelpers could include various technologies when rendering. For example, if you created a regular web page and added an AMPTagHelper for different content, it could render the page as a Google AMP page for mobile users.
These are just a few simple concepts but can be expanded further to consolidate website components for ASP.NET Core.
Conclusion
ASP.NET Core TagHelpers, coupled with a library like Bootstrap, is something extremely useful when dealing with end-users or content editors.
With custom TagHelpers, the user would be able to understand the HTML syntax for a web page. This would make TagHelpers an excellent bridge between users and developers.

