Build a Real-Time Materialized View From Postgres Changes
Neon’s support for Postges’ logical replication features opens up a variety of interesting use cases for real-time streaming architectures based on change data capture. We previously demonstrated how to use Debezium to fan out changes from Postgres by using Redis as a message broker.
Today, we’ll explore how you can leverage the Apache Kafka and Kafka Connect ecosystem to capture and process changes from your Neon Postgres database. Specifically, you’ll learn how to stream changes from Postgres to Apache Kafka and process those changes using ksqlDB to create a materialized view that updates in response to database changes.
It’s possible to run Apache Kafka, Kafka Connect, and ksqlDB on your infrastructure; however, this guide will be using Confluent Cloud to host these components so we can focus on enabling data streaming and building a materialized view instead of managing infrastructure.
Why Apache Kafka With Postgres for Materialized Views?
Postgres is a mature and battle-tested database solution that supports materialized views, so why do we need messaging infrastructure like Apache Kafka to process events and create a materialized view? We previously explained the importance of avoiding the dual-write problem when integrating your application with message brokers, so let’s focus on the data streaming and performance concerns instead.
As a reminder, a materialized view stores the result of a query at a specific point in time. Let’s take a look at an example. Imagine you have a write-heavy application that involves two tables represented by the following SQL:
CREATE TABLE players (
    id SERIAL PRIMARY KEY,
    name TEXT NOT NULL
);

CREATE TABLE player_scores (
    id SERIAL PRIMARY KEY,
    score DECIMAL(10, 2) NOT NULL,
    player_id INTEGER REFERENCES players(id),
    CONSTRAINT fk_player
        FOREIGN KEY(player_id)
        REFERENCES players(id)
        ON DELETE CASCADE
);
This database contains a players table to store player information and a player_scores table to track their scores. You might be required to create a leaderboard table that keeps track of each player's total score (using a SUM aggregate function), retain a history of these changes, and notify subscribers about changes to the leaderboard in real time.
Using a materialized view is one option for keeping track of the total scores. The following SQL would create a materialized view to achieve this functionality in Postgres:
CREATE MATERIALIZED VIEW player_total_scores AS
SELECT
    p.id AS player_id,
    p.name,
    COALESCE(SUM(s.score), 0) AS total_score
FROM
    players p
LEFT JOIN
    player_scores s ON p.id = s.player_id
GROUP BY
    p.id;
Keeping the view current requires issuing a REFRESH MATERIALIZED VIEW after each insert to the player_scores table. This could have significant performance implications, doesn’t retain leaderboard history, and you still need to stream the changes to downstream subscribers reliably unless you want them to poll the database for changes.
A more scalable and flexible approach involves a microservices architecture that uses change data capture with logical replication to stream player data and score events to an Apache Kafka cluster for processing, as outlined in the following architecture diagram.
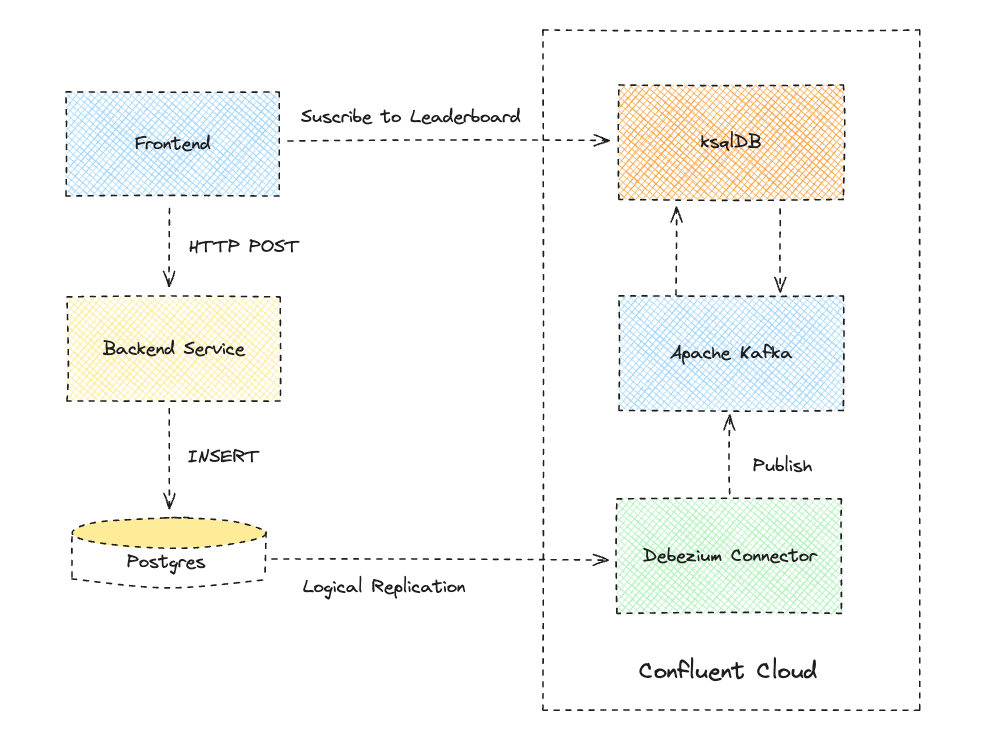
An Apache Kafka cluster is a collection of brokers (or nodes) that enable parallel processing of records by downstream subscribers such as ksqlDB. Data is organized into topics in Apache Kafka, and topics are split into partitions that are replicated across brokers for high availability. The beauty of using Apache Kafka is that connectors can source events from one system and sink them to other systems, including back to Postgres if you want! You could even place Kafka in front of Postgres to insert score events into the database in a controlled manner.
Get Started With Neon and Logical Replication
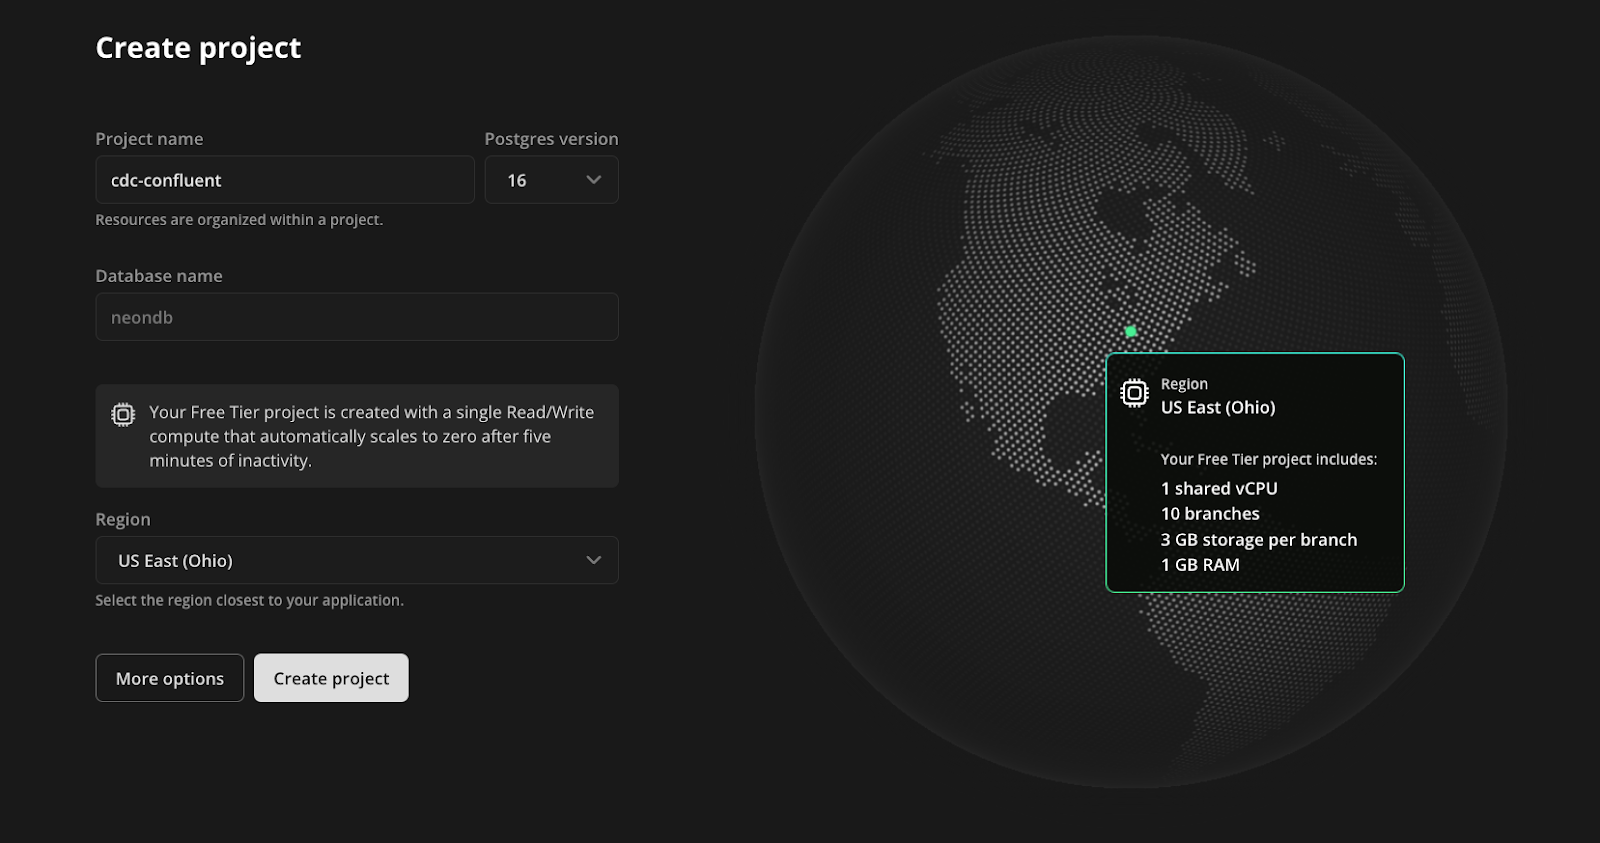
To get started, sign up for Neon and create a project. This project will contain the Postgres database that holds the players and player_scores tables:
- Enter a project name.
- Use the default database name of
neondb. - Choose the region closest to your location.
- Click Create project.
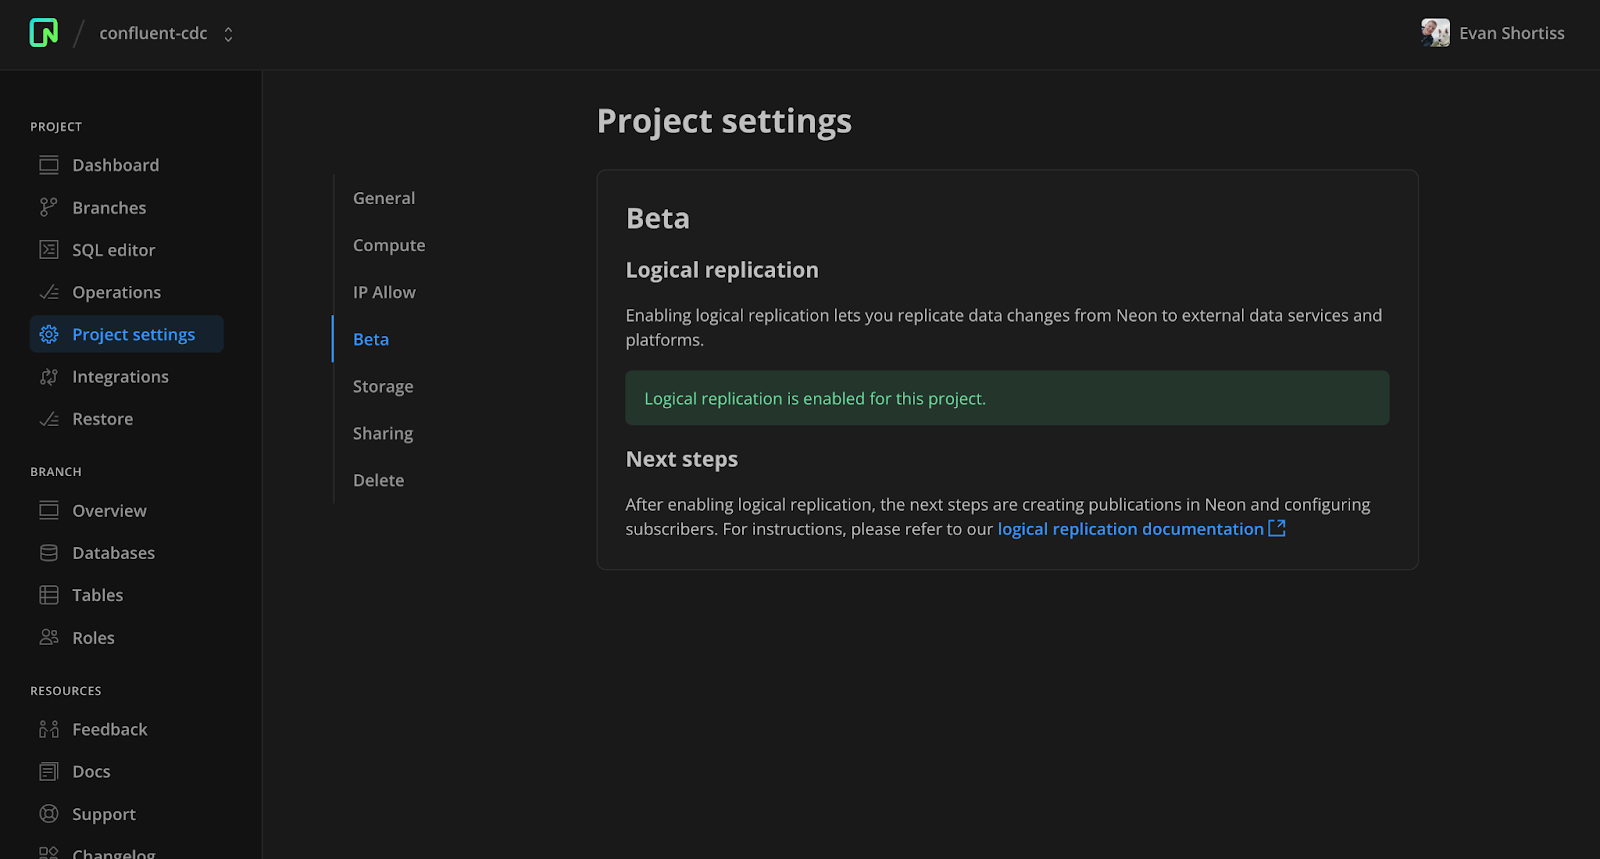
Next, visit the Beta section of the Project settings screen and enable logical replication. Visit our documentation to view a complete set of logical replication guides.
Use the SQL Editor in the Neon console to create two tables in the neondb database: one to hold player information and another to hold score records for players. Each row in player_scores contains a foreign key referencing a player by their ID.
CREATE TABLE players (
    id SERIAL PRIMARY KEY,
    name TEXT NOT NULL
);

CREATE TABLE player_scores (
    id SERIAL PRIMARY KEY,
    score DECIMAL(10, 2) NOT NULL,
    player_id INTEGER REFERENCES players(id),
    CONSTRAINT fk_player
        FOREIGN KEY(player_id)
        REFERENCES players(id)
        ON DELETE CASCADE
);
Create a publication for these two tables. The publication defines what operations on those tables are replicated to other Postgres instances or subscribers. You’ll deploy a Debezium connector on Confluent’s cloud that uses this publication to observe changes in the specified tables:
CREATE PUBLICATION confluent_publication FOR TABLE players, player_scores;Create a logical replication slot to retain and stream changes in the write-ahead log (WAL) to subscribers. The Debezium connector on Confluent’s cloud will use this slot to consume relevant changes from the WAL:
SELECT pg_create_logical_replication_slot('debezium', 'pgoutput');Use the Roles section of the Neon console to create a new role named confluent_cdc. Be sure to save the password for the role someplace safe since it will only be displayed once. With the role in place, grant it permissions on the public schema using the SQL Editor:
GRANT USAGE ON SCHEMA public TO confluent_cdc;
GRANT SELECT ON ALL TABLES IN SCHEMA public TO confluent_cdc;
ALTER DEFAULT PRIVILEGES IN SCHEMA public GRANT SELECT ON TABLES TO confluent_cdc;
Now, you’ve got everything in place to start consuming changes from your players and player_scores tables in your Neon Postgres database.
Get Started With Apache Kafka and Debezium on Confluent Cloud
This guide assumes you’re new to Confluent Cloud. If you’re an existing user, you can modify the steps to integrate with your existing environments and Apache Kafka cluster(s).
Sign in to Confluent Cloud and follow the onboarding flow to create a basic Apache Kafka cluster. Choose the region that’s closest to your Neon Postgres database region.
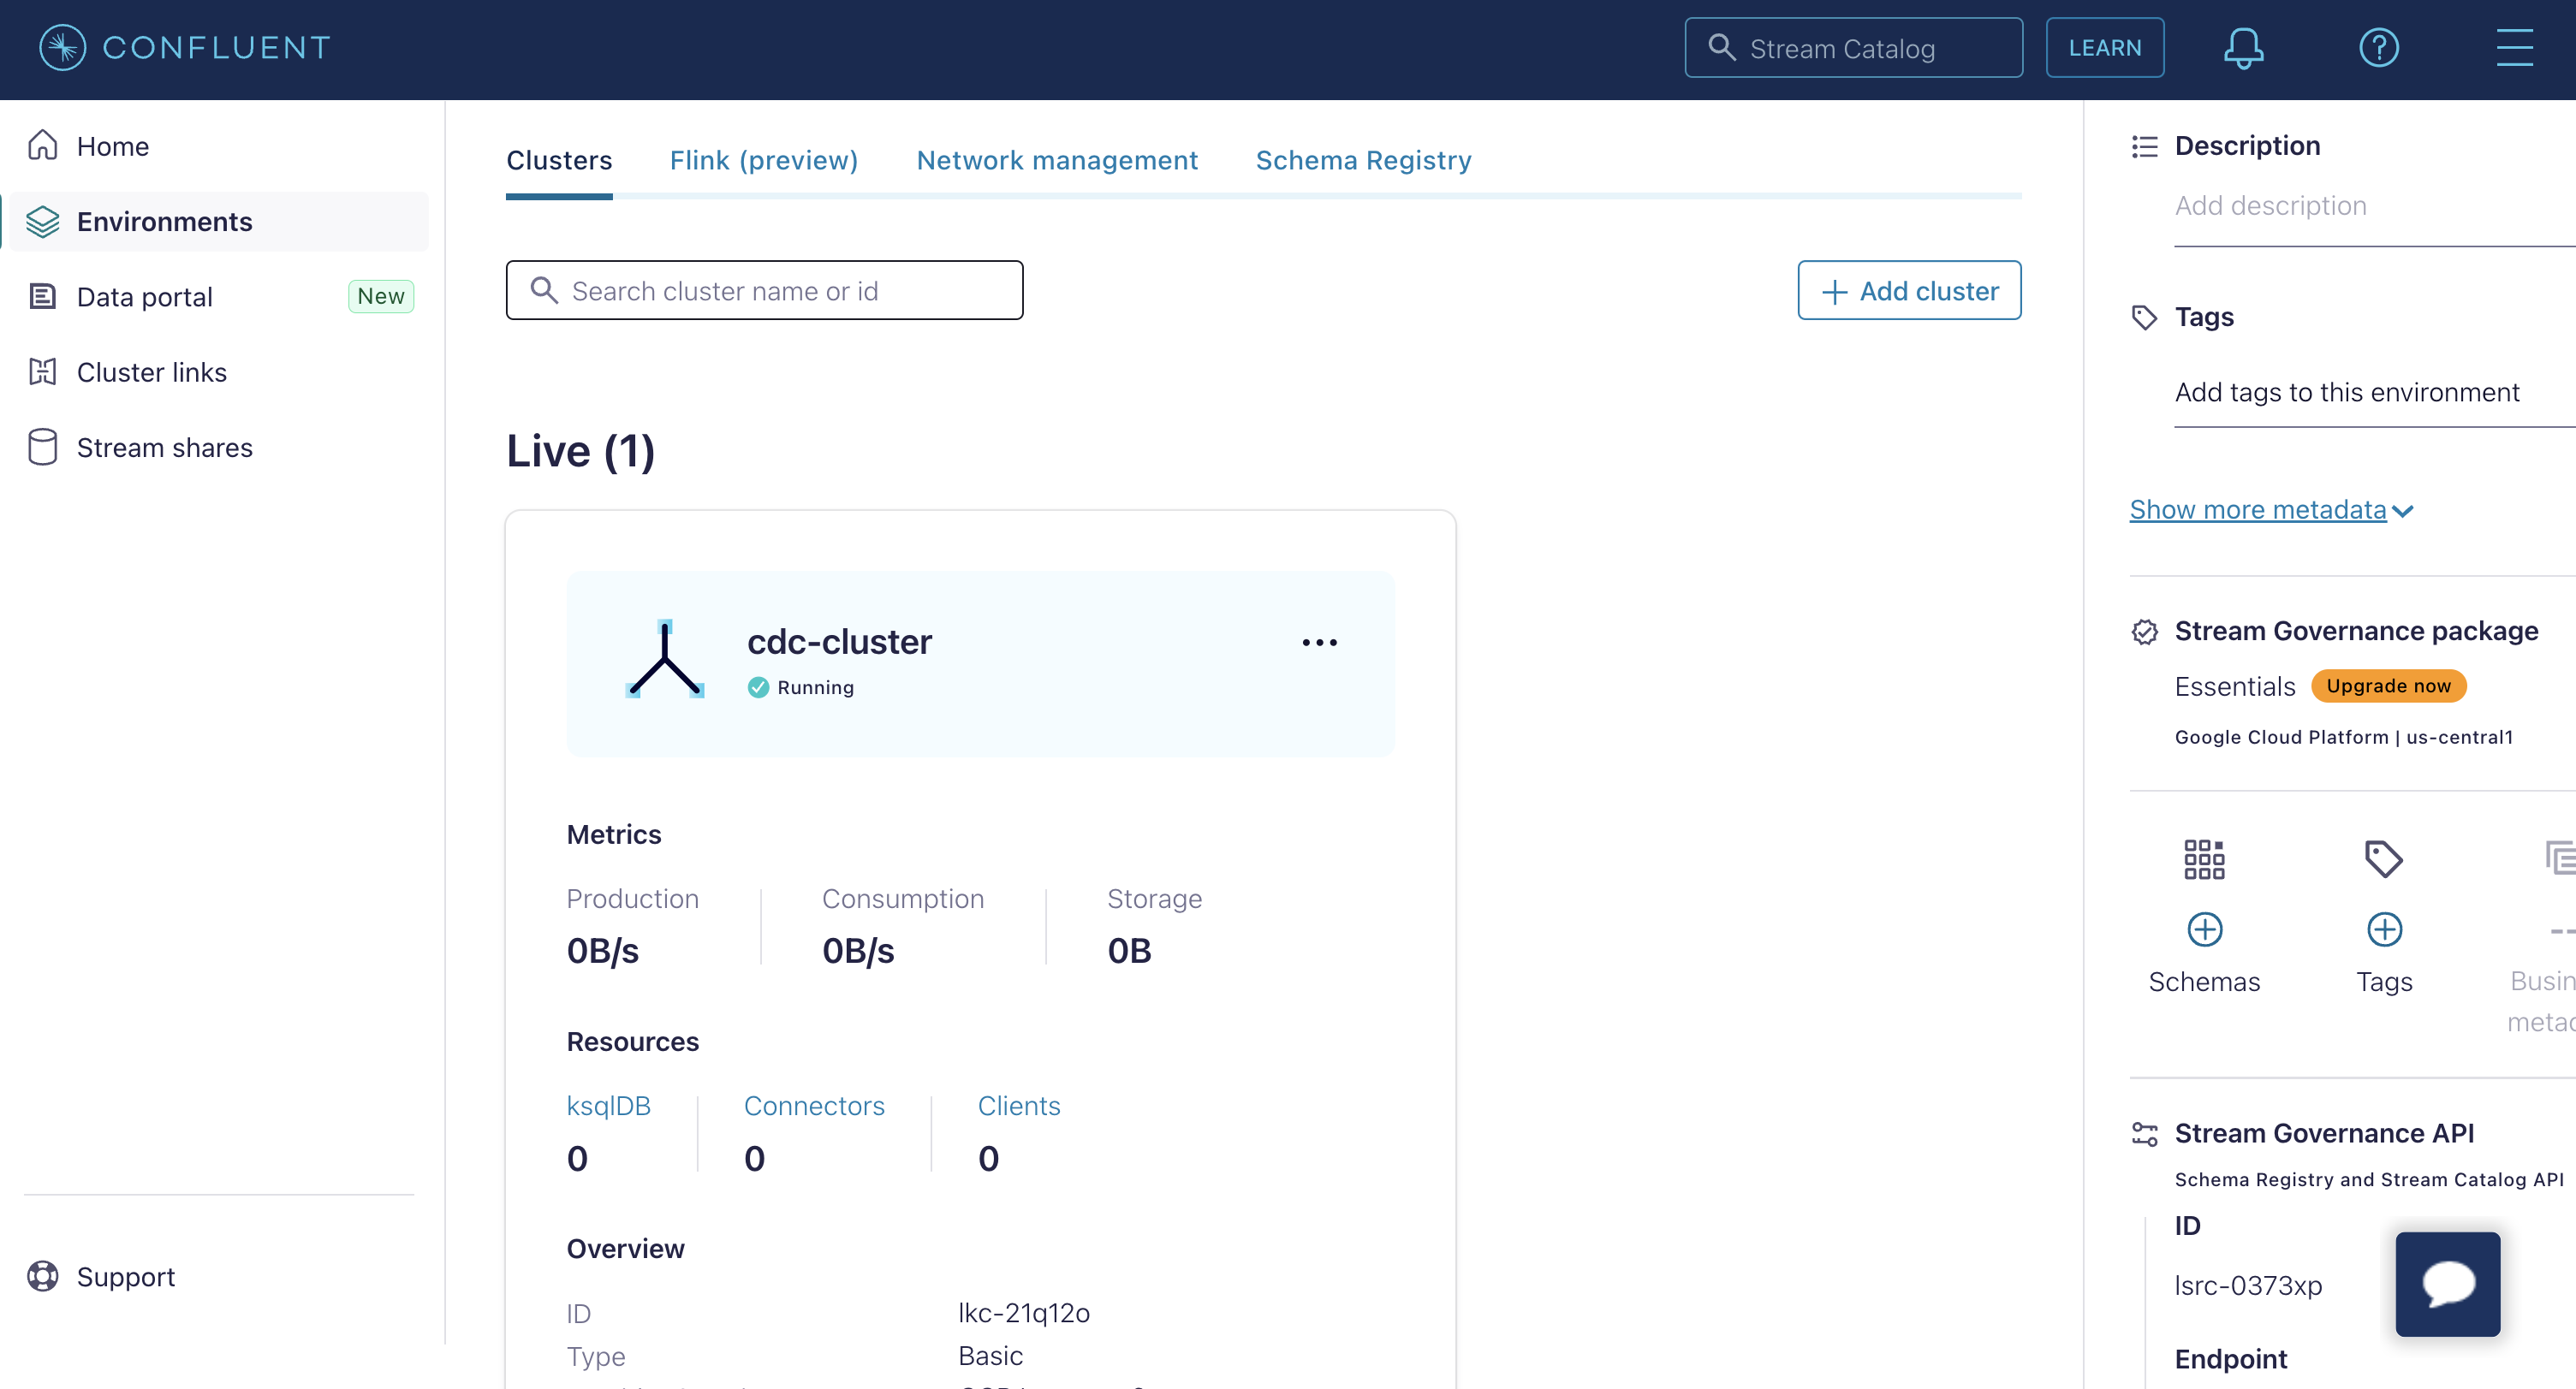
Once your cluster has been provisioned, click on it in the Environments screen, then select the Connectors view from the side menu on the next page.
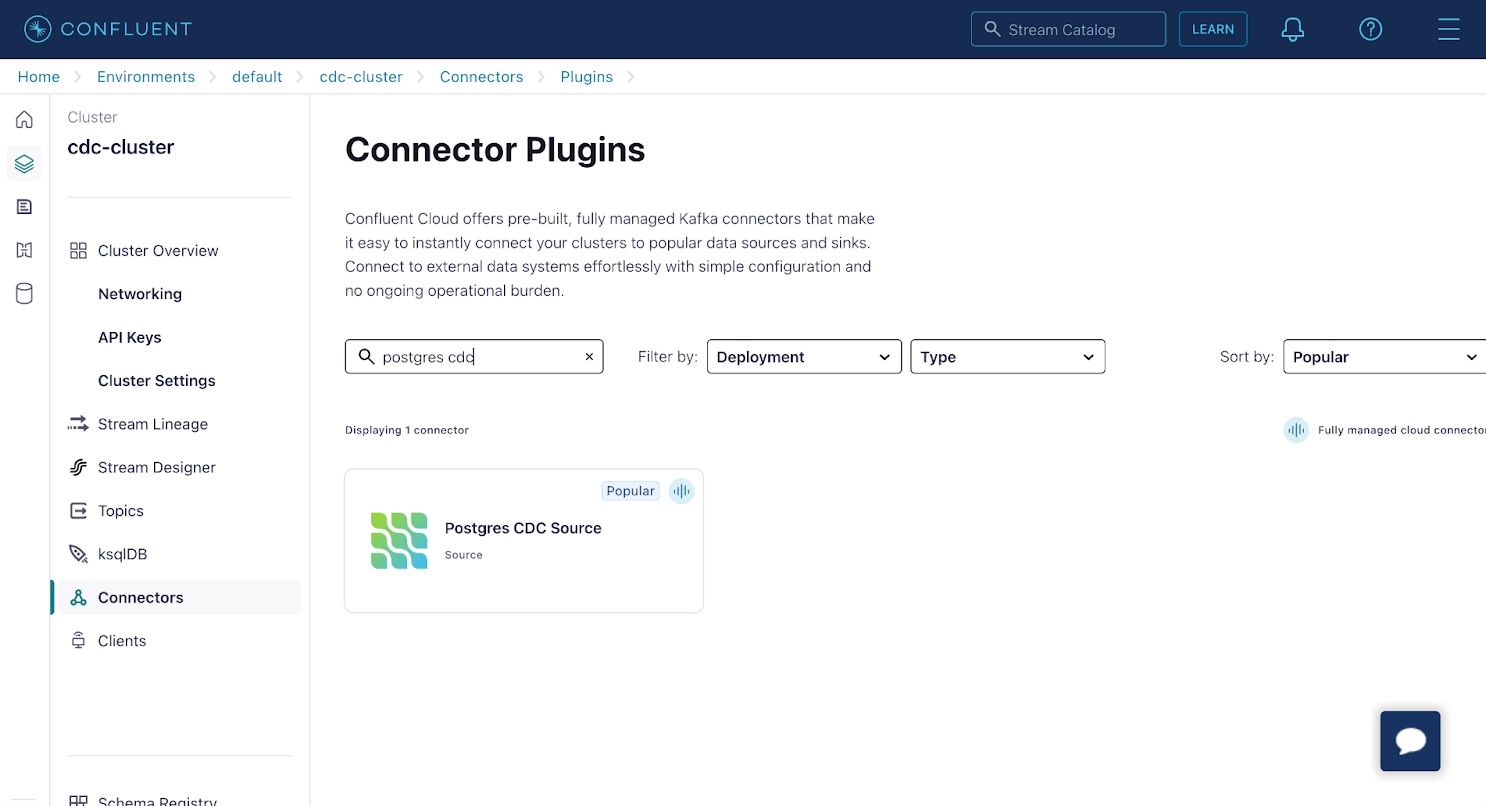
Apache Kafka on Confluent supports a plethora of connectors. Many of these are based on the various OSS Kafka Connect connectors. Find and select the Postgres CDC Source connector in the list. This connector is based on the Debezium project we wrote about in our fan-out using Debezium and Upstash Redis article.
On the Add Postgres CDC Source connector screen:
- Select Global Access.
- Click the Generate API key & download button to generate an API key and secret.
- Click Continue
Next, configure the connection between the connector and your Postgres database on Neon:
- Database name:
neondb - Database server name:
neon - SSL mode:
require - Database hostname: Find this on the Neon console. Refer to our documentation.
- Database port:
5432 - Database username:
confluent_cdc - Database password: This is the password for the
confluent_cdcrole you just created. - Click Continue.
Configure the connector properties. The first of these is the Kafka record key and value formats. Select the following options:
- Output Kafka record value format:
JSON_SR - Output Kafka record key format:
JSON_SR
The JSON_SR option causes change event record schemas to be registered in your Confluent Cloud environment’s Schema Registry. This is essential to working with the change data event records, as you’ll see shortly. You can think of the schema as type information for records in your Kafka topics.
Expand the advanced configuration and set the following options:
- Slot name:
debezium - Publication auto create mode:
disabled - Publication name:
confluent_publication - Tables included:
public.players,public.player_scores
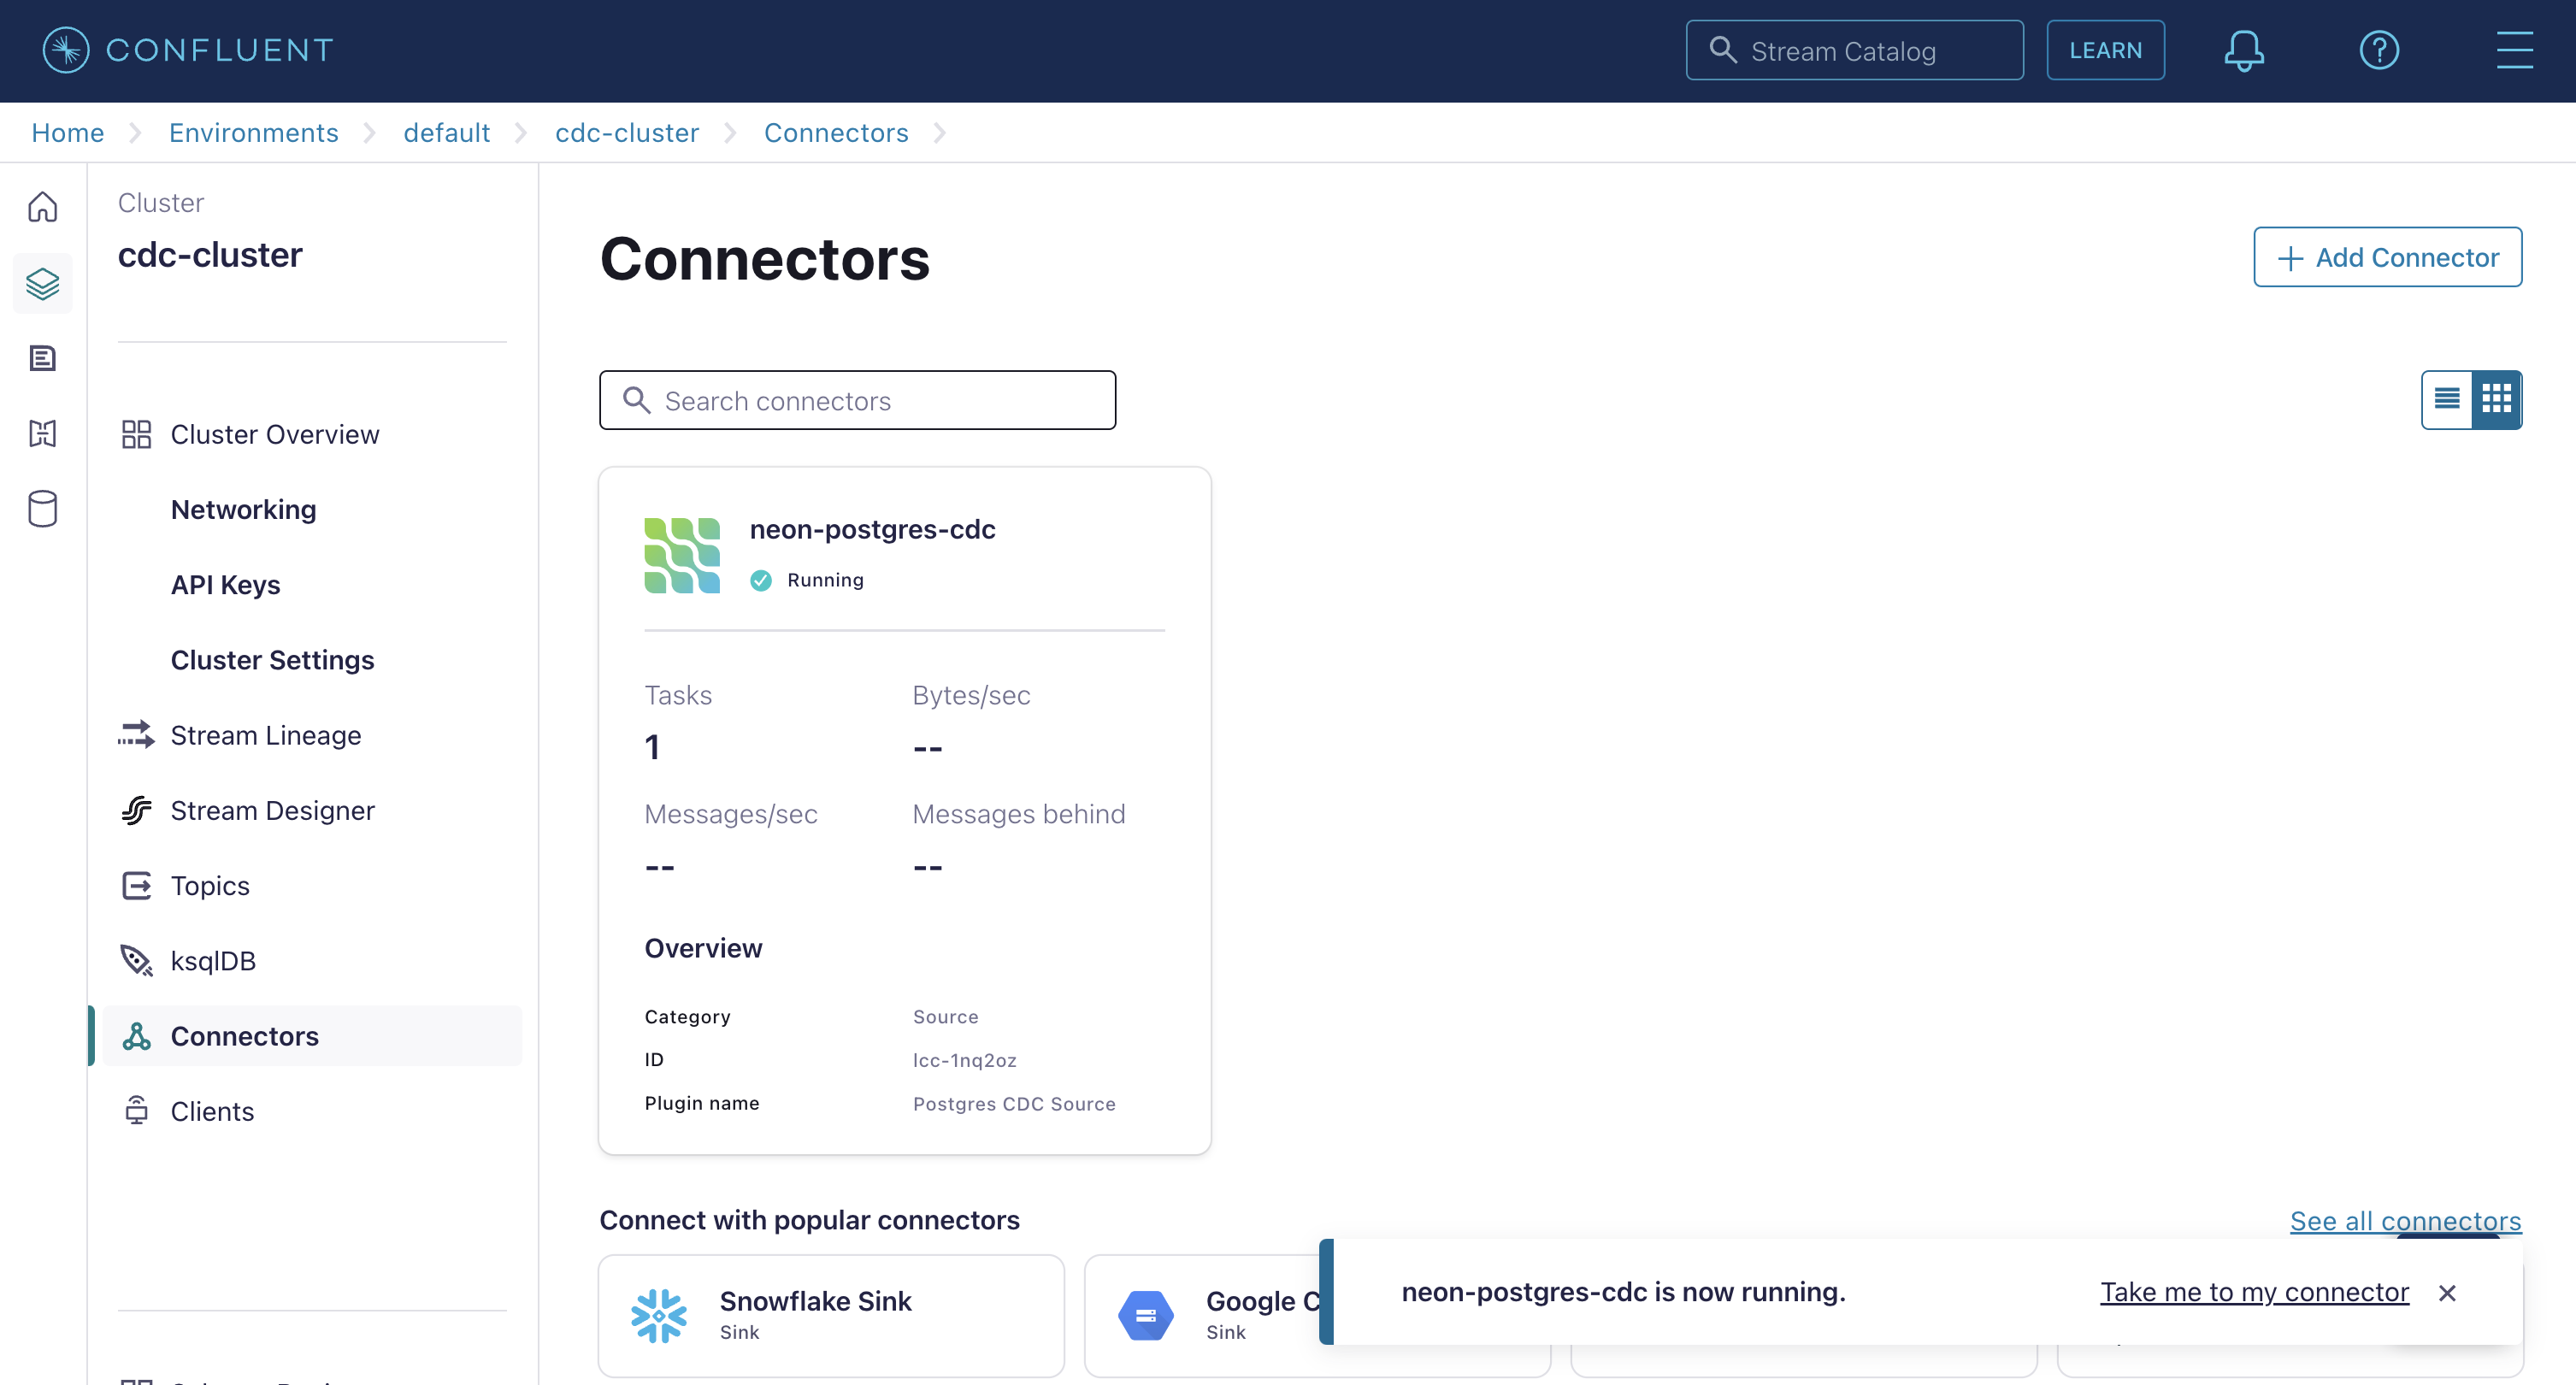
Click Continue, accept the default values for sizing and tasks, and give your connector a name. Once finished, your connector will be shown on the Connectors screen. Confirm that it’s marked as Running and not in an error state. If the connector reports an error, check the configuration properties for correctness.
Confirm Change Data Capture Is Working
Use the SQL Editor in the Neon console to insert some players and scores into your tables using the following SQL statements:
INSERT INTO players (name) VALUES ('Mario'), ('Peach'), ('Bowser'), ('Luigi'), ('Yoshi');

INSERT INTO player_scores (player_id, score) VALUES
(1, 0.31),
(3, 0.16),
(4, 0.24),
(5, 0.56),
(1, 0.19),
(2, 0.34),
(3, 0.49),
(5, 0.71);
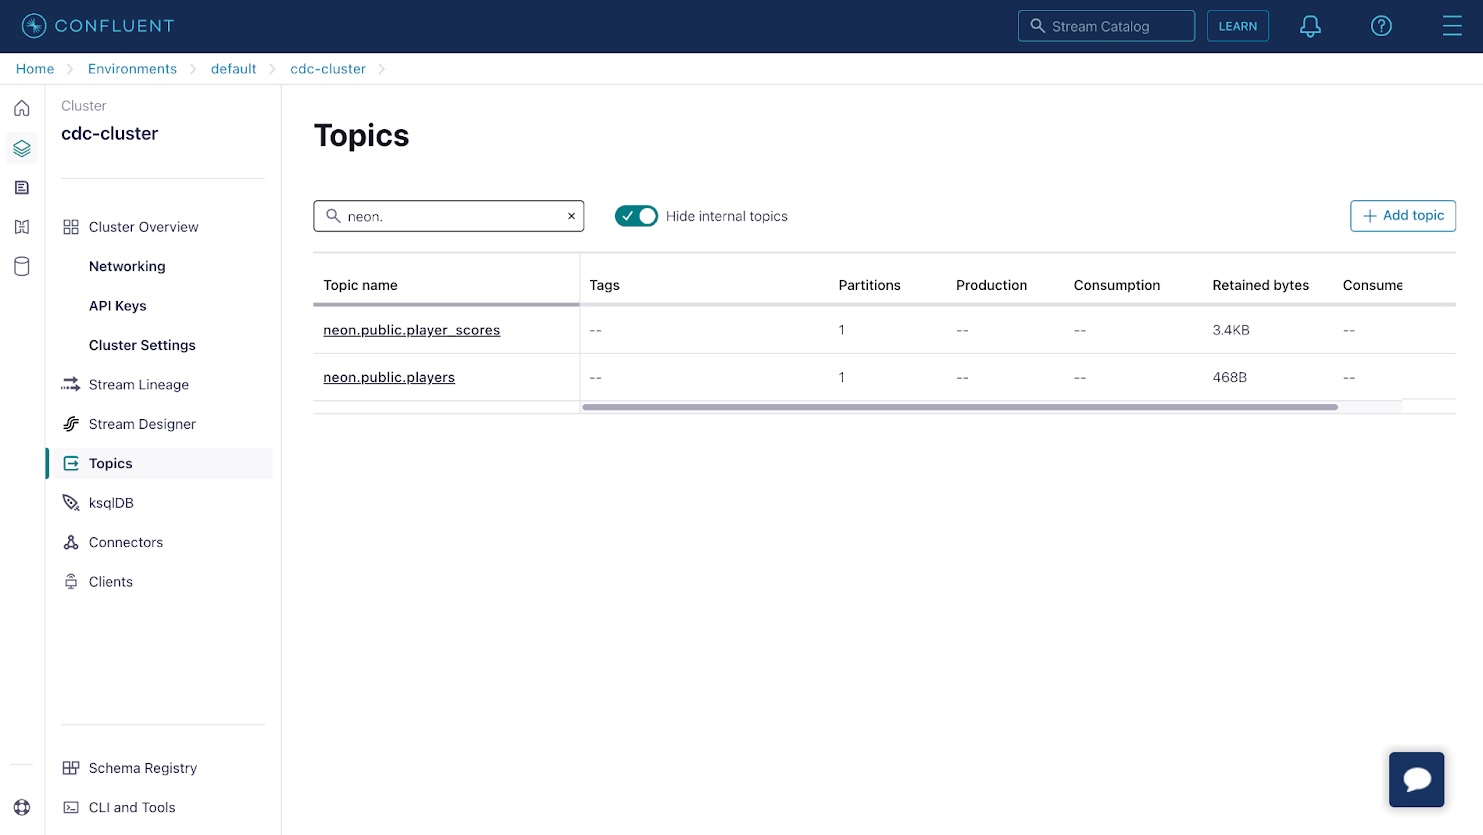
Return to the Confluent Cloud console and select the Topics item from the side menu. You will see two topics that correspond to your database tables.
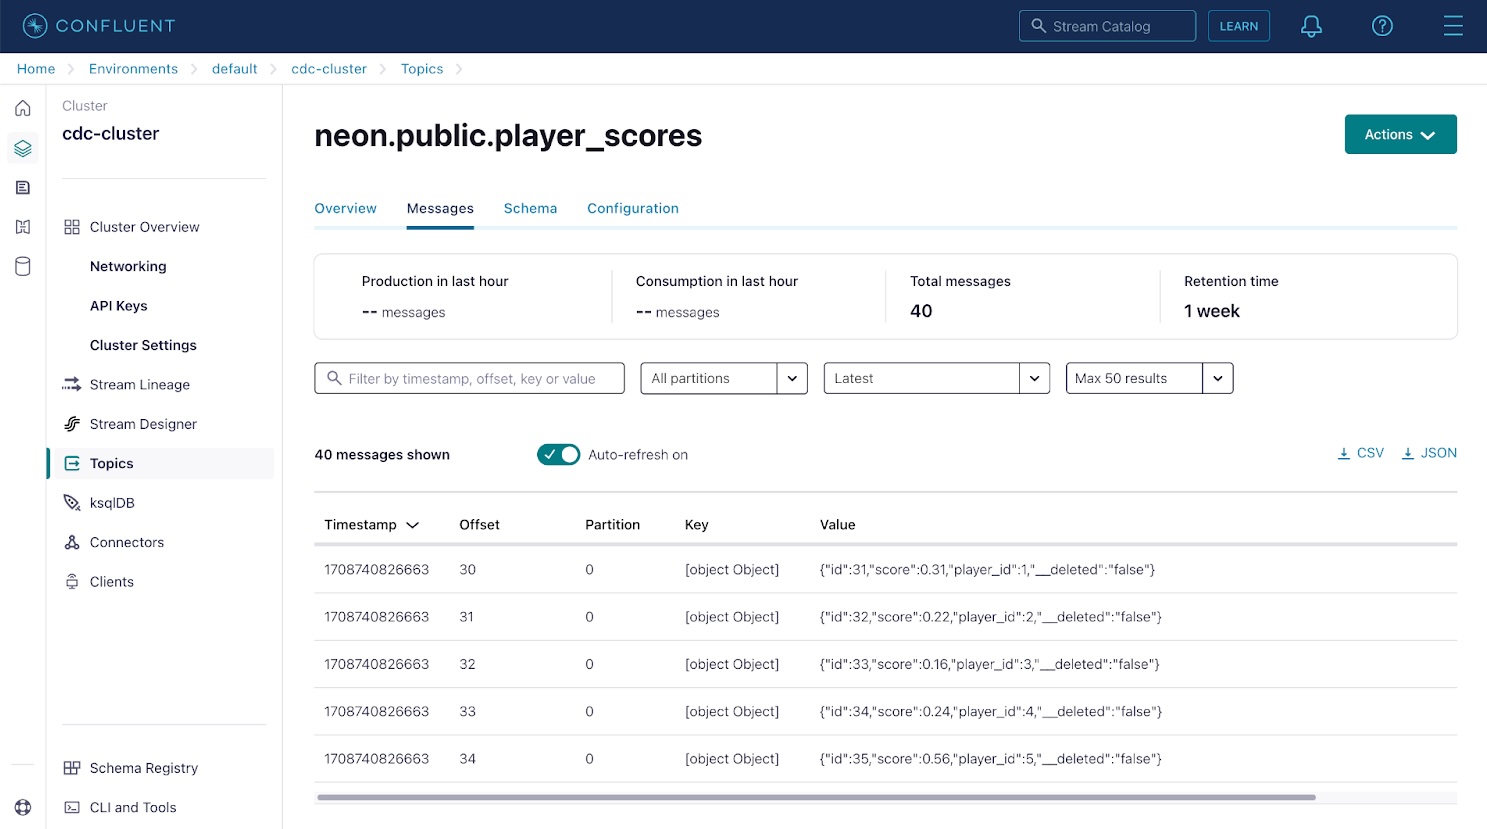
Click on either of the topics, then use the Messages tab to view database change events captured by the Debezium connector and streamed to the topic. Each message in Kafka contains a key and value; in this case, these are the database row ID and row contents.
Apache Kafka uses partitions to increase parallelism and replicates partitions across multiple nodes to increase durability. Since Kafka partitions are an ordered immutable sequence of messages, the offset represents the message position in its partition. Topics in a production Kafka environment can be split into 100 or more partitions, if necessary, to enable parallel processing by as many consumers as there are partitions.
Next, confirm that schemas have been registered for your change records. Select the Schema Registry from the bottom left of the side menu in the Confluent Cloud console, and confirm that schemas have been registered for the records in your topics.
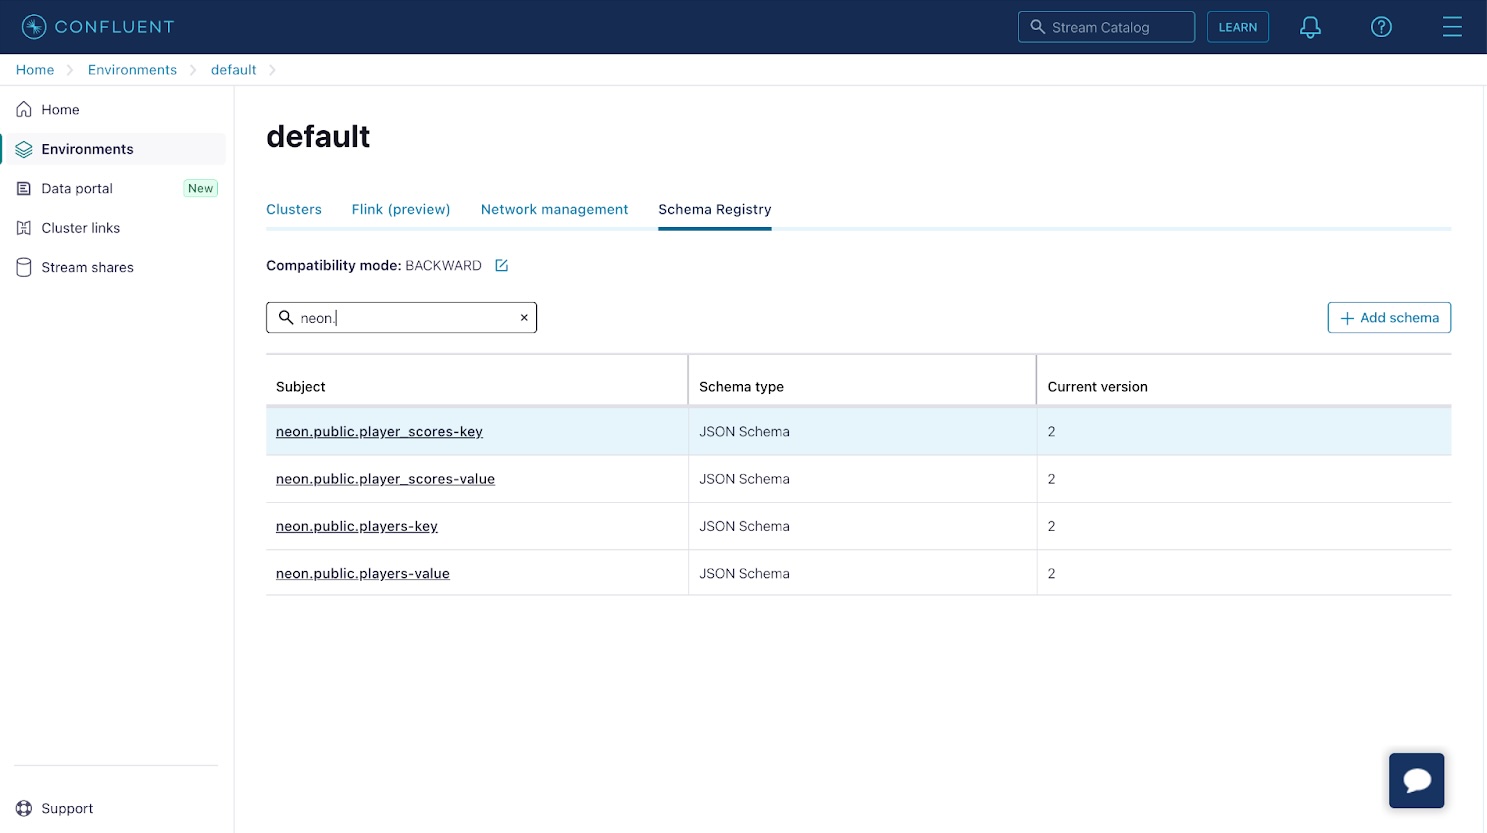
If you click on the schema entries with a “key” suffix, you notice that the schema simply contains an id property. This property corresponds to the id or primary key of the database row. The schema entries with a “value” suffix correspond to the backing table’s schema.
Create a Materialized View Using ksqlDB
With schemas and topics containing messages in place, you can use ksqlDB to create a materialized view that updates in response to database changes.
Select ksqlDB in the side menu for your cluster to provision a new ksqlDB instance with Global access enabled, and use the default values for sizing and configuration. The provisioning process can take a couple of minutes, so be patient.
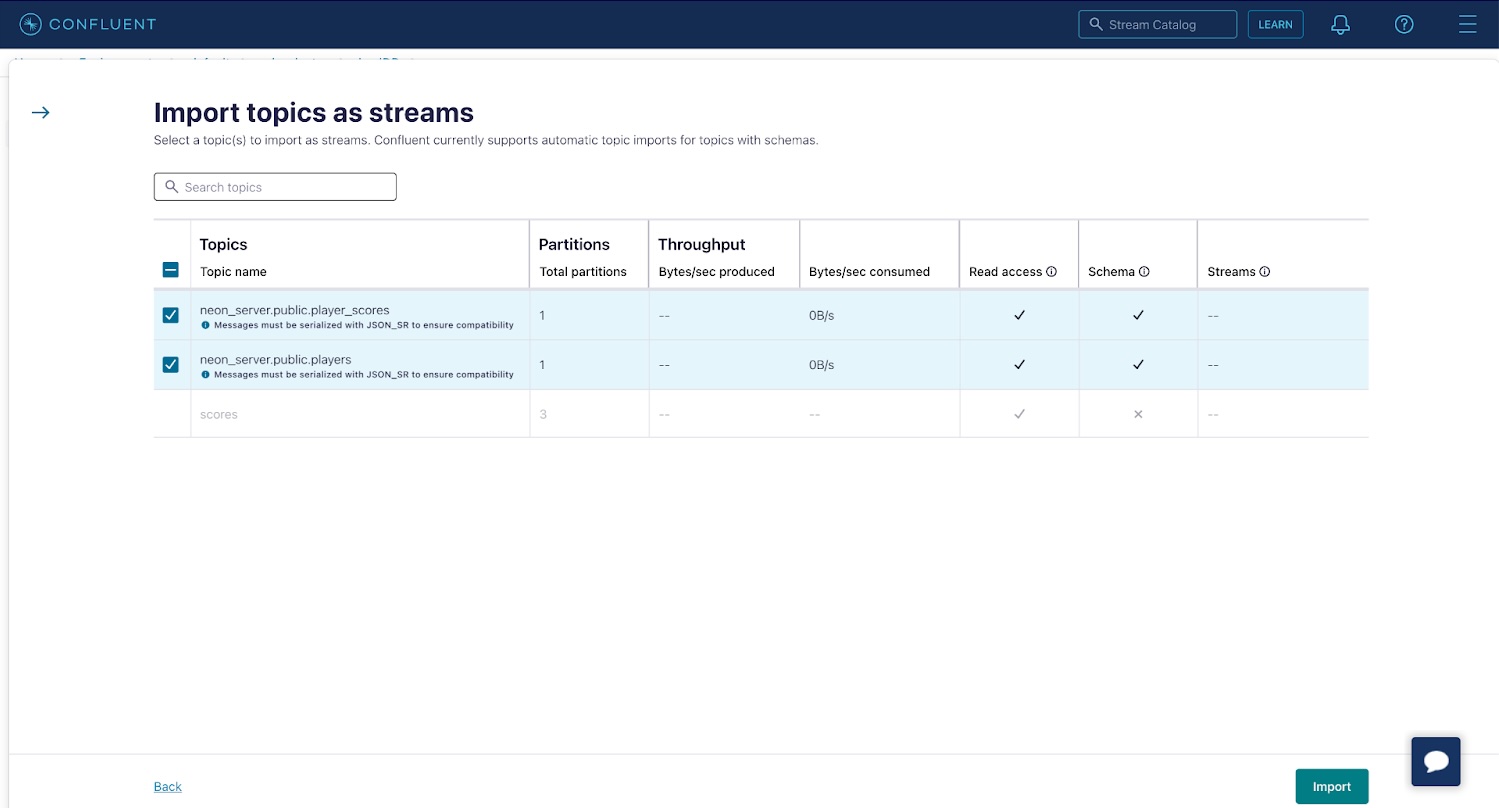
Select your ksqlDB cluster once it’s ready, then navigate to the Streams tab and click Import topics as streams to import your player_scores and players topics as streams in ksqlDB. Creating a stream from your topic allows you to perform operations such as joins or aggregations on the data contained in the underlying topic, as you’ll see in a moment. Click Import to create the streams.
Now, use the Editor tab in the ksqlDB cluster UI to create a table named player_scores. The table will store an aggregation of your system's latest state, i.e., a materialized view. In your case, it’ll represent the sum of the score events for each player. Paste the following query into the Editor and click Run query.
CREATE TABLE player_scores AS
    SELECT player_id, SUM(score) as total_score
    FROM NEONPUBLICPLAYER_SCORES
    GROUP BY player_id
    EMIT CHANGES;
This creates a table in ksqlDB that is continuously updated in response to events in the NEONPUBLICPLAYER_SCORES stream. The table will contain a row for each player with their unique ID and the sum of all associated score events.
Confirm the table is working as expected by selecting PLAYER_SCORES under the Tables heading and clicking Query table. A list of records that contain the sum of player scores will be displayed.
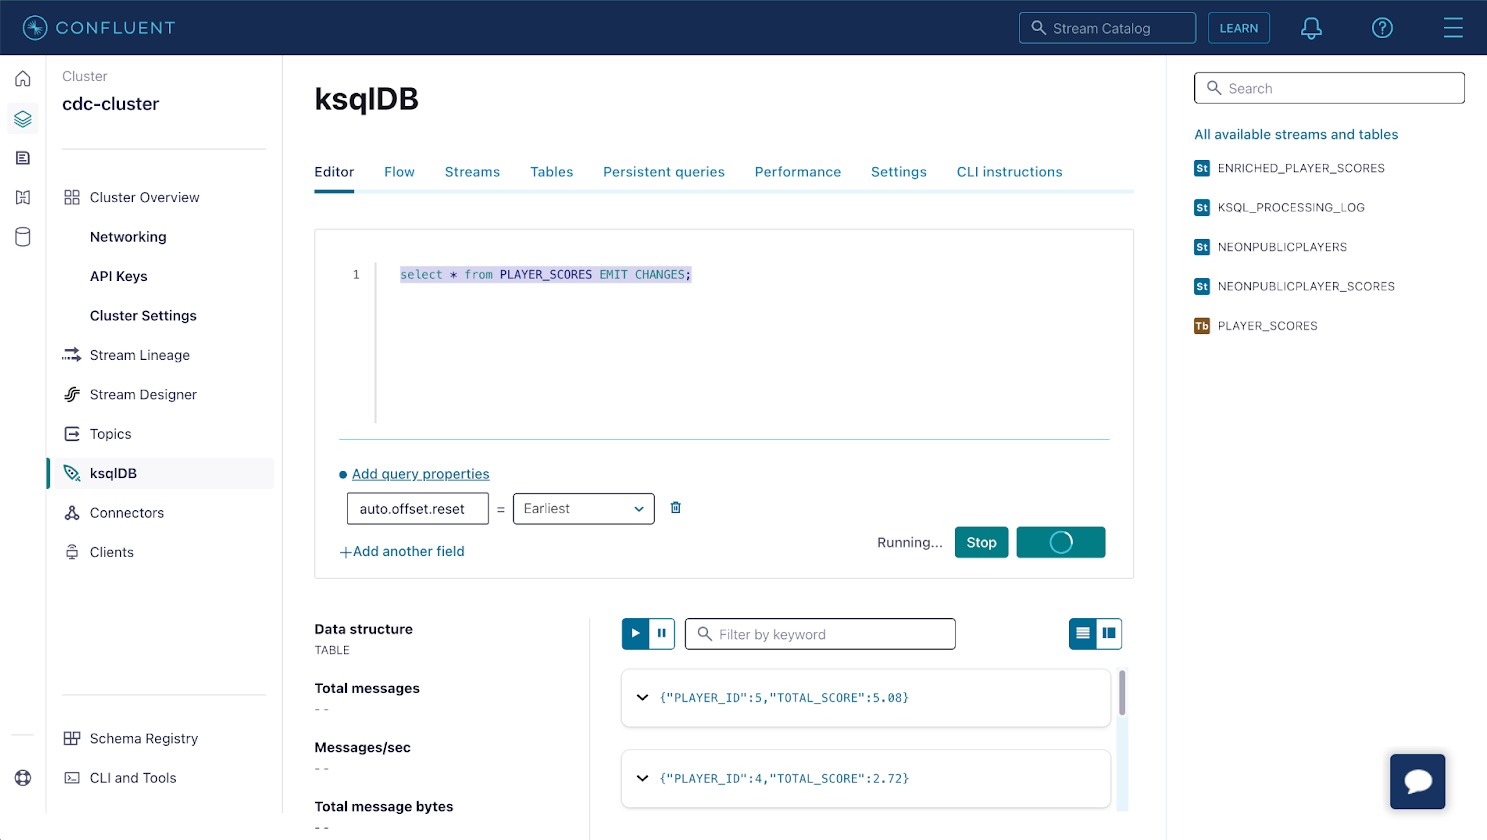
Return to the Neon console and insert more data into the player_scores table. The materialized view will automatically update within a few seconds to reflect the new total_score for each player.
The materialized view can be consumed by interacting with the ksqlDB REST API. Visit the API Keys in your cluster’s UI to create an API key to authenticate against the ksqlDB REST API, and use the settings tab in your ksqlDB cluster UI to find the cluster’s hostname.
You can use the following cURL command to get a stream of changes from the table in your terminal:
curl --http1.1 -X "POST" "https://$KSQLDB_HOSTNAME/query" \
-H "Accept: application/vnd.ksql.v1+json" \
--basic --user "$API_KEY:$API_SECRET" \
-d $'{
"ksql": "SELECT * FROM PLAYER_SCORES EMIT CHANGES;",
"streamsProperties": {}
}'
This command will establish a persistent connection that streams a header followed by changes as they occur in the table in real time. You can confirm this by using the SQL Editor in the Neon console to insert more data into the player_scores table and observing the updated total scores being streamed into your terminal:
[{"header":{"queryId":"transient_PLAYER_SCORES_7047340794163641810","schema":"`PLAYER_ID` INTEGER, `TOTAL_SCORE` DECIMAL(10, 2)"}},
{"row":{"columns":[1,4.50]}},
{"row":{"columns":[2,5.04]}},
{"row":{"columns":[3,5.85]}},
{"row":{"columns":[4,6.12]}},
{"row":{"columns":[5,11.43]}},
{"row":{"columns":[1,5.00]}},
{"row":{"columns":[4,6.80]}},
{"row":{"columns":[5,12.70]}},
{"row":{"columns":[1,5.82]}},
{"row":{"columns":[4,6.92]}}
This same stream of events over HTTP can be integrated into your application to enable real-time updates in a UI or to update other components in your application architecture.
Conclusion
Neon’s support for Postgres’ logical replication enables change data capture and streaming database changes to Apache Kafka for real-time processing with ksqlDB to create enriched data streams and materialized views using SQL syntax. If you’re looking for a Postgres database, sign up and try Neon for free. Join us on our Discord server to share your experiences, suggestions, and challenges.

