Manage Microservices With Docker Compose
As microservices systems expand beyond a handful of services, we often need some way to coordinate everything and ensure consistent communication (avoid human error). Tools such as Kubernetes or Docker Compose have quickly become commonplace for these types of workloads. Today’s example will use Docker Compose.
Docker Compose is an orchestration tool that manages containerized applications, and while I have heard many lament the complexity of Kubernetes, I found Docker Compose to have some complexities as well. We will work through these along the way and explain how I solved them.
For our project, we have two high-level steps to get managed microservice containers - 1. containerize any currently-local applications, 2. set up the management layer with Docker Compose.
Let’s get started!
Architecture
Our microservices system contains quite a few pieces to manage. We have two databases, three API services, a user-view service, and a configuration service. With so many components needing coordination, Docker Compose will reduce manual interaction for starting, stopping, and maintaining individual services by orchestrating them as a united group.
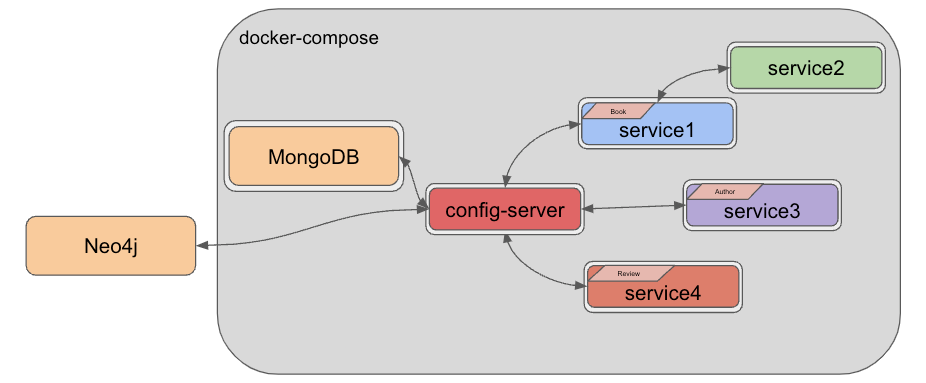
The border around each service represents the container housing each application. Notice that only one service is not containerized - Neo4j. The database is managed separately in Neo4j Aura (a Neo4j-hosted cloud service), so we don’t containerize and manage it ourselves. The rest of the services are encompassed in a gray box denoting what Docker Compose handles.
Application Setup
There are a few steps I would recommend for integrating a microservice with an orchestration tool like Docker Compose. Mostly, they focus on testing and resiliency concerns. Networking, communication, and configuration become a bit more complicated in a microservices environment, so I took a few extra steps and precautions to simplify those components.
Create an internal test method. When requests don’t respond, there are many different variables, making it hard to debug. By including a “ping”-like method, we can test only whether the application is live and reachable. Example code is in the GitHub repository for each service.
Build in resiliency with retry logic and open health check access. If requests fail or take too long, it is good practice to build in some plan for how you want the service and/or method to react. While doing this didn’t solve all the problems, having the app handle intermittent interruptions on its own takes out some of the guesswork later. By exposing health endpoints, we can also inspect various aspects of the app. More about this is outlined in the application changes section of this blog post.
Containerizing Services
In order for Docker Compose to manage services, we need to put them into containers. We can use a Dockerfile to set up the commands needed in order to build a container (like a mini virtual machine) that includes the application and any other components we need available.
There are a lot of options for what to put in a container, but we will stick with just a few necessary requirements.
#Pull base image
#-----------------
FROM azul/zulu-openjdk:17

#Author
#-------
LABEL org.opencontainers.image.authors="Jennifer Reif,jennifer@thehecklers.org,@JMHReif"

#Copy jar and expose entrypoints
#--------------------------------
COPY target/service1-*.jar goodreads-svc1.jar
ENTRYPOINT ["java","-jar","/goodreads-svc1.jar"]
First, we need a Java environment in the container (since we have Java-based applications), so the FROM command will pull Azul’s version 17 image as the base layer. Next, the LABEL command tells users who owns/maintains the file. Lastly, there are a couple of instructions to copy the JAR file (packaged application) into the container (COPY) and then add commands/arguments for the build command (ENTRYPOINT).
We will need a similar file in each service folder (4 services + config service + mongodb service = 6 total). Next, we need to package each application by going into each folder and running the below command to create the bundled application JAR file.
mvn clean packageNote: For service1, service3, and service4, we need to add -DskipTests=true to the end of the above command. Those services rely on a config server application, and if the tests don’t find one running, the build will fail. The extra option tells Maven to skip that part.
Now that we have the application JAR files ready, we need to create a docker-compose.yml file that outlines all the commands and configuration for setup to run the services as a unit!
Docker-compose.yml
A YAML file will include container details, configuration, and commands that we want Compose to execute. It will list each of our services, then specify subfields for each. We will also set up a dedicated network for all of the containers to run on. Let’s build the file piece by piece in the main project folder using the template below.
version: "3.9"
services:
  <service>:
    <field>: <value>
networks:
  goodreads:
The first field displays the Docker compose version (not required). Next, we will list our services. The child fields for each service can hold details and configurations. We will go through those in the next subsections. Lastly, we have a networks field, which specifies a custom network that we want the containers to join. This was the part that took some time to figure out. Docker compose documentation has a page dedicated to networking, but I found the critical information easy to miss.
To summarize, if we do not specify a custom network in the Docker compose file, it will create a default network. Each container will only be able to communicate with other containers on that network via IP address. This means if containerA wants to talk to containerB, a call would look like curl http://127.0.0.2:8080. However, if IP addresses expire or rotate, then any references would need to dynamically retrieve the container’s IP address before calling.
One way around this is to create a custom network, which allows containers to reference one another by container name, instead of just IP address. This an improvement, both to solve dynamic IP issues, as well as human memory/reference issues. Therefore, the networks field in the docker-compose.yml states any custom network names along with any configurations. Since we don’t need anything fancy, the network name goodreads is the only thing here. We will then assign the services to that same network with an option under each service.
Now we need to fill in the services and related options under the services section.
MongoDB Database
version: "3.9"
services:
  goodreads-db:
    container_name: goodreads-db
    image: jmreif/mongodb
    environment:
      - MONGO_INITDB_ROOT_USERNAME=mongoadmin
      - MONGO_INITDB_ROOT_PASSWORD=Testing123
    ports:
      - "27017:27017"
    volumes:
      - $HOME/Projects/docker/mongoBooks/data:/data/db
      - $HOME/Projects/docker/mongoBooks/logs:/logs
      - $HOME/Projects/docker/mongoBooks/tmp:/tmp
    networks:
      - goodreads
networks:
  goodreads:
The first service is the MongoDB database container loaded with Book data. To configure it, we have the container name, so we can reference and identify the container by name. The image field specifies whether we want to use an existing image (as we have done here) or build a new image.
Note: I am running on Apple silicon architecture. If you are not, you will need to build your own version of the image with the instructions provided on GitHub. This will build the container on your local architecture.
The next field sets environment variables for connecting to the database with the provided credentials (username and password). Specifying ports comes next, where we map the host post to the container port, allowing traffic to flow between our local machine and the container via the same port number. Note: It is recommended to enclose the port field values with quotes, as shown.
Then, we need to add the container to our custom goodreads network we set up earlier. The final subfield is to mount volumes from the local machine to the container, allowing the database to store the data files in a permanent place so that the loaded data does not disappear when the container shuts down. Instead, each time the container spins up, the data is already there, and each time it spins down, any changes are stored for the next startup.
Let’s look at goodreads-config next.
Spring Cloud Config Service
version: "3.9"
services:
  #goodreads-db...
  goodreads-config:
    container_name: goodreads-config
    image: jmreif/goodreads-config
    # build: ./config-server
    ports:
      - "8888:8888"
    depends_on:
      - goodreads-db
    environment:
      - SPRING_PROFILES_ACTIVE=native,docker
    volumes:
      - $HOME/Projects/config/microservices-java-config:/config
      - $HOME/Projects/docker/goodreads/config-server/logs:/logs
    networks:
      - goodreads
Tacking onto our list of services is the configuration server. Just like our database service, we specify the container name and image. We could also substitute the build field (next field that is commented out) for the image field, if we wanted to build the container locally, rather than using a pre-built image. The ports field comes next to map internal and external container ports, followed by the depends_on field, which specifies that the database container must be started before this service can start. Note: This does not mean that the database container is in a "ready" state, only started.
Under the environment block, we have a variable set up for a Spring profile. This allows us to use different credentials, depending on whether we are running in a local test environment or in Docker. The main difference is the use of localhost to connect to other services in a local environment (specified by native profile), versus container names in a Docker environment (profile: docker). The next option for volumes sets up the location of the config files (for now, in a local config directory) and log files. We cap off the options by adding the container to our goodreads Docker network.
Moving to our numbered services!
Spring Boot API Microservice - MongoDB (Books)
version: "3.9"
services:
  #goodreads-db...
  #goodreads-config...
  goodreads-svc1:
    container_name: goodreads-svc1
    image: jmreif/goodreads-svc1:lvl9
    # build: ./service1
    ports:
      - "8081:8081"
    depends_on:
      - goodreads-config
    restart: on-failure
    environment:
      - SPRING_APPLICATION_NAME=mongo-client
      - SPRING_CONFIG_IMPORT=configserver:http://goodreads-config:8888
      - SPRING_PROFILES_ACTIVE=docker
    networks:
      - goodreads
I found this piece to be the toughest one to get working because there were a couple of quirks when interacting with the config service in Docker Compose. This was mostly due to startup order and timing of services with Docker Compose. Let’s walk through it.
The first four fields are the same as with previous services (container name, image/build, ports, and depends on), although service1 actually depends on the config service and not the database container directly. This is because the config service supplies the database credentials, so service1 cannot call the database without the config service providing credentials to access the database. Plus, since the config service relies on the database, then service1 can rely on the config service, creating a dependency chain without too much complexity.
The next field for restart is new, though. Earlier, I mentioned that depends_on only waits for the container to start, not for the service to be ready. Service1 would start too early and fail to find the configuration. After trying a few different methods, such as building in request retries in the application itself, I discovered that the only working solution was to restart the whole container. The most straightforward way to do this was through the restart option in Docker Compose. This solved the startup and configuration issues I was seeing by automatically restarting the container when the application fails.
The following environment variable option specifies the application name, location of the config server, and Spring profile. The application name and active profile help the application find the appropriate configuration file on the config server. The SPRING_CONFIG_IMPORT variable tells the container where to look for the config server. These properties also did not work correctly if I put them in the config file itself. The values had to be accessible within the container, or it would not know where to look. Lastly, we add this container to our custom network.
With this core application service added to the mix, services two through four are a bit easier.
Spring Boot Client Microservice
version: "3.9"
services:
  #goodreads-db...
  #goodreads-config...
  #goodreads-svc1...
  goodreads-svc2:
    container_name: goodreads-svc2
    image: jmreif/goodreads-svc2:lvl9
    # build: ./service2
    ports:
      - "8080:8080"
    depends_on:
      - goodreads-svc1
    restart: on-failure
    environment:
      - BACKEND_HOSTNAME=goodreads-svc1
    networks:
      - goodreads
The fields should start to seem pretty familiar. We use the container name, image (or build), ports, depends on, and restart options like we did before. The environment option contains a new value for dynamically plugging in a value for the WebClient bean to find the API service (service1). For more background on this feature, check out this blog post. We wrap up with our custom network assignment and charge on to service3!
Spring Boot API Microservice - MongoDB (Authors)
version: "3.9"
services:
  #goodreads-db...
  #goodreads-config...
  #goodreads-svc1...
  #goodreads-svc2...
  goodreads-svc3:
    container_name: goodreads-svc3
    image: jmreif/goodreads-svc3:lvl9
    # build: ./service3
    ports:
      - "8082:8082"
    depends_on:
      - goodreads-config
    restart: on-failure
    environment:
      - SPRING_APPLICATION_NAME=mongo-client
      - SPRING_CONFIG_IMPORT=configserver:http://goodreads-config:8888
      - SPRING_PROFILES_ACTIVE=docker
    networks:
      - goodreads
This service’s configuration looks nearly identical to that of service1 because they are both providing the same function within the microservices system - an API backing service. The big difference is that service1 is handling Book data objects, and service3 is handling Author data objects. Otherwise, they both use the config service for database credentials to the MongoDB container and also both depend on the config service.
Let’s dive into service4!
Spring Boot API Microservice - Neo4j (Reviews)
version: "3.9"
services:
  #goodreads-db...
  #goodreads-config...
  #goodreads-svc1...
  #goodreads-svc2...
  #goodreads-svc3...
  goodreads-svc4:
    container_name: goodreads-svc4
    image: jmreif/goodreads-svc4:lvl9
    # build: ./service4
    ports:
      - "8083:8083"
    depends_on:
      - goodreads-config
    restart: on-failure
    environment:
      - SPRING_APPLICATION_NAME=neo4j-client
      - SPRING_CONFIG_IMPORT=configserver:http://goodreads-config:8888
      - SPRING_PROFILES_ACTIVE=docker
    networks:
      - goodreads
This service also mimics services 1 and 3 because it is the API service, but it interacts with a cloud-hosted Neo4j database. The configuration looks nearly identical, except that the environment variable for the application name references the config file containing Neo4j database credentials (versus MongoDB credentials).
Time to put everything to the test!
Put it to the Test
Docker compose will handle starting all of the containers in the proper order, so all we need to do is assemble the command.
docker-compose up -dNote: If you are building local images with the build field in docker-compose.yml, then use the command docker-compose up -d --build. This will build the Docker containers each time on startup from the directories.
The containers should spin up, and we can verify them with docker ps. Next, we can test all of our endpoints.
- Goodreads-config (mongo): browser with
localhost:8888/mongo-client/docker.
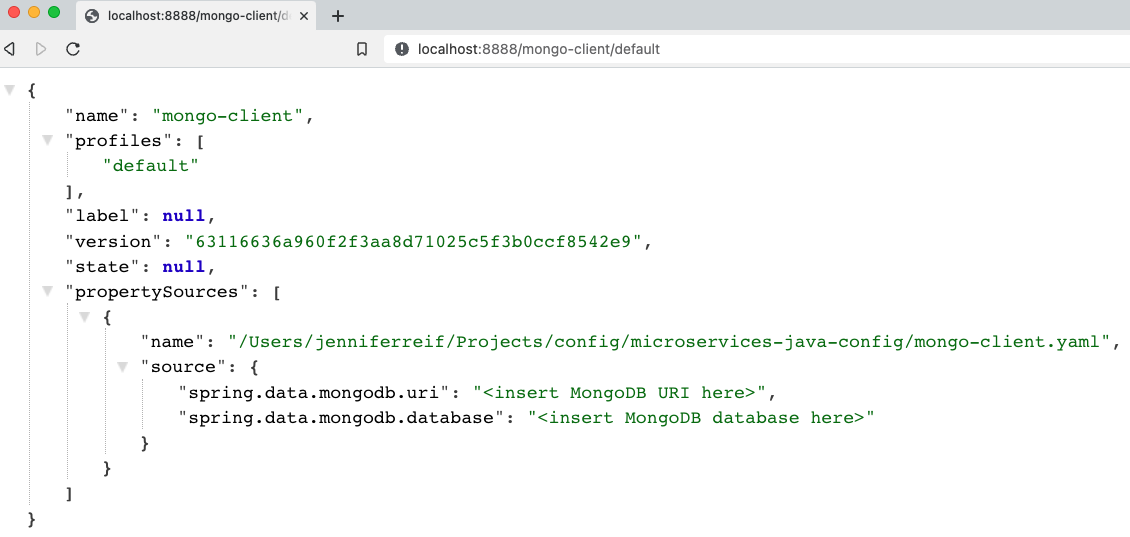
Note: Showing default profile to hide sensitive values.
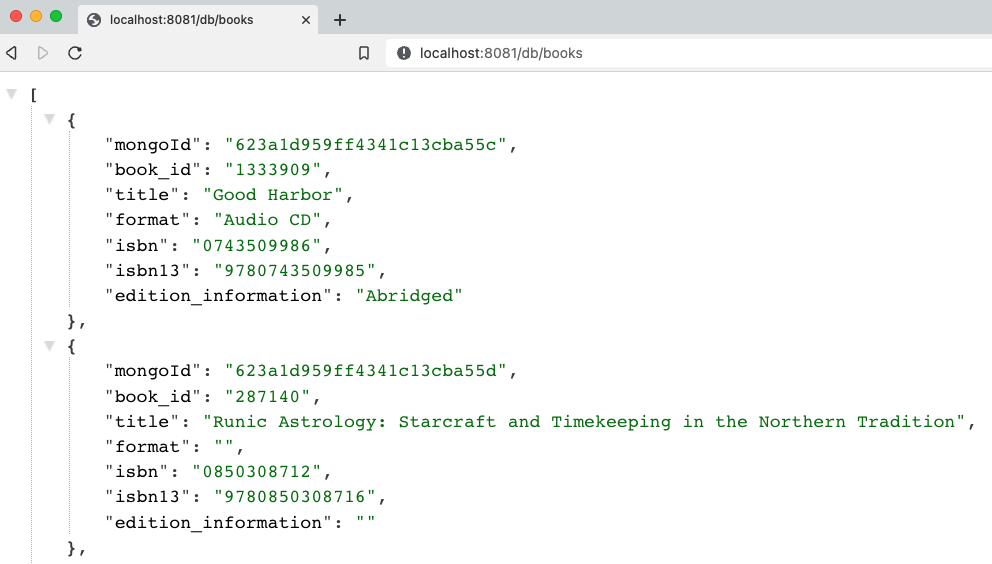
- Goodreads-svc1: browser with
localhost:8081/db/books.
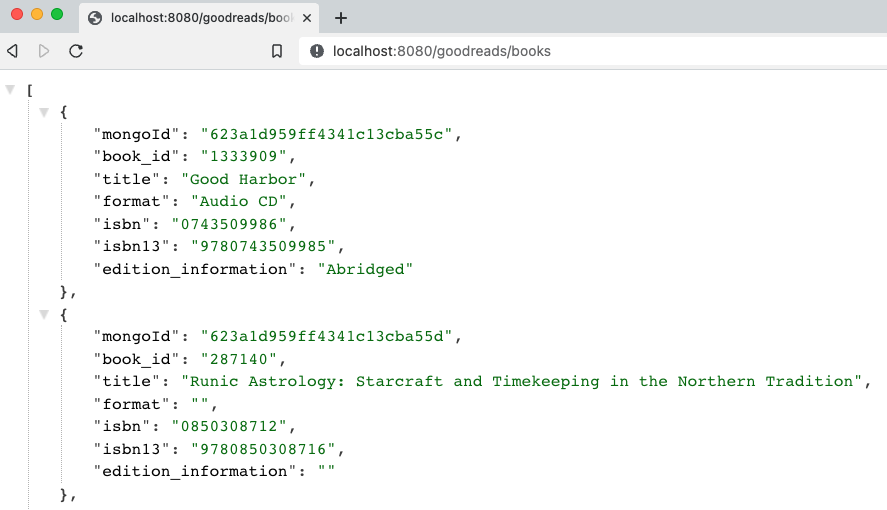
- Goodreads-svc2: browser with
localhost:8080/goodreads/books.
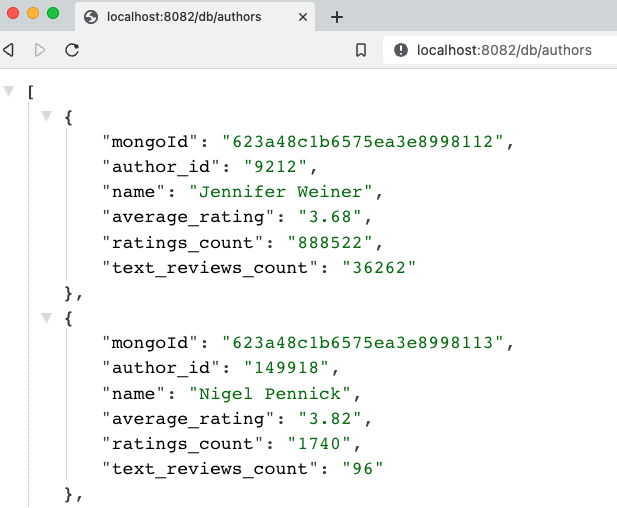
- Goodreads-svc3: browser with
localhost:8082/db/authors.
- Goodreads-config (neo4j): browser with
localhost:8888/neo4j-client/docker.
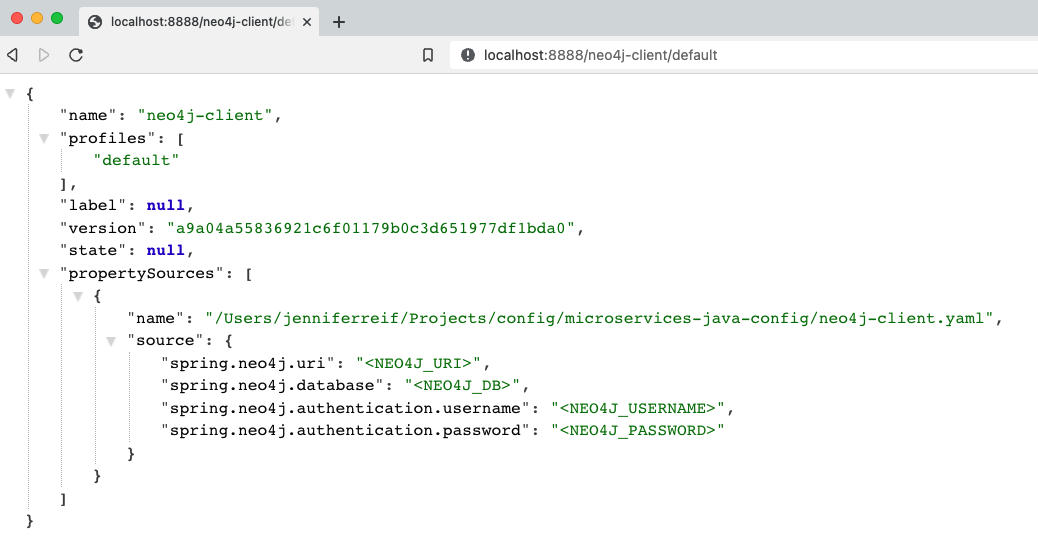
Note: Showing `default` profile to hide sensitive values.
- Neo4j database: ensure AuraDB instance is running (free instances are automatically paused after 3 days).
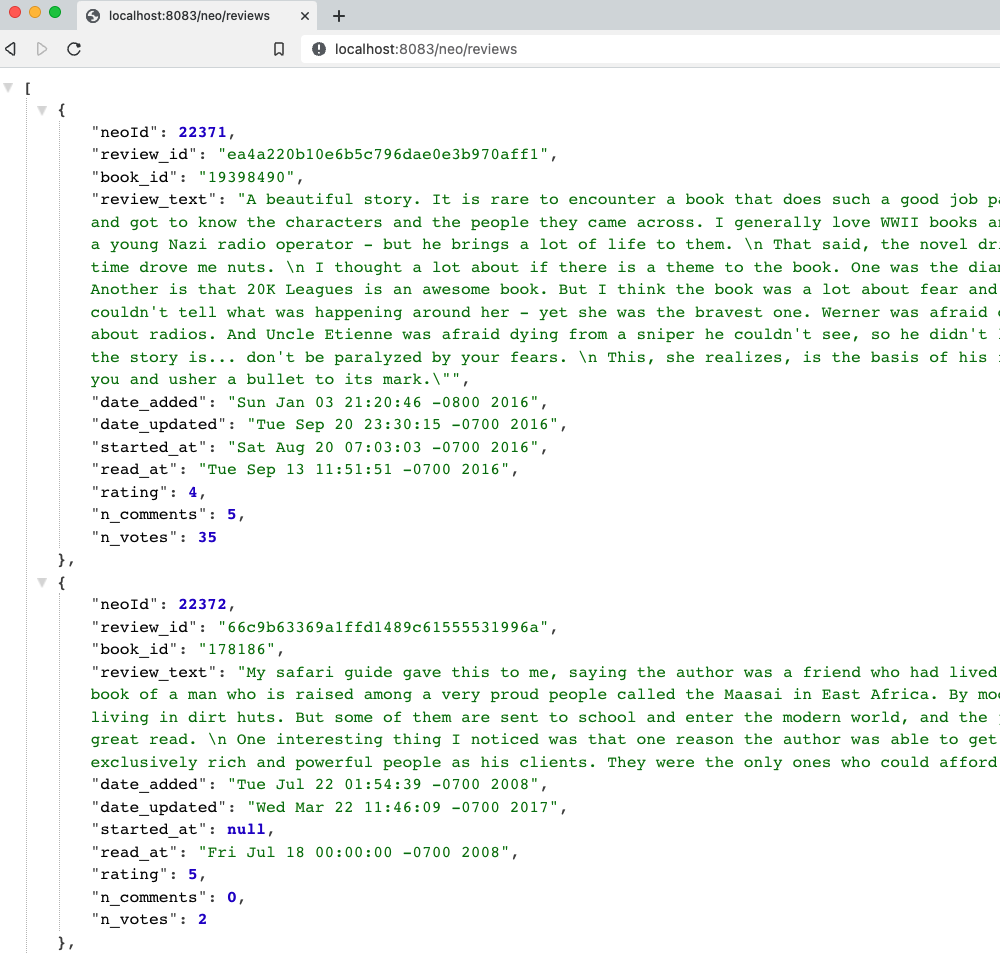
- Goodreads-svc4: browser with
localhost:8083/neo/reviews.
Bring everything back down again with the below command.
docker-compose downWrapping Up!
We have successfully created an orchestrated microservices system with Docker Compose!
This post tackled Docker Compose for managing microservices together based on information we specify in the docker-compose.yml file. We also covered some tricky "gotchas" with Docker networks and environment issues related to startup order and dependencies between microservices, but we were able to navigate those with configuration options.
There is so much more we can explore with microservices, such as adding more data sources, additional services, asynchronous communication through messaging platforms, cloud deployments, and more. I hope to catch you in future improvements on this project. Happy coding!
Resources
- GitHub: Meta repository for microservices project (this post covers Level 5 and Level 9)
- Documentation: Docker compose
- Blog post: Baeldung's Introduction to Docker Compose
- Documentation: Docker Compose - restart option
- Neo4j AuraDB: Create a FREE database

